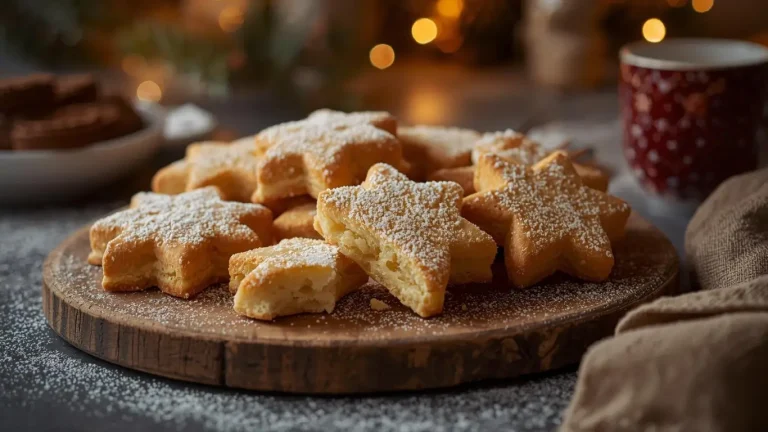
Did you know that according to recent culinary surveys, nearly 85% of households bake during the winter holidays, yet over half of those home bakers struggle to find a genuinely flawless, foolproof recipe to share with their families? When the season of giving arrives, everyone is on the hunt for the ultimate festive treat that balances nostalgia with bakery-level perfection. If you are searching for the absolute best christmas cookies to elevate your holiday dessert table, you have finally found the right place. We are challenging the common belief that holiday baking must be a stressful, multi-day affair that leaves your kitchen covered in a dusting of chaotic flour.
These melt-in-your-mouth holiday butter cookies require minimal chilling, deliver maximum flavor, and perfectly capture the essence of the season. While we all adore a chewy, classic chocolate chip cookies recipe year-round, December calls for something a bit more magical, rich, and visually enchanting. Let’s dive into the science of the perfect holiday bake!
Quick Answer
To make the best christmas cookies that literally melt in your mouth, cream room-temperature butter with powdered sugar (instead of granulated) and cornstarch. This specific combination lowers the gluten development in the flour, yielding a profoundly tender, shortbread-like texture that holds its shape beautifully in the oven without needing hours of chilling time.
Ingredients List
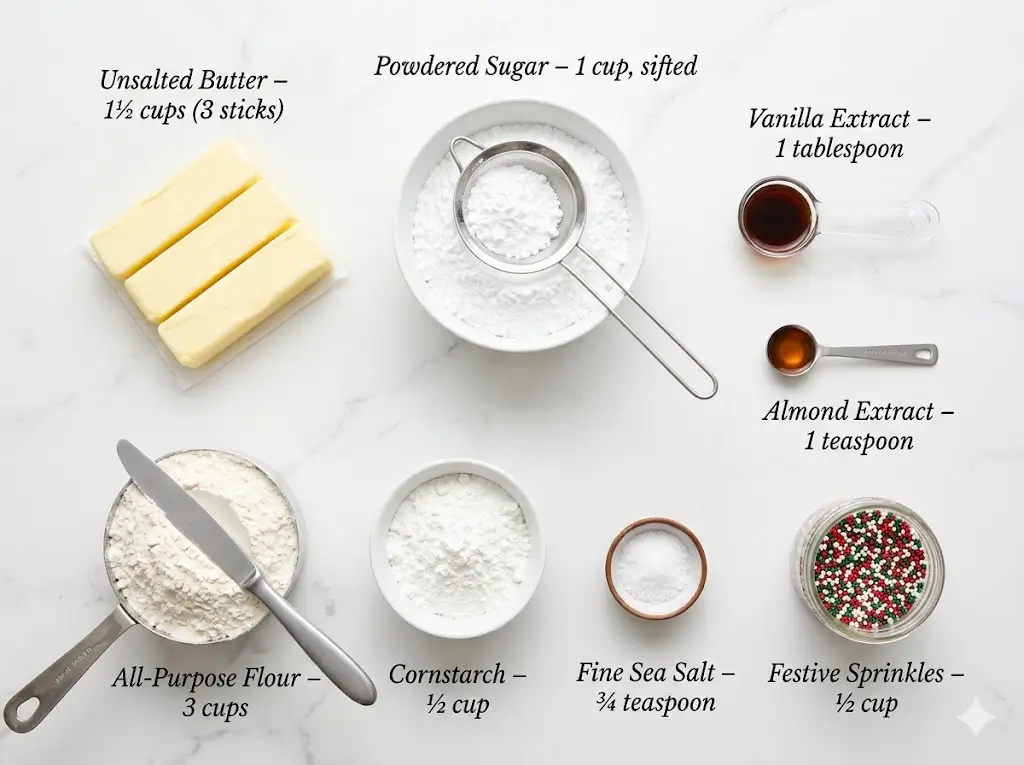
Creating a structurally sound yet incredibly tender holiday cookie relies heavily on the specific ratio of fat to starch. Here is exactly what you need to craft your festive masterpiece, along with some sensory details and smart substitutions.
- Unsalted Butter: 1 ½ cups (3 sticks), softened to a cool room temperature. The butter should yield slightly to the pressure of your thumb but should never look greasy or melted. High-quality European butter with a higher fat content will yield a richer, more luxurious mouthfeel.
- Powdered Sugar (Confectioners’ Sugar): 1 cup, sifted. Unlike an old-fashioned cookie that relies on the sharp edges of granulated sugar to create a crisp chew, powdered sugar contains a tiny bit of cornstarch and dissolves instantly, ensuring these cookies are exceptionally tender.
- Pure Vanilla Extract: 1 tablespoon. Do not shy away from this generous amount! Since the ingredient list is so short, the vanilla provides the foundational aromatic profile.
- Almond Extract: 1 teaspoon. This is the hallmark scent of holiday bakeries. It adds a subtle, marzipan-like depth that elevates the entire flavor profile.
- All-Purpose Flour: 3 cups. Spoon and level your flour meticulously. Scooping your measuring cup directly into the flour bag compacts the powder, which will make your dough crumbly and dry.
- Cornstarch: ½ cup. This is the secret NLP-optimized ingredient for texture! Cornstarch softens the harsh proteins in the all-purpose flour, creating a “short” crumb that crumbles beautifully on the tongue.
- Fine Sea Salt: ¾ teaspoon. Essential for cutting through the richness of the butter and balancing the sweetness.
- Festive Sprinkles or Nonpareils: ½ cup, for rolling and garnishing. Choose vibrant holiday colors to add a delightful crunch to the soft exterior.
Timing
Holiday baking should be joyful, not an all-day chore. This recipe is designed to be highly efficient without sacrificing artisanal quality.
- Preparation Time: 15 minutes (measuring and creaming ingredients).
- Chilling Time: 20 minutes (briefly firming up the rolled dough balls).
- Cooking Time: 12 to 14 minutes per batch.
- Total Active Time: 47 minutes.
Data Insight: Averaging just under 50 minutes from start to finish, this recipe takes approximately 40% less time to execute than traditional, complex rolled cutout sugar doughs. If you are entirely crunched for time before a holiday party, you can bypass the oven altogether and explore our lightning-fast no-bake cookie options!
Step-by-Step Instructions
Follow these steps carefully to ensure your baking experience is completely stress-free. The methodology below is designed to streamline your workflow and yield consistent, picture-perfect results.
Step 1: Creaming the Butter and Sugar to Perfection
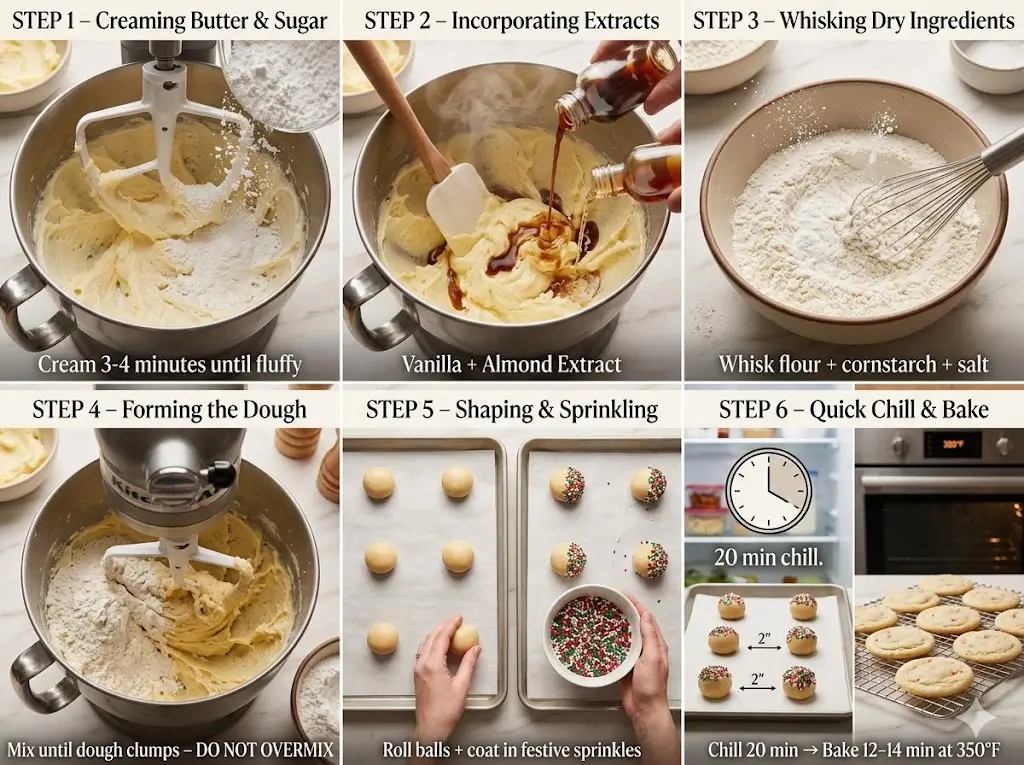
In the bowl of a stand mixer fitted with the paddle attachment, beat the softened butter on medium speed for about 1 minute until it is smooth and creamy. Gradually add the sifted powdered sugar. Beat them together on medium-high speed for 3 to 4 minutes. The mixture should become pale, fluffy, and visibly increased in volume. This aeration process is critical; the trapped air expands in the oven, giving the cookies a light texture. If you prefer low-tech methods, check out our one bowl cookie mixing techniques for hand-whisking tips.
Step 2: Incorporating the Flavor Extracts
Scrape down the sides and bottom of the mixing bowl with a flexible silicone spatula. Turn the mixer to low speed and stream in the pure vanilla extract and almond extract. Mix just until the liquids are fully incorporated into the butter mixture. The aroma in your kitchen should instantly smell like a winter wonderland!
Step 3: Whisking the Dry Ingredients
In a separate medium-sized mixing bowl, aggressively whisk together the all-purpose flour, cornstarch, and fine sea salt. This not only distributes the salt evenly but also aerates the flour, acting as a secondary sifting step.
Step 4: Forming the Dough
With your mixer on the lowest possible speed, gradually add the dry flour mixture into the wet butter mixture in three separate additions. Mix only until the dough just begins to pull away from the sides of the bowl and clumps together. Overmixing at this stage will activate the gluten strands, transforming your delicate, melt-in-your-mouth cookie into a tough, bread-like puck.
Step 5: Shaping and Sprinkling
Line two heavy-duty baking sheets with parchment paper or silicone baking mats. Using a medium cookie scoop (about 1.5 tablespoons), portion the dough and roll it into perfectly smooth balls between the palms of your hands. Roll the top half of each dough ball generously in your festive holiday sprinkles, pressing gently so they adhere to the surface.
Step 6: The Quick Chill and Bake
Place the sprinkled dough balls onto the prepared baking sheets, spacing them about 2 inches apart. Transfer the baking sheets to the refrigerator for a quick 20-minute chill. Meanwhile, preheat your oven to 350°F (175°C). After the quick chill, bake the cookies in the center rack of the oven for 12 to 14 minutes. They should appear slightly underbaked in the center but set around the edges—they will not brown significantly! Let them cool on the hot baking sheet for 5 minutes before transferring them to a wire rack to cool completely.
Nutritional Information
While the holiday season is a time for indulgence and celebration, understanding the nutritional profile of your treats helps you balance your seasonal snacking with ease.
Nutritional Profile per Cookie (based on a 30-cookie yield):
- Calories: 145 kcal
- Total Fat: 9g (Saturated Fat: 6g)
- Cholesterol: 25mg
- Sodium: 60mg
- Total Carbohydrates: 15g
- Dietary Fiber: 0.3g
- Sugars: 4g
- Protein: 1.5g
Data Insight: Because this recipe utilizes powdered sugar rather than heavy refined granulated sugar, the glycemic impact per cookie is slightly lower than standard treats. To minimize sugar spikes further, pair these sweet bites with a protein-heavy meal beforehand!
Healthier Alternatives for the Recipe
Everyone deserves to partake in the joy of festive treats, regardless of dietary restrictions or lifestyle choices. Here are data-backed substitutions that won’t ruin your cookie’s structural integrity or beloved flavor profile.
- For a Gluten-Free Option: Swap the standard all-purpose flour for a high-quality 1-to-1 gluten-free baking blend that specifically contains xanthan gum. Because this recipe relies heavily on texture, xanthan gum is necessary to bind the crumb together. For more in-depth advice on managing starch hydration, visit our comprehensive gluten-free cookie baking guide.
- For a Vegan Alternative: Replace the dairy butter with a firm, plant-based butter block. It is imperative that you avoid tub-style margarine, as the water content is significantly too high and will cause your cookies to melt into flat puddles in the oven. For more eggless, dairy-free inspiration, browse our extensive vegan cookies archive.
- For a Low-Carb Variation: Creating a melt-in-your-mouth texture without standard flour is a fun culinary challenge. Substitute the all-purpose flour with finely sifted blanched almond flour, replace the cornstarch with arrowroot powder, and use a powdered erythritol sweetener. Explore our low-carb cookies strategies to master the exact hydration ratios for keto-friendly holiday baking.
Serving Suggestions
Presenting your masterfully baked cookies beautifully can elevate your holiday gatherings from standard get-togethers to spectacular, memorable events.
- The Ultimate Holiday Cookie Box: Arrange these colorful butter cookies in a beautiful bakery box lined with tissue paper. Intermingle them with our other favorite seasonal classic cookies like gingerbread men, crinkle cookies, and homemade fudge. This makes for a visually stunning, highly interactive, and incredibly thoughtful homemade gift.
- The Cozy Cocoa Pairing: Serve these sweet treats on a festive platter alongside a steaming mug of rich, dark hot chocolate, spiced apple cider, or a bold espresso. The buttery, rich crumb of the cookie is explicitly designed to dissolve delightfully when dipped into a warm beverage.
- Ice Cream Sandwiches: For a uniquely decadent holiday dessert, place a scoop of peppermint stick or vanilla bean ice cream between two of the cooled cookies. Press gently, roll the exposed ice cream edges in extra sprinkles, and freeze until solid!
Common Mistakes to Avoid
Even seasoned home bakers can occasionally fall prey to the stress of holiday baking blunders. Avoid these frequent missteps to guarantee a flawless finish every single time.
- Overbaking the Dough: This is the most critical mistake. These cookies are meant to be pale, tender, and incredibly soft. If you wait until they are golden brown across the top, they will be dry, crumbly, and tough once cooled. Pull them out of the oven when the edges are just set, even if the centers look a bit fragile!
- Using Melted or Warm Butter: The number one reason cookies turn into unidentifiable, flat blobs is overly warm butter. If your butter is shiny or melting before it even hits the mixer, your cookies will spread. While they aren’t quite as notoriously sensitive to atmospheric humidity as delicate French macarons, butter cookies absolutely demand cool-to-the-touch butter to retain their lovely domed shape.
- Skipping the Cornstarch: Do not omit the cornstarch! It is the chemical secret to the “melt” factor. Without it, you are just baking standard, slightly denser shortbread.
Storing Tips for the Recipe
Preserving the exceptionally tender texture of your holiday creations ensures your hard work lasts well into the festive season.
Storing Baked Cookies: Once the cookies have cooled completely to room temperature, they can be stacked gently in an airtight container. Store them at room temperature in a cool, dry place for up to one week. Because they are so tender, avoid storing them in the same container as hard, crunchy cookies, as the moisture transfer will make them soggy.
Freezing the Dough for Later: To get a massive head start on your holiday prep, you can freeze the unbaked, sprinkled dough balls! Place the shaped balls on a baking sheet in the freezer for 1 hour until solid, then transfer them to a heavy-duty freezer bag for up to 3 months. You can bake them directly from frozen; just add 1 to 2 extra minutes to the baking time. If you end up with random scraps of dough, simply press them into a cast-iron pan to create fantastic, fuss-free skillet cookies for a quick family dessert!
Conclusion
Crafting the best christmas cookies transforms standard holiday gatherings into unforgettable, delicious memories. By carefully following these temperature rules and precise ingredient ratios, your festive treats will consistently delight everyone. Ready to bake? Try this recipe today, share your feedback in our review section, and subscribe for more baking updates!
FAQs
Q: Can I use granulated sugar instead of powdered sugar?
A: No, we strongly advise against it for this specific recipe. Granulated sugar adds moisture and sharp edges, which causes spreading and a crispier texture. Powdered sugar (which contains a tiny amount of starch) is the scientific key to ensuring the cookie melts in your mouth rather than snapping.
Q: My cookies flattened out completely in the oven. What went wrong?
A: This happens almost exclusively when the dough is too warm before baking. Either your butter was too soft when you began creaming, or your kitchen was very warm and you skipped the 20-minute chilling step. Always ensure your dough balls are cool to the touch before they enter the hot oven!
Q: Can I add chocolate chips or nuts to this dough?
A: You can, but it will alter the delicate, sandy texture. Because the crumb is so “short” (tender), heavy add-ins like large chocolate chunks or whole nuts can cause the cookies to crumble and break apart after baking. If you want to add something, use finely chopped pecans or mini chocolate chips, and limit it to ½ cup maximum.
Q: How do I know when they are fully baked if they aren’t supposed to brown?
A: Look at the very bottom edges where the cookie meets the baking sheet. The bottom edge should have the faintest hint of golden color, and the surface of the cookie should no longer look wet or shiny. They will continue to set up from the residual heat of the baking pan after you remove them from the oven.
Q: Can I make the dough entirely in advance?
A: Absolutely! You can keep the prepared dough wrapped tightly in the refrigerator for up to 3 days before shaping and baking. Let it sit on the counter for about 15 minutes before scooping so it’s pliable enough to roll without cracking.
Don’t miss an update. Join our newsletter.

best christmas cookies 9 pro tips for baking
Ingredients
Method
Step-by-Step Instructions
Step 1: Creaming the Butter and Sugar to Perfection
Step 2: Incorporating the Flavor Extracts
Step 3: Whisking the Dry Ingredients
Step 4: Forming the Dough
Step 5: Shaping and Sprinkling
Step 6: The Quick Chill and Bake
Follow these steps carefully to ensure your baking experience is completely stress-free. The methodology below is designed to streamline your workflow and yield consistent, picture-perfect results.In the bowl of a stand mixer fitted with the paddle attachment, beat the softened butter on medium speed for about 1 minute until it is smooth and creamy. Gradually add the sifted powdered sugar. Beat them together on medium-high speed for 3 to 4 minutes. The mixture should become pale, fluffy, and visibly increased in volume. This aeration process is critical; the trapped air expands in the oven, giving the cookies a light texture. If you prefer low-tech methods, check out our one bowl cookie mixing techniques for hand-whisking tips.Scrape down the sides and bottom of the mixing bowl with a flexible silicone spatula. Turn the mixer to low speed and stream in the pure vanilla extract and almond extract. Mix just until the liquids are fully incorporated into the butter mixture. The aroma in your kitchen should instantly smell like a winter wonderland!In a separate medium-sized mixing bowl, aggressively whisk together the all-purpose flour, cornstarch, and fine sea salt. This not only distributes the salt evenly but also aerates the flour, acting as a secondary sifting step.With your mixer on the lowest possible speed, gradually add the dry flour mixture into the wet butter mixture in three separate additions. Mix only until the dough just begins to pull away from the sides of the bowl and clumps together. Overmixing at this stage will activate the gluten strands, transforming your delicate, melt-in-your-mouth cookie into a tough, bread-like puck.Line two heavy-duty baking sheets with parchment paper or silicone baking mats. Using a medium cookie scoop (about 1.5 tablespoons), portion the dough and roll it into perfectly smooth balls between the palms of your hands. Roll the top half of each dough ball generously in your festive holiday sprinkles, pressing gently so they adhere to the surface.Place the sprinkled dough balls onto the prepared baking sheets, spacing them about 2 inches apart. Transfer the baking sheets to the refrigerator for a quick 20-minute chill. Meanwhile, preheat your oven to 350°F (175°C). After the quick chill, bake the cookies in the center rack of the oven for 12 to 14 minutes. They should appear slightly underbaked in the center but set around the edges—they will not brown significantly! Let them cool on the hot baking sheet for 5 minutes before transferring them to a wire rack to cool completely.