Let’s address the elephant in the pastry kitchen: French Macarons have a notorious reputation. Industry data suggests that nearly 70% of home bakers fail on their first attempt at making these delicate, jewel-like confections. They are whispered about in baking forums as an elusive, temperamental cookie that requires a culinary degree to conquer. But what if I told you that this reputation is entirely based on a misunderstanding of the science behind the bake?
Welcome to the definitive, ultimate masterclass on French Macarons. Whether you are a total novice looking to impress your friends or an intermediate baker desperate to eradicate hollow shells and cracked tops from your repertoire, this guide is the final resource you will ever need. By demystifying the precise chemical reactions, mastering the specific physical techniques, and relying on strict data over guesswork, you will learn how to produce bakery-quality macarons that boast a perfectly smooth dome, a delicate ruffled pied (foot), and a texture that gives way to a melt-in-your-mouth, nougat-like center.
What You Will Learn in This Masterclass:
- The Science of Meringue & Almonds: Understanding the biochemical interplay of protein matrices and nut lipids.
- Essential Equipment & Ingredient Selection: Why a digital scale and specific almond flours are non-negotiable.
- The Art of Macaronage: Mastering the exact physical movement and consistency required for flawless batter.
- Expert Troubleshooting: A definitive diagnostic guide to fixing hollows, cracks, spreading, and missing feet.
- Advanced Storage & Maturation: How the 24-hour resting period transforms a good cookie into an extraordinary one.
- Dietary Adaptations: Innovative techniques for vegan and nut-free macaron variations.
The Science & Fundamentals of the Macaron
To truly master the French macaron, you must stop thinking of it as a recipe and start viewing it as a delicate scientific formula. Every single ingredient plays a highly specific, irreplaceable role. When we understand why we perform certain steps, we eliminate the blind guesswork that leads to failed batches.
The Anatomy of a Perfect Macaron Shell
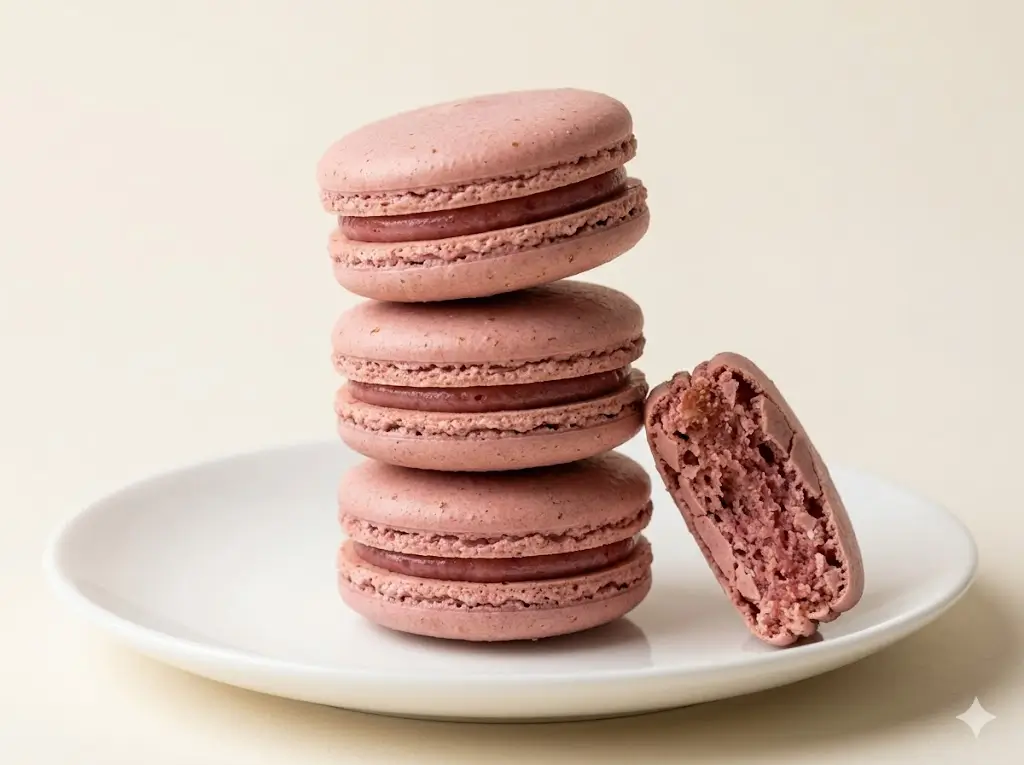
A proper macaron shell consists of three distinct textural zones. First, the eggshell crust: a micro-thin, smooth outer layer that shatters gently upon the first bite. Second, the nougat-like interior: slightly chewy, moist, and capable of melding seamlessly with the filling. Finally, the pied (foot): the delicate, aerated ruffle at the base that signifies a properly structured and baked meringue. Achieving this trifecta relies on three core scientific pillars: hydration, protein coagulation, and the Maillard reaction.
The Role of Meringue: Protein Denaturation
At its core, a macaron is an almond-enriched meringue. Egg whites are roughly 90% water and 10% protein (primarily ovalbumin). When you whisk egg whites, you are applying mechanical force that denatures (unfolds) these tightly coiled proteins. As they unfold, they trap air bubbles, creating a complex foam matrix.
Granulated sugar is gradually introduced to stabilize this matrix. Sugar is highly hygroscopic (water-attracting); it dissolves into the water of the egg whites, creating a viscous syrup that coats the air bubbles, preventing them from popping. If you whip the meringue too little, the structure is weak, resulting in flat, spreading macarons. If you over-whip, the proteins bind too tightly, squeezing out the water and resulting in dry, brittle, hollow shells.
Pro Baker Secret: Optimal Meringue Temperature While many recipes call for “room temperature” egg whites, the science points to an optimal whipping temperature of 70°F to 74°F (21°C – 23°C). At this precise range, the surface tension of the egg whites decreases, allowing them to whip to maximum volume and stability significantly faster than cold eggs.
The Almond Meal: Fat Content and Granulation
Almond flour provides the bulk, flavor, and chewiness of the macaron. However, almonds are composed of roughly 50% fat (lipids). Fat is the natural enemy of meringue; it coats the protein strands and causes the aerated foam to collapse. This is why folding the almond flour into the meringue (the macaronage) is the most critical and delicate step of the entire process.
Furthermore, the physical granulation of the almond flour matters immensely. If the almond flour is too coarse, the surface of your macarons will be bumpy and speckled. If you attempt to grind it further in a food processor without adding confectioners’ sugar, the blades will heat the nuts, releasing their natural oils and turning the flour into almond butter, instantly ruining your batter.
Sugar Science: Confectioners’ vs. Granulated
French macarons require two types of sugar. Granulated (or caster) sugar is used to build and stabilize the meringue. Confectioners’ sugar (powdered sugar) is blended with the almond flour. Confectioners’ sugar contains about 3% cornstarch, an anti-caking agent. This trace amount of starch actually benefits the macaron by absorbing excess moisture during the resting phase, helping to form the crucial skin (pellicle) before baking.
The Maillard Reaction & Feet Formation
Why do macarons get those iconic ruffled feet? It’s a combination of steam and the Maillard reaction. During the resting phase, the batter forms a dry skin on top. When the baking sheet enters the hot oven, the moisture inside the batter begins to evaporate into steam. Because the dry skin on top acts as an impermeable lid, the steam cannot escape upwards. Instead, it is forced downwards and outwards, lifting the entire shell up and creating the bubbly extrusion known as the pied. Simultaneously, the Maillard reaction (the browning of amino acids and reducing sugars) occurs, giving the shell its final structural rigidity and nuanced flavor.
Essential Equipment & Ingredients
You cannot build a structurally sound house without precise tools, and you cannot bake a flawless French macaron without absolute accuracy. Throw away your measuring cups; volume measurements have no place in a macaron kitchen.
The Non-Negotiable Equipment Arsenal
- Digital Kitchen Scale (0.1g Accuracy): A cup of almond flour can vary in weight by up to 30 grams depending on how it was scooped. In a recipe that relies on chemical ratios, a 30-gram discrepancy is catastrophic. You must measure all ingredients in grams.
- Stainless Steel or Copper Bowls: Never use plastic or silicone bowls to whip meringue. Plastic is porous and clings to residual fats from previous uses (like buttercream or oil). Even a microscopic drop of fat will prevent your egg whites from reaching stiff peaks. Use impeccably clean, grease-free stainless steel or glass.
- Oven Thermometer: Home ovens are notoriously inaccurate, often fluctuating wildly by 25°F to 50°F. An independent oven thermometer hung from the center rack is the only way to ensure your oven is actually sitting at the crucial 300°F (150°C) required for proper baking.
- Heavy-Duty, Light-Colored Baking Sheets: Dark baking sheets absorb and conduct heat far too aggressively, which will scorch the bottoms of your macarons before the centers are baked. Stick to heavy-gauge aluminum half-sheet pans.
- Silicone Baking Mats vs. Parchment Paper: Both work, but they yield different results. Silicone mats (like Silpat) conduct heat more slowly, which can help prevent hollows and brown bottoms, and they provide perfectly round templates. Parchment paper allows for faster heat transfer and easier release but can wrinkle, causing warped shells.
Sourcing Master-Quality Ingredients
- “Aged” Egg Whites: Aging egg whites (separating them and leaving them in a covered container in the fridge for 24-48 hours) allows some of the water content to evaporate, concentrating the protein. This yields a more stable, resilient meringue.
- Blanched, Super-Fine Almond Flour: Always buy blanched almond flour (skins removed). Almond meal containing skins will result in a gritty texture and a mottled appearance. Brands specifically labeled “super-fine” or “macaron-grade” are worth the extra investment.
- Gel or Powder Food Coloring: Never use liquid grocery-store food coloring. The extra water content will instantly alter the hydration ratio of your batter and ruin the recipe. Use highly concentrated gel pastes or water-soluble powder colors.
Pro Baker Secret: The Vinegar Wipe Before you begin, wipe down your mixing bowl, whisk attachment, and silicone spatulas with a paper towel dampened with a few drops of white vinegar or lemon juice. The acidity cuts through any invisible, lingering grease, ensuring your meringue whips up flawlessly every single time.
The Recipe Cluster Highlights
Once you have mastered the foundational French macaron shell, the flavor possibilities are infinite. The true artistry of a macaron lies in the filling, which dictates the overall flavor profile and moisture transfer. Explore our master collection of variations below:
1. Classic Vanilla Bean French Macarons
The quintessential test of a pastry chef. These shells are left uncolored to showcase the beautiful ivory hue of the almond flour. The filling is a luxurious, whipped white chocolate and heavy cream ganache infused with scraping from a whole Madagascar vanilla bean. The flavor profile is deeply floral, creamy, and nostalgic. Perfect for weddings, baby showers, or traditionalists who appreciate understated elegance.
2. Decadent Dark Chocolate Ganache French Macarons
For the ultimate chocoholic. The shells are modified by replacing a small percentage of the almond flour with premium, high-fat Dutch-processed cocoa powder, giving them a deep mahogany color and a slightly more brownie-like chew. They are filled with an intense 70% dark chocolate and espresso ganache. The slight bitterness of the dark chocolate perfectly balances the inherent sweetness of the macaron shell.
3. Sicilian Pistachio Praline Macarons
A textural and visual masterpiece. We substitute a portion of the almond flour with finely ground, vibrant green Sicilian pistachios. The filling is a rich, nutty French buttercream flavored with a homemade caramelized pistachio praline paste. The result is an earthy, slightly savory, and deeply roasted flavor profile that cuts through the sugar brilliantly.
4. Tangy Lemon Curd Macarons
The perfect spring and summer bite. The bright yellow shells are filled with a ring of stable lemon-vanilla buttercream, creating a protective dam for a center dollop of sharp, buttery, mouth-puckering Meyer lemon curd. This two-part filling prevents the high-moisture curd from melting the delicate shells, resulting in a refreshing, tart-and-sweet explosion.
5. Raspberry Rose Ispahan Macarons
Inspired by Pierre Hermé’s famous creation, this is the epitome of romantic French pastry. The shells are tinted a delicate blush pink. The filling features a rose-water infused white chocolate ganache, sandwiching a tart, vibrant core of reduced raspberry pâte de fruit (fruit jelly). It is floral, fruity, and incredibly sophisticated.
Step-by-Step Master Techniques
Forget following a static recipe; mastering the French macaron requires mastering the techniques. Whether you are baking vanilla or chocolate, the physical handling of the batter remains universal.
Phase 1: The Sift and Whisk (Dry Ingredients)
Even if you purchased “super-fine” almond flour, you must sift it. Weigh your almond flour and confectioners’ sugar together, then pass them through a fine-mesh sieve into a large bowl. Discard any large almond chunks that remain in the sieve—do not force them through, or you will extract their oils. Whisk the sifted dry mixture thoroughly to ensure the sugar and almond flour are homogenous.
Phase 2: Meringue Mastery (The French Method)
In the bowl of your stand mixer, begin whipping your aged, room-temperature egg whites on medium-low speed. Once they become foamy (resembling beer foam), add a pinch of cream of tartar (an acid that further stabilizes the proteins).
Gradually shower in your caster sugar, one tablespoon at a time, while the mixer is running. Slowly increase the speed to medium-high. You are looking for very stiff peaks. When you pull the whisk attachment out of the bowl and flip it upside down, the meringue should form a sharp, distinct point that points straight up at the ceiling without bending or drooping. It should be glossy, dense, and resemble shaving cream.
Phase 3: The Art of Macaronage This is the make-or-break moment. Macaronage is the technique of folding the dry ingredients into the meringue and purposely deflating some of the air to achieve the correct batter fluidity.
- Add the dry ingredients to the meringue in two batches.
- Using a flexible silicone spatula, scrape around the edges of the bowl and fold the batter over itself.
- Once the dry ingredients are mostly incorporated, begin the macaronage: press the batter firmly against the sides of the bowl to knock the air out of the meringue, then scrape it back into the center.
- The Figure-8 Test: You are aiming for a consistency reminiscent of wet sand or slow-moving lava. When you scoop up a large amount of batter with your spatula and let it fall back into the bowl, it should flow continuously without breaking. You should be able to draw a “figure 8” in the batter with the ribbons falling from the spatula. If the ribbon breaks, give it two more folds and test again.
Phase 4: Piping and Tapping
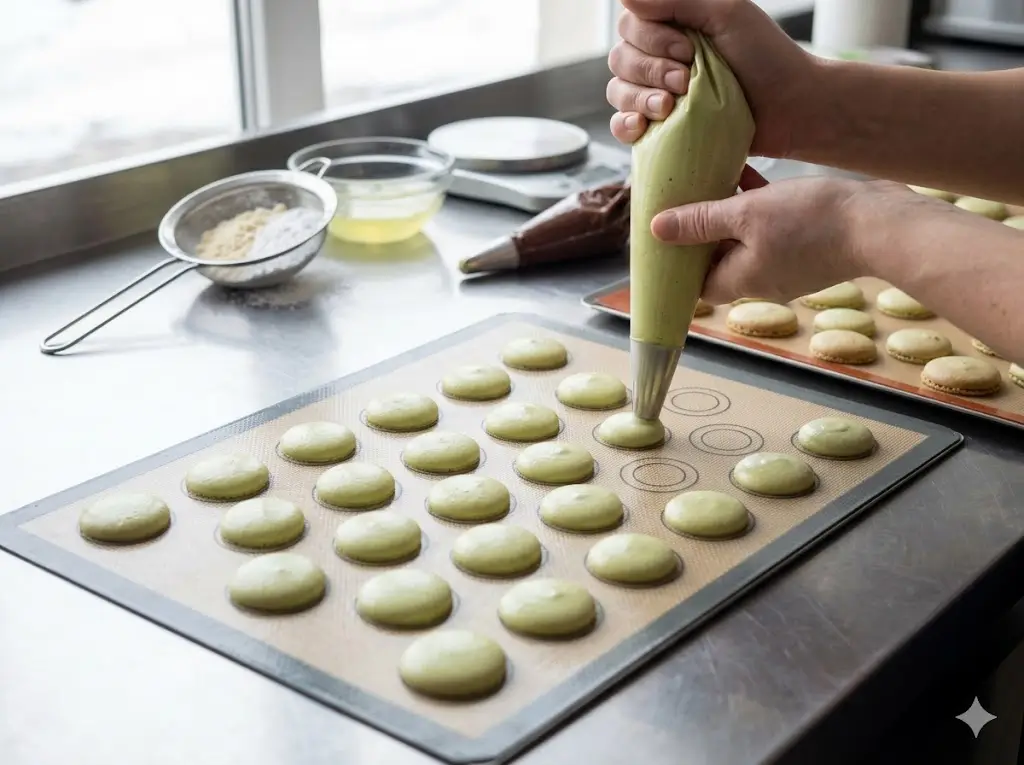
Transfer your perfect batter to a piping bag fitted with a medium round tip (such as a Wilton 1A or 2A). Hold the bag completely vertical, about half an inch above your silicone mat. Squeeze gently from the top, allowing the batter to spread into a 1.5-inch circle. Stop squeezing, do a quick swirling motion to break the tail, and pull away.
Crucial Step: Once the tray is piped, lift the baking sheet and smack it firmly and aggressively against your kitchen counter 5 to 6 times. Rotate the pan and smack it again. This forces large, trapped air bubbles to the surface. Use a toothpick to pop any visible bubbles that rise to the top. Failure to do this will result in cracked shells.
Phase 5: The Skin/Resting Phase
Leave the piped macarons on the counter to dry. This takes anywhere from 30 minutes to 2 hours, depending entirely on the ambient humidity in your kitchen. You know they are ready to bake when you can lightly brush the surface of the macaron with your finger and the batter does not stick to you at all. It should feel like a matte, dry skin.
Phase 6: The Bake
Bake at exactly 300°F (150°C) for 14 to 16 minutes. Do not open the oven door during the first 10 minutes, or the sudden drop in temperature will cause your feet to collapse. To test for doneness, lightly touch the top of a shell and wiggle it. If the top slides around on the “foot,” it needs another minute. If it feels firmly attached, they are done. Remove from the oven and let them cool completely on the tray before attempting to peel them off.
The Ultimate Troubleshooting Guide
Even the most seasoned pastry chefs occasionally pull a tray of disastrous macarons from the oven. The key is knowing how to read the physical symptoms to diagnose the scientific failure.
| The Symptom | The Visual Cue | The Scientific Cause | The Expert Fix |
|---|---|---|---|
| Hollow Shells | A large air gap between the top crust and the chewy interior. | 1. Over-whipped meringue (proteins too tight).2. Under-baked shells (internal structure collapsed).3. Oven temperature too low. | Whip meringue only to just stiff peaks. Increase oven temp by 10°F. Ensure the batter is folded enough during macaronage to release excess air. |
| Cracked Tops | Shells erupt like miniature volcanoes; no feet form. | 1. Batter did not rest long enough to form a proper skin.2. Oven temperature drastically too high.3. Trapped air bubbles were not tapped out. | Rest until absolutely dry to the touch. Lower oven temp. Smack the trays harder on the counter prior to resting. |
| No Feet (Pied) | Macarons remain flat disks without the ruffled base. | 1. Batter was significantly over-mixed (too thin).2. Batter did not form a skin.3. Meringue was severely under-whipped. | Stop macaronage as soon as the batter flows like lava. Ensure a solid resting phase. Whip egg whites longer. |
| Lopsided Shells | Feet blow out on one side, while the other side remains flat. | 1. Convection fan blew the batter.2. Piping bag was held at an angle.3. Uneven resting/drafty kitchen. | Turn off convection fan (bake on conventional). Hold piping bag at a strict 90-degree vertical angle. Rotate pan halfway through baking. |
| Brown Bottoms | The bottoms of the shells are dark and hard. | Heat conducted too quickly from the bottom element of the oven. | Double-pan! Place your baking sheet on top of a second, empty baking sheet before putting it in the oven to insulate the bottom. |
| Wrinkled Tops | The surface is dry but incredibly wrinkled and deflated. | Cocoa powder or oily ingredients degraded the meringue, or too much liquid food coloring was used. | Use gel coloring only. If using cocoa powder, fold slightly less aggressively, as fat breaks down the batter faster. |
Pro Baker Secret: The Maturation Cure for Hollows If you end up with slightly hollow shells, do not throw them away! Fill them as usual, place them in an airtight container, and let them mature in the fridge for 48 hours. The moisture from the filling will migrate into the shell, expanding the nougat interior and physically “healing” the hollow gap!
Dietary Adaptations & Substitutions
French macarons are naturally gluten-free, which is a massive bonus for those with Celiac disease or gluten intolerances. However, adapting them for vegan or nut-free diets requires advanced chemical substitutions.
Vegan Macarons (The Aquafaba Method)
Egg whites can be successfully replaced by Aquafaba (the viscous liquid found in a can of chickpeas). Aquafaba mimics the proteins and starches of egg whites remarkably well.
- The Technique: To achieve the correct viscosity, you must reduce the aquafaba. Simmer the liquid from one can of chickpeas on the stove until it reduces by about 30-40%. Let it cool completely in the fridge overnight.
- Whipping: Aquafaba takes significantly longer to whip to stiff peaks than egg whites—often 10 to 15 minutes in a stand mixer. You must also use slightly more cream of tartar to stabilize it.
- Baking: Vegan macarons require a slightly lower baking temperature (around 285°F / 140°C) and a longer baking time (18-20 minutes) to fully dry out.
Nut-Free Macarons
For those with severe almond or tree nut allergies, the almond flour can be replaced.
- Pumpkin Seeds or Sunflower Seeds: The most successful 1:1 replacement by weight is raw, hulled pumpkin seeds (pepitas) or sunflower seeds.
- The Process: You must grind the seeds yourself in a food processor along with the confectioners’ sugar to prevent them from turning into paste. Because these seeds are slightly oilier than blanched almonds, you may need to stop the macaronage one or two folds earlier than you would with almond flour.
Advanced Storage & Make-Ahead Strategies
A freshly baked macaron is actually not ready to eat. If you eat a macaron straight out of the oven, the shell will be dry, crunchy, and disjointed from the filling. The magic of the macaron lies entirely in the maturation process.
The 24-Hour Maturation Rule
Once your shells are filled and sandwiched, place them in an airtight container and place them in the refrigerator for a minimum of 24 to 48 hours. During this time, osmosis occurs. The moisture and flavor from the ganache, buttercream, or curd slowly migrate into the dry, crisp interior of the shell. This softens the shell, creating the signature chewy, melt-in-your-mouth texture, and marries the flavors together.
Always bring matured macarons back to room temperature for 20 minutes before serving. Cold macarons are tough and their flavors are muted.
Long-Term Freezing Guidelines
Macarons freeze exceptionally well, making them the ultimate make-ahead dessert for large events.
- Freezing Unfilled Shells: Place completely cooled shells in a single layer in an airtight Tupperware container, separated by parchment paper. They will keep perfectly for up to 3 months. Thaw at room temperature for 30 minutes before filling.
- Freezing Filled Macarons: Most filled macarons (especially those with buttercream or dense ganache) freeze beautifully. Allow them to mature in the fridge for 24 hours first, then transfer the container to the freezer. They will last for 2 months. Defrost in the fridge overnight, then bring to room temperature.
- Warning: Do not freeze macarons filled with high-moisture centers like jams, fresh fruit, or loose curds, as the liquid will expand and destroy the shell structure upon thawing.
Conclusion
Mastering the French macaron is a journey of precision, patience, and scientific understanding. By respecting the strict ratios, controlling your temperatures, and learning to “read” the batter during the macaronage stage, you have empowered yourself to conquer the most intimidating pastry in the world. Remember that every failed batch is simply a data point bringing you closer to perfection. The tools, techniques, and troubleshooting matrices provided in this masterclass are everything you need to transform basic ingredients into extraordinary, bakery-quality art.
Are you ready to heat up your oven and start your macaron journey? I highly recommend starting with our Classic Vanilla Bean French Macarons, then sharing your beautiful creations with us! Leave a comment below with your biggest macaron triumph (or tragedy!), subscribe to our baking newsletter for weekly technical deep-dives, and be sure to tag us on social media with your perfect pied!
Comprehensive FAQs
1. Why are my French macarons completely hollow inside?
Hollow shells are the most common macaron ailment. They are typically caused by over-whipping the meringue (creating a protein matrix that is too tight and pushes outward rather than expanding inward), under-mixing the batter during macaronage (leaving too much air in the batter), or under-baking. If you take the shells out of the oven before the internal structure has set, the inside collapses, creating a gap. Ensure your meringue is at just stiff peaks and bake for 1-2 minutes longer.
2. Do I really need to “age” my egg whites?
While you can make macarons with fresh eggs, aging them significantly increases your success rate. Aging egg whites (leaving them in the fridge covered for 24-48 hours) allows some of the water content to evaporate. This concentration of proteins makes the egg whites more resilient, allowing them to whip into a stronger, more stable meringue that is less prone to breaking during the folding process.
3. What is the difference between the French, Italian, and Swiss macaron methods?
French Method: Uncooked granulated sugar is whipped directly into raw egg whites. It is the easiest and fastest method, yielding a very delicate shell, but is the most temperamental regarding humidity.
Italian Method: A boiling sugar syrup (heated to 240°F/115°C) is slowly poured into whipping egg whites. This cooks the whites, creating a highly stable, dense meringue. It is preferred by commercial bakeries for its consistency.
Swiss Method: Egg whites and sugar are whisked together over a double boiler until the sugar dissolves and the mixture reaches 130°F (54°C), then whipped into a meringue. It offers a middle ground of stability and ease.
4. Can I use liquid grocery store food coloring?
Absolutely not. Liquid food coloring introduces excess water into the delicate chemical balance of the batter. Even a few drops can thin out your meringue, prevent a skin from forming, and cause cracked, feetless shells. Always use concentrated gel food coloring or powdered food coloring, which deliver intense pigment without altering the hydration ratio.
5. How long do homemade French macarons last?
Once filled and matured, macarons will last for 5 to 7 days in an airtight container in the refrigerator. The exact lifespan depends on the filling; high-moisture fillings (like curds or jams) will cause the shells to become overly soggy after 3 or 4 days, while buttercream or dense ganache fillings allow them to last longer. They can also be frozen for up to 2 months.
6. What is the absolute best oven temperature for baking macarons?
There is no single “best” temperature because every oven behaves differently, but the industry standard is 300°F (150°C) for 14-16 minutes. If your macarons are browning too quickly, drop the temperature to 285°F (140°C) and bake for 17-19 minutes. Always use an internal oven thermometer, as the dial on your oven can be off by up to 50 degrees.
7. Why did my macarons crack on top and fail to grow feet?
Cracking occurs when steam escapes through the top of the shell rather than pushing out the bottom to form feet. This almost always happens because the macarons did not rest long enough to form a proper skin (pellicle). The skin acts as a lid, forcing the steam downward. Cracking can also be caused by baking at a temperature that is far too high, causing the air inside to expand violently before the shell can set.
8. Can I make macarons without almond flour?
Yes, though technically they are no longer traditional French macarons. For those with nut allergies, you can substitute the almond flour 1:1 by weight with finely ground, raw pumpkin seeds (pepitas) or sunflower seeds. Keep in mind that seeds can be oilier than almonds, so you must process them carefully with the powdered sugar to avoid making seed butter, and you may need slightly less macaronage.
9. Why is my macaron batter too thick and won’t pipe smoothly?
If your batter is stiff and leaves a sharp point (a “nipple”) on top when you pipe it that won’t settle down, you have under-mixed your batter during the macaronage stage. You need to fold it a few more times, pressing the batter against the side of the bowl to knock out more air. The batter should flow off your spatula like a thick ribbon of lava and settle back into itself within 10-15 seconds.
10. Do I have to use a silicone baking mat, or is parchment paper okay?
Both work, but they transfer heat differently. Silicone mats insulate the bottom of the macaron, which helps prevent over-browning and yields perfectly round shapes, but they can occasionally contribute to hollows if the heat doesn’t penetrate fast enough. Parchment paper transfers heat faster and is preferred by many professionals, but it can wrinkle due to the moisture in the batter, resulting in slightly oval or warped shells. Choose the one that works best with your specific oven’s heat distribution.