
For decades, removing wheat from baked goods was synonymous with culinary compromise. We have all experienced the heartbreak of a gluten-free dessert that promised indulgence but delivered a dry, sandy, crumbly mess that tasted more like punishment than pleasure. If you are ready to banish gritty textures and flat puddles from your kitchen forever, you have arrived at the ultimate resource. Welcome to gluten-free cookie baking 101.
This definitive masterclass is the only guide you will ever need to decode the complex science of baking without wheat. We are moving far beyond simple 1-to-1 flour substitutions. To truly master gluten-free cookie baking, you must understand the microscopic architecture of your ingredients—how hydrocolloids replace protein strands, how specific starches manipulate hydration curves, and how to engineer the perfect Maillard reaction without traditional gluten networks. Whether you have Celiac disease, a gluten intolerance, or simply want to expand your advanced baking repertoire, this guide will elevate your gluten-free bakes to professional, bakery-window quality.
What You Will Learn in This Guide:
- The precise scientific role of gluten (gliadin and glutenin) and how to successfully mimic its viscoelastic properties using hydrocolloids like xanthan gum.
- A deep dive into the anatomy of gluten-free flours: distinguishing between protein flours, whole-grain flours, and starches.
- Why resting your dough is the single most critical step to eliminating the dreaded “gritty” gluten-free mouthfeel.
- How to manipulate your sugar and fat ratios to achieve perfect chewiness and structural integrity.
- A master troubleshooting matrix designed specifically for gluten-free cookie baking disasters.
- Advanced make-ahead, freezing, and storage strategies to combat rapid starch retrogradation.
- Direct links to our specialized gluten-free recipe cluster to help you build the ultimate inclusive cookie tin.
The Science & Fundamentals of Gluten-Free Cookie Baking
To master gluten-free baking, we must first understand exactly what we are missing. Gluten is not a single entity; it is a complex protein network formed when two specific wheat proteins—gliadin (which provides extensibility or stretch) and glutenin (which provides elasticity or strength)—are hydrated and agitated. This network traps gases and moisture, giving traditional cookies their chew and structure. When we remove wheat, we remove this architectural scaffolding. We must rebuild it scientifically.
The Role of Binders and Hydrocolloids
Without gluten, a cookie has no intrinsic elasticity; it will simply shatter when bitten. To replace this, we rely on hydrocolloids—substances that form a gel when mixed with water.
- Xanthan Gum: The gold standard in gluten-free cookie baking. Produced by the fermentation of glucose by the Xanthomonas campestris bacteria, xanthan gum acts as a powerful binding agent. It provides the crucial “chew” and prevents the cookie from crumbling into dust. However, precision is key: too much xanthan gum creates a rubbery, gummy texture, while too little leads to a total structural collapse.
- Guar Gum and Psyllium Husk: While sometimes used, guar gum (derived from a legume) is generally better suited for cold applications (like ice cream), and psyllium husk is highly absorbent and better suited for yeast breads. For cookies, xanthan gum remains the supreme choice for mimicking gluten’s exact elasticity.
The Hydration Curve and Starch Gelatinization
Perhaps the most fundamental difference between traditional and gluten-free baking lies in hydration kinetics. Wheat flour absorbs moisture relatively quickly. Gluten-free flours—particularly rice flour and starches—are incredibly dense and crystalline.
- The Grittiness Problem: If you mix a gluten-free cookie dough and bake it immediately, the moisture from the eggs and butter will not have enough time to penetrate the hard starch granules. The result is a cookie that feels like chewing on fine sand.
- The Hydration Rest: The ultimate secret to flawless gluten-free cookie baking is a mandatory hydration rest. Allowing your mixed dough to sit in the refrigerator for 24 to 72 hours gives the starches ample time to act as sponges, fully absorbing the liquids. This softens the starches, resulting in a perfectly smooth, velvety crumb structure that is indistinguishable from a wheat-based cookie.
The Maillard Reaction Without Wheat
The Maillard reaction is the chemical process of browning that creates complex, caramel flavor profiles in baked goods. It requires amino acids (proteins) and reducing sugars. Wheat flour provides ample protein for this reaction. When using starch-heavy gluten-free flours (which are low in protein), you may notice your cookies bake up pale and lack depth of flavor.
- The Protein Boost: To achieve beautiful browning and a robust flavor profile, professional bakers often add a small percentage of a high-protein flour (like almond flour or oat flour) to their gluten-free blends. Additionally, ensuring your recipe has adequate milk solids (from butter) or an extra egg yolk will provide the necessary amino acids to kickstart a vigorous Maillard reaction.
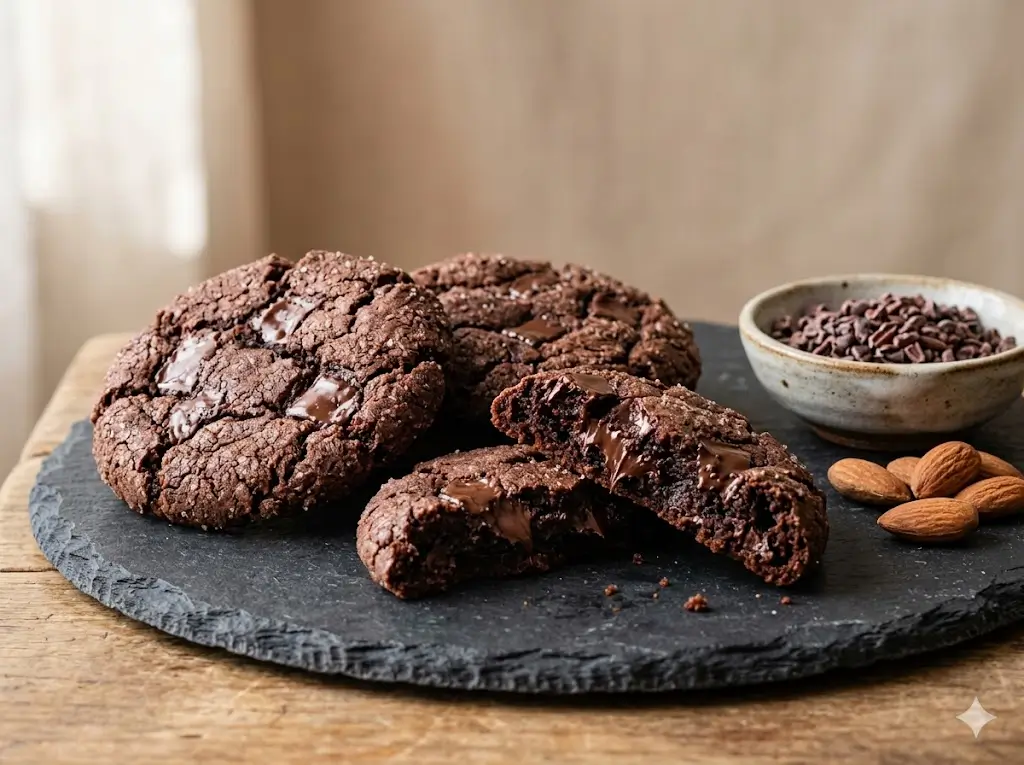
Essential Equipment & Ingredients in Gluten-Free Cookie Baking
In gluten-free baking, precision is not just recommended; it is an absolute necessity. Because you are dealing with a delicate balance of starches and gums, volumetric measurements will almost certainly lead to failure.
The Non-Negotiable Tools
- High-Precision Digital Kitchen Scale: This is non-negotiable. One cup of gluten-free flour can weigh anywhere from 120 grams to 160 grams depending on how it settled in the bag and the specific blend of starches it contains. A 40-gram discrepancy will completely ruin your hydration ratio, resulting in either a soupy mess or a dry hockey puck.
- Heavy-Gauge Aluminum Baking Sheets: Gluten-free doughs are highly sensitive to radiant heat. Dark, non-stick pans absorb too much heat and will scorch the bottoms of your delicate cookies before the centers have a chance to set. Thick, light-colored aluminum ensures a gentle, even bake.
- Food Processor (for DIY blends): If you are mixing your own flour blends or need to refine the texture of almond or oat flour, a food processor is essential for achieving the ultra-fine, powdery consistency required for a smooth mouthfeel.
Decoding Gluten-Free Flours and Blends
Not all gluten-free flours are created equal. A successful cookie requires a meticulously balanced blend of whole-grain flours (for flavor and protein) and starches (for lightness and crispness).
- Superfine White Rice Flour: The backbone of most blends. It must be superfine. Standard rice flour (often found in generic grocery aisles) is too coarse and is the primary culprit behind gritty cookies.
- Almond Flour (Blanched): Provides incredible moisture, fat, and protein. Almond flour encourages aggressive Maillard browning and adds a rich, nutty depth. Because it lacks complex carbohydrates, it helps keep the cookie tender.
- Tapioca Starch (Cassava): This starch is crucial for creating a chewy, stretchy texture. It mimics the extensibility of gliadin (the stretchy part of gluten) and helps the cookies achieve perfectly crisp, caramelized edges.
- Oat Flour (Certified Gluten-Free): Adds a comforting, wholesome flavor and excellent structure. The beta-glucans in oat flour hold onto moisture beautifully, extending the shelf-life of your baked cookies.
- The 1-to-1 Premade Blends: If you prefer convenience, look for high-quality commercial blends (like King Arthur Measure for Measure or Bob’s Red Mill 1-to-1). Crucial Check: Always look at the ingredient list to ensure the blend already contains xanthan gum. If it does not, you must add it manually to your recipe.
The Recipe Cluster Highlights
To truly understand the versatility of gluten-free cookie baking, we have developed four master recipes. Each highlights a different method of achieving structural perfection without wheat.
The Ultimate GF Chocolate Chip Cookies
This is the holy grail. We utilize a customized blend of superfine rice flour, tapioca starch, and almond flour to create a cookie with perfectly crispy, caramelized edges and a dense, chewy center. This recipe mandates a 48-hour refrigeration rest to ensure absolute starch hydration, eliminating any trace of grittiness. Browned European butter and a touch of molasses provide a flavor profile so deep and complex, no one will believe it is completely gluten-free. [Link to Full Recipe: Ultimate GF Chocolate Chip Cookies]
Flourless Peanut Butter Cookies
Sometimes, the best way to bake gluten-free is to rely on recipes that naturally require no flour at all. This naturally gluten-free marvel relies entirely on the protein and fat structure of high-quality peanut butter, combined with sugar and eggs, to create its architecture. Beaten vigorously to incorporate air, these cookies emerge from the oven impossibly tender, wildly peanut-forward, and practically melting on the tongue. [Link to Full Recipe: Flourless Peanut Butter Cookies]
Classic Almond Flour Amaretti
A staple of Italian bakeries, these naturally gluten-free cookies are a masterclass in meringue-based baking. By folding finely ground almond flour and pure bitter almond extract into a stiff, glossy French meringue, we create a cookie that boasts a cracked, shatteringly crisp exterior yielding to a dense, marzipan-like chewy center. They are elegant, dairy-free, and rely on egg white proteins for their flawless structure. [Link to Full Recipe: Almond Flour Amaretti]
GF Oatmeal Lace Cookies
A testament to the power of caramelization. These incredibly thin, delicate, glass-like cookies rely on a boiling syrup of butter and brown sugar poured over certified gluten-free oats. Because they contain almost no flour, the structural integrity comes entirely from the caramelized sugar hardening as it cools. They are crisp, buttery, and perfect for snapping into pieces over premium vanilla bean ice cream. [Link to Full Recipe: GF Oatmeal Lace Cookies]
Step-by-Step Master Techniques for Gluten-Free Cookie Baking
Gluten-free baking requires a paradigm shift. You must discard some traditional baking rules and embrace techniques specifically designed to optimize hydrocolloids and starches.
1. The Modified Creaming Method
In traditional baking, we cream butter and sugar to create air pockets, then gently fold in the flour to avoid overworking the gluten. In gluten-free cookie baking, overmixing the flour is physically impossible because there is no gluten to overwork!
- The Aggressive Mix: Once you add your gluten-free flour blend and xanthan gum to your creamed wet ingredients, you should actually beat the dough on medium speed for a full 2 to 3 minutes. This rigorous mixing serves two purposes: it ensures the xanthan gum is perfectly, homogeneously distributed (preventing gummy pockets), and it forces the starches to begin absorbing the liquid immediately.
2. The Mandatory Hydration Rest (The Autolyse)
As discussed, starches need time to absorb moisture.
- The Technique: Once your dough is mixed, it will likely look significantly softer, stickier, and wetter than a traditional wheat dough. Do not panic, and do not add more flour. Wrap the bowl tightly in plastic wrap and place it in the refrigerator for a minimum of 24 hours. When you check it the next day, the starches will have absorbed the excess moisture, and the dough will be firm, scoopable, and ready to bake without any gritty texture.
3. Shaping and Controlling Spread
Gluten-free cookies lack the elastic tension of wheat, meaning they often behave unpredictably in the oven—either spreading too rapidly into flat puddles or refusing to spread at all, remaining in tight, tall balls.
- The Press: If you are baking a dense cookie (like a peanut butter or thick chocolate chip), you may need to physically coax the spread. Instead of leaving the dough in a sphere, gently press the top of the dough ball down with the palm of your hand or a flat glass before baking.
- Temperature Control: Always bake your GF cookies directly from a cold, refrigerated state. If the dough comes to room temperature before entering the oven, the butter will melt before the xanthan gum and starches can set the structure, resulting in excessive spreading.
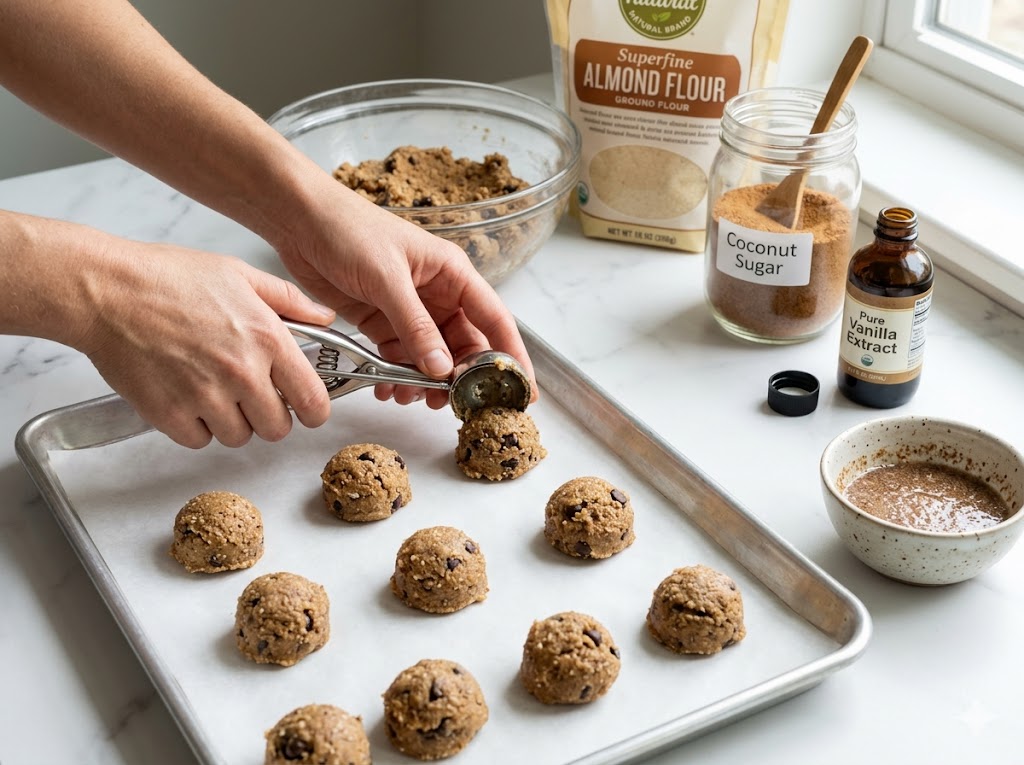
The Ultimate Troubleshooting Guide
Even with precision, gluten-free cookie baking can present unique challenges. Use this diagnostic matrix to identify and cure the most common GF baking failures.
| The Symptom | The Scientific Cause | The Expert Fix |
|---|---|---|
| Cookies are gritty, sandy, or powdery in the mouth. | The starches were not properly hydrated, or you used coarse rice flour instead of superfine. | Implement a mandatory 24-48 hour dough resting period in the fridge. Source only “superfine” or “finely milled” white rice flour for your blends. |
| Cookies spread into flat, thin puddles. | Lack of binder (xanthan gum), butter was too warm, or not enough flour was used (due to volumetric measuring). | Ensure your blend contains xanthan gum (usually 1/4 tsp per cup of GF flour). Weigh your ingredients. Bake dough directly from the refrigerator. |
| Cookies are gummy, rubbery, or have a strange aftertaste. | Excessive use of xanthan gum or other hydrocolloids. | Reduce xanthan gum. A standard ratio is 1/4 to 1/2 teaspoon per cup of gluten-free flour. Never guess; measure gums with exact precision. |
| Cookies crumble and fall apart instantly. | Insufficient binder, or the recipe lacks fat/protein to hold the starches together. | Check your xanthan gum levels. Add an extra egg yolk to the recipe; the fat and emulsifiers in the yolk act as a powerful natural glue for GF starches. |
| Cookies are pale and look raw, even when fully baked. | Lack of protein to initiate the Maillard browning reaction. | Substitute 10% of your GF flour blend with almond flour or oat flour to introduce browning proteins. Ensure your oven is hot enough (use an oven thermometer). |
| Cookies did not spread at all and remain as tall balls. | The flour blend contained too much heavy starch (like potato starch) which absorbed all the moisture, or the dough was baked too cold without being pressed. | Gently press the dough balls down by half an inch before baking. Ensure your flour blend is balanced (roughly 60% starches, 40% whole grain flours). |
Dietary Adaptations & Substitutions
Often, a requirement for gluten-free baking coincides with other dietary restrictions. Because gluten-free baking relies heavily on eggs and dairy for structure and browning, removing them requires advanced substitutions.
Gluten-Free AND Vegan
Removing both gluten (the structural net) and eggs (the primary binder and hydrator) is the ultimate baking challenge.
- The Binder Strategy: You cannot rely solely on xanthan gum. You must introduce a secondary binder. A “flax egg” (1 tbsp ground flaxseed + 3 tbsp warm water, rested for 10 minutes) is incredible here. The mucilage in the flaxseed acts as a powerful gel, mimicking the structural properties of an egg while adding a pleasant, nutty flavor that complements GF flours perfectly.
- The Fat Swap: Use a high-quality, high-fat vegan butter block (like Miyoko’s). Do not use coconut oil as a direct 1:1 substitute for butter in GF baking, as coconut oil is 100% fat and lacks the water content necessary to hydrate the starches, resulting in a greasy, crumbly cookie.
Gluten-Free AND Dairy-Free
Dairy provides lactose (milk sugars) and milk proteins that aid in browning and flavor.
- The Milk Swap: If a recipe calls for a splash of milk to adjust hydration, use a high-protein non-dairy milk like soy milk or oat milk (ensure it is certified GF). Avoid almond or rice milk, which are essentially flavored water and will not contribute to the Maillard reaction.
- The Butter Substitute: Again, rely on European-style vegan block butters. If you must use shortening, be aware that your cookies will bake up taller and softer, but will lack the complex butterscotch flavor notes. Add a tiny splash of butter extract or increase the vanilla extract to compensate.
Advanced Storage & Make-Ahead Strategies
Gluten-free baked goods suffer from a scientific phenomenon called rapid starch retrogradation. Because GF starches absorb so much water, they recrystallize and release that water much faster than wheat flours when exposed to air. This means a GF cookie will go stale and hard almost twice as fast as a traditional cookie.
Freezing Unbaked GF Dough (The Superior Method)
The absolute best way to enjoy GF cookies is freshly baked.
- Scoop and Freeze: Portion your fully hydrated (post-24-hour rest) dough into balls. Place them on a baking sheet and flash freeze for 2 hours.
- Store: Transfer the rock-hard dough balls to an airtight freezer bag, squeezing out all the air. Shelf Life: Up to 3 months.
- Bake: Bake directly from frozen. Because GF dough needs to stay cold to prevent excessive spreading, baking from frozen actually yields a superior thicker cookie. Just add 2 to 3 minutes to the standard bake time.
Maximizing Room Temperature Storage
If you must store baked GF cookies, do so at room temperature in an airtight container.
- The Bread Trick: Place a piece of traditional (or gluten-free) sandwich bread in the container with the cookies. The highly hygroscopic GF starches in the cookies will steal moisture from the bread, keeping the cookies soft and chewy for up to 4 days, while the bread turns to a crouton.
- Never Refrigerate: The ambient temperature of a refrigerator is the exact optimal temperature for rapid starch retrogradation. Storing baked GF cookies in the fridge will turn them into hard, inedible pucks overnight.
Reviving Stale GF Cookies
If your cookies have gone hard, you can re-gelatinize the starches with heat and moisture. Wrap the stale cookie in a slightly damp paper towel and microwave it for 10 seconds. The injected steam will temporarily soften the starches, making the cookie warm and pliable again. Eat immediately, as it will harden as soon as it cools.
Conclusion
Mastering gluten-free cookie baking is a triumph of culinary science. By understanding the critical role of hydrocolloids like xanthan gum, respecting the hydration kinetics of complex starches, and embracing the mandatory dough-resting period, you can create spectacular treats that rival any wheat-based bakery. You no longer have to settle for gritty, flat, or crumbly desserts.
Armed with this knowledge, your kitchen is now an inclusive bakery. We invite you to explore our highly specialized gluten-free cluster recipes linked above to put these techniques to the test. Did the 48-hour hydration rest completely change your cookie texture? Have you mastered the perfect DIY flour blend? Share your baking triumphs with us in the comments below, post your photos, and be sure to subscribe to our newsletter for more advanced gluten-free masterclasses!
Comprehensive FAQs about Gluten-Free Cookie Baking
1. Can I just swap gluten-free flour 1:1 for regular all-purpose flour in my old recipes?
Sometimes, but it is risky. High-quality commercial “1-to-1” or “Measure for Measure” blends are designed to be direct substitutes, as they already contain the precise ratio of starches, whole grains, and xanthan gum. However, GF flours absorb liquid differently. Even with a 1-to-1 blend, you must let the dough rest in the fridge for 24 hours to allow for proper hydration, otherwise, your old recipe will taste gritty.
2. Why do my gluten-free cookies taste gritty and sandy?
Grittiness is the most common GF complaint. It happens because rice flour (the base of most blends) is highly crystalline and takes a long time to absorb moisture. If you mix and bake immediately, the rice flour remains hard. To fix this, you must use superfine rice flour and allow the mixed dough to rest in the refrigerator for at least 24 hours to fully hydrate the starches.
3. What happens if I forget to add xanthan gum?
Without xanthan gum (or a similar hydrocolloid like guar gum), your cookies will have no structural integrity. There is nothing to bind the ingredients together. They will likely spread into a massive, thin puddle in the oven and crumble into dust the moment you try to pick them up.
4. Are oats naturally gluten-free?
Yes, pure oats are naturally gluten-free. However, the vast majority of commercial oats are grown in fields adjacent to wheat and processed on the exact same equipment as wheat, leading to severe cross-contamination. If you are baking for someone with Celiac disease, you absolutely must purchase oats that are explicitly labeled “Certified Gluten-Free.”
5. Why are my gluten-free cookies so pale?
Wheat flour contains proteins that promote browning (the Maillard reaction). Because GF flours are mostly starches, they lack these proteins. To encourage beautiful golden-brown cookies, try substituting 10% to 20% of your flour blend with a high-protein flour like almond flour, or ensure your recipe uses butter (which contains browning milk solids) and brown sugar (which caramelizes easily).
6. Is it better to weigh my gluten-free flour or use measuring cups?
You must weigh it with a digital kitchen scale. Measuring cups are wildly inaccurate for GF baking. Different starches and flours settle differently in the bag. A cup of one GF blend might weigh 120 grams, while a cup of another might weigh 160 grams. Weighing your ingredients is the only way to ensure proper hydration and consistent results.
7. Can I overmix my gluten-free cookie dough?
Surprisingly, no! In traditional baking, overmixing develops too much gluten, making the cookie tough. Because there is no gluten here, overmixing is not a concern. In fact, vigorously mixing your GF dough for 2-3 minutes is highly recommended, as it ensures the xanthan gum is evenly distributed and kickstarts the starch hydration process.
8. Why do my gluten-free cookies go stale so quickly?
GF starches are highly prone to “retrogradation.” They absorb a lot of water during mixing, but they release that water and recrystallize rapidly when exposed to air. Store baked GF cookies in a perfectly airtight container with a slice of bread to maintain moisture, or better yet, freeze the unbaked dough and bake fresh cookies on demand.
9. Can I use almond flour to replace all the flour in a cookie recipe?
No. Almond flour is incredibly rich in fat and moisture, but it lacks the complex starches needed to provide structure. If you replace an entire cup of GF flour blend with pure almond flour, your cookies will melt into a greasy puddle. Almond flour is best used as a supplement (up to 30% of the total flour weight) to add flavor, moisture, and browning.
10. Do I need to alter the baking time or temperature for gluten-free cookies?
Generally, you bake them at the same temperature (usually 350°F / 175°C). However, because GF cookies can be pale, bakers are sometimes tempted to leave them in the oven longer to brown. Do not do this; overbaking will dry them out instantly. Bake them until the edges are just set, and let them cool completely on the baking sheet to finish setting up structurally.