
Let’s address a universal truth of the pastry world: there is an unparalleled, primal joy in dragging a spoon through a molten, fresh-from-the-oven, ice-cream-topped cookie. Yet, industry data and home-baking surveys suggest that nearly 80% of home bakers struggle to replicate that thick, gooey, restaurant-style dessert at home. They often end up with dry, cakey edges, a raw (rather than fudgy) center, or fillings that mysteriously vanish into the dough during the bake.
Welcome to the definitive, ultimate masterclass on Skillet Cookies and bakery-style stuffed cookies. Whether you refer to them as “Pizookies” (pizza-cookies), deep-dish cookies, or cast-iron confections, mastering this category of dessert requires more than just pressing standard cookie dough into a pan. It requires a fundamental understanding of thermodynamics, ingredient ratios, and dough architecture. This guide is the final resource you will ever need. By demystifying the chemical reactions, the thermal mass of cast iron, and the precise techniques of stuffing and baking, you will learn how to produce bakery-elite desserts that boast a perfectly caramelized, crispy edge and a dense, melt-in-your-mouth center.
What You Will Learn in This Masterclass:
- The Thermodynamics of Cast Iron: How heat retention and emissivity create the ultimate crispy-edge-to-gooey-center ratio in skillet cookies.
- The Science of Sugar and Hydration: Understanding how the exact ratio of molasses to sucrose dictates the chewiness and spread of your dough.
- Advanced Stuffing Architecture: The structural secrets to ensuring Nutella, caramel, or ganache stays perfectly molten in the center of your cookie without leaking or dissolving.
- Master Techniques & Dough Maturation: Why resting your dough initiates enzymatic breakdowns that radically alter flavor and texture.
- Expert Troubleshooting: A definitive diagnostic guide to fixing sunken centers, burnt bottoms, and dry textures.
- Dietary Adaptations: Innovative, scientifically backed methods for gluten-free and vegan deep-dish skillet cookies.
The Science & Fundamentals of Skillet Cookies
To truly master the deep-dish and skillet cookie, you must stop viewing baking as an art and start viewing it as delicious chemistry. Unlike standard drop cookies, which bake rapidly on a flat sheet, a heavy cast-iron cookie undergoes a complex, prolonged thermal journey. Every single ingredient plays a highly specific, irreplaceable role in establishing the structural integrity required for a thick, stuffed cookie.
The Thermodynamics of Cast Iron
Why do the best deep-dish cookies come from a cast-iron skillet? It comes down to thermal mass and emissivity. Cast iron is a poor conductor of heat compared to aluminum, but it has exceptional heat retention and a high emissivity rating (roughly 0.64 compared to aluminum’s 0.04). This means that once the heavy iron gets hot, it stays hot and radiates heat aggressively.
When you press cookie dough into a pre-seasoned cast-iron skillet, the edges and bottom are immediately subjected to intense, sustained conductive heat. This rapid heat transfer accelerates the Maillard reaction (the complex browning of amino acids and reducing sugars) and caramelization, creating a deeply toasted, crispy, and structurally sound outer crust. Meanwhile, the sheer volume of the dough insulates the center, allowing it to bake gently via radiant heat, resulting in the coveted molten, fudgy core.
Sugar Ratios: Moisture vs. Crispness
The soul of a chewy cookie lies in its sugar composition. Granulated white sugar (sucrose) is highly crystallizing; as it melts and then cools, it recrystallizes, creating crisp edges and aiding in aeration during the creaming process.
Brown sugar, however, contains molasses. Molasses is slightly acidic (which reacts with baking soda to create lift) and highly hygroscopic, meaning it actively attracts and retains water from the surrounding environment. To achieve the perfect dense, fudgy texture required for Skillet Cookies, you cannot use a standard 50/50 sugar split. The optimal ratio for a deep-dish or stuffed cookie is typically 70% dark brown sugar to 30% granulated sugar. This ensures high moisture retention, severe chewiness, and a dense, tight crumb structure that can support a heavy filling.
Leavening Agents: Spread vs. Lift
Leavening dictates the architectural spread and rise of your dough.
- Baking Soda (Sodium Bicarbonate): This requires an acid (like the molasses in brown sugar) to activate. It neutralizes the acidity of the dough, which actually promotes faster browning and encourages the dough to spread outward.
- Baking Powder: Contains its own acid and activates via heat and moisture, pushing the dough upwards (vertical lift).
For a skillet cookie, excessive vertical lift is your enemy; it creates a cake-like texture rather than a fudgy one. Therefore, master recipes lean heavily on baking soda, using just enough to aerate the dense dough without turning it into a sponge.
Hydration and Gluten Matrix Development
Hydration refers to the amount of water (from butter, eggs, and extracts) absorbed by the flour. For massive, stuffed cookies, we need a stronger structural framework than standard drop cookies. This brings us to protein content.
All-purpose flour sits around 10-11% protein. For stuffed cookies, professional bakers often blend in Bread Flour (12.5-13% protein). The higher protein content allows for the development of a more robust gluten matrix. When hydrated and agitated, glutenin and gliadin proteins bond to form an elastic web. In a deep-dish cookie, this stronger web traps expanding gases more effectively and provides the tensile strength necessary to hold a massive core of molten chocolate or caramel without collapsing.
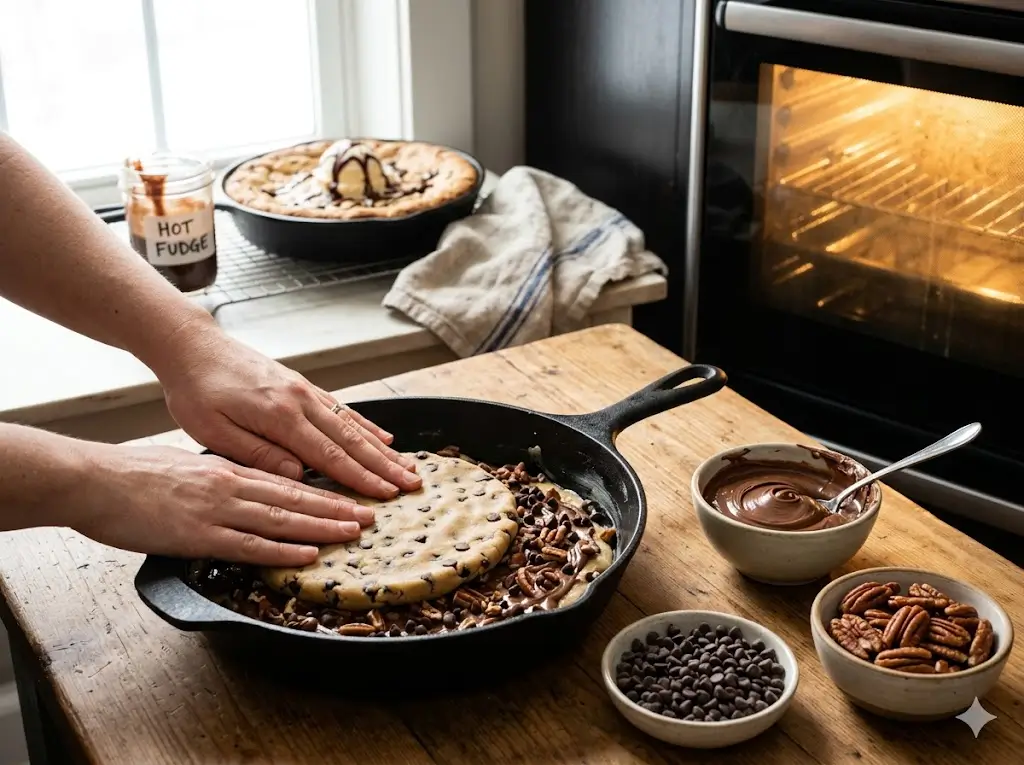
Essential Equipment & Ingredients for Perfect Skillet Cookies
You cannot construct a structurally sound, bakery-tier dessert without precision tools and premium building blocks. When baking massive, dense cookies, the margin for error shrinks drastically. Throw away your volumetric measuring cups; they are the enemy of consistency.
The Non-Negotiable Equipment Arsenal
- Cast Iron Skillets (Specific Sizing): The size of your vessel dictates your dough-to-pan volume ratio. A standard recipe for a 10-inch skillet will be dangerously thin and overbaked if spread into a 12-inch skillet, and will overflow if crammed into an 8-inch skillet. Collect a range of sizes: 6-inch for individual portions, 8-inch for sharing, and 10-inch for party-sized desserts.
- Digital Kitchen Scale (0.1g Accuracy): A cup of flour can fluctuate in weight from 120 grams to 150 grams depending on how you scoop it. A 30-gram discrepancy in flour will completely alter your hydration levels, turning a fudgy center into dry cake. Weighing in grams is an absolute mandate.
- Stand Mixer with Paddle Attachment: While hand mixers work for small batches, the dense, low-hydration dough of a bakery-style stuffed cookie requires the heavy torque of a stand mixer to properly cream cold butter and incorporate high-protein flours without burning out the motor.
- Instant-Read Digital Thermometer: Not just for meats! Plunging a digital thermometer into the center of your skillet cookie is the only foolproof way to test doneness. For a gooey center, you want an internal temperature of about 165°F to 175°F (74°C – 79°C).
Sourcing Master-Quality Ingredients
- European-Style Butter (82%+ Butterfat): Standard American butter is legally mandated to contain 80% butterfat, meaning the remaining 20% is mostly water and milk solids. European-style butter contains 82% to 84% butterfat. Less water means less gluten development, resulting in a richer, more tender, and less cakey crumb.
- Pure Vanilla Extract vs. Imitation Essence: Imitation vanilla is synthesized from lignin (wood pulp) or guaiacol and contains a single flavor compound: vanillin. Pure vanilla extract contains over 250 distinct flavor compounds, offering deep, floral, woody, and nuanced notes that elevate the massive amounts of butter and sugar in the dough.
- Chocolate Feves (Discs) vs. Chocolate Chips: Standard chocolate chips are engineered with high amounts of soy lecithin and stabilizers designed specifically to prevent them from melting and losing their shape. For a truly luxurious, bakery-style melt, you must use high-quality chocolate feves (discs), wafers, or hand-chopped baking bars. These melt into magnificent, striated layers of liquid chocolate throughout the dough.
Pro Baker Secret: The Temperature of Eggs Always use room-temperature eggs (around 68°F/20°C). Cold eggs introduced to perfectly creamed room-temperature butter will instantly shock the butterfat, causing it to seize and break the emulsion you just spent five minutes building. This results in a dense, greasy cookie.
The Recipe Cluster Highlights: Our Signature Skillet Cookies
Once you have mastered the foundational dough science, the flavor profiles and stuffing possibilities become infinite. The true artistry of a skillet cookie lies in contrasting textures and complementary flavor notes. Explore our master collection of variations below:
1. The Ultimate Brown Butter Chocolate Chunk Skillet Cookie
This is the holy grail, the recipe that ruins all other chocolate chip cookies for you. We initiate the Maillard reaction before the bake by gently browning the European butter, evaporating its water content and toasting the milk solids into liquid gold. The resulting dough is infused with a deep, nutty, toffee-like aroma. Packed with distinct pools of 70% dark chocolate feves and finished with flaky Maldon sea salt, this 10-inch masterpiece offers an intense contrast between the crispy, caramelized cast-iron edge and the molten, deeply savory center. Perfect for purists.
2. The Epic Nutella-Stuffed Hazelnut Pizookie
A masterclass in structural engineering. This individual-sized (6-inch) skillet cookie features a dough enriched with finely ground, toasted hazelnuts and a splash of Frangelico. The secret lies in the center: a massive, frozen 3-ounce “puck” of pure Nutella is completely encased within the dough before baking. As the cookie bakes, the dough acts as an insulating blanket, allowing the Nutella core to thaw into a steaming, volcanic center of chocolate-hazelnut lava without overcooking or leaking. Best served aggressively topped with vanilla bean gelato.
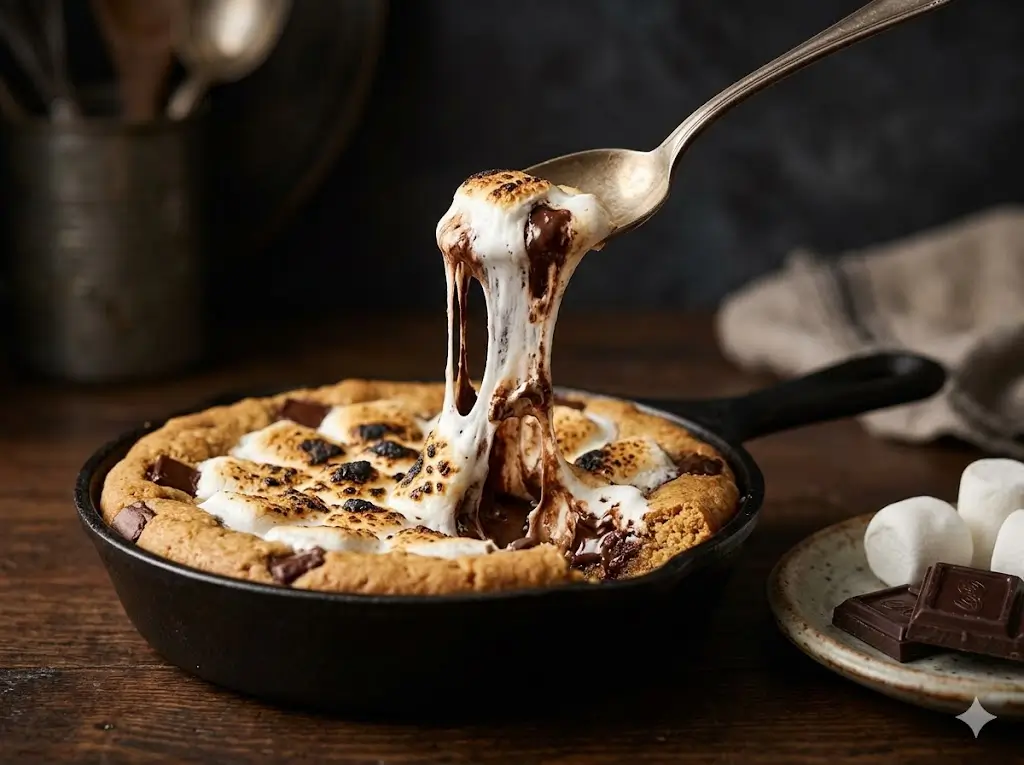
3. The Campfire S’mores Cast Iron Skillet Cookie
Bringing the nostalgic flavor profile of a campfire indoors without the smoke. This variation utilizes a graham-cracker-infused dough, replacing 20% of the flour with finely pulverized graham crumbs to drastically alter the texture and flavor. The dough is layered with colossal milk chocolate chunks and massive, homemade marshmallows. Under the broiler for the final two minutes of baking, the marshmallows expand, toast, and achieve a charred, caramelized crust that cracks perfectly beneath a spoon.
4. The PB&J Stuffed Peanut Butter Deep Dish Cookie
A sophisticated elevation of a childhood classic. The dough is a dense, intensely peanut-forward matrix utilizing both creamy commercial peanut butter (for structural stability) and roasted peanut chunks (for texture). Hidden within the deep-dish center is a generous layer of high-quality, tart raspberry preserve. The acidity and brightness of the raspberry jam cut through the rich, heavy lipid profile of the peanut butter dough perfectly. It is nostalgic, surprisingly complex, and utterly devastating to diets.
Step-by-Step Master Techniques for Stuffed & Skillet Cookies
Following a recipe blindly is a gamble; mastering the techniques guarantees consistency. Whether you are baking a massive 10-inch skillet cookie or individual stuffed cookies, the physical manipulation of the ingredients follows a universal set of scientific rules.
Phase 1: The Emulsion (Creaming Butter and Sugar)
Creaming is not merely mixing; it is a physical process of aeration and emulsion.
- Temperature is Everything: Your butter must be exactly between 65°F and 68°F (18°C – 20°C). At this temperature, the butter is malleable enough to stretch but cold enough to hold air. If it is too warm, the air bubbles will collapse, resulting in a greasy, flat cookie.
- The Friction Phase: Add your 70/30 blend of brown to white sugar. Beat on medium-high speed for a minimum of 3 to 4 minutes. The sharp sugar crystals act like microscopic knives, cutting into the butterfat and creating thousands of tiny air pockets. This aeration is crucial for giving the heavy dough lift and preventing it from becoming a brick.
Phase 2: The Fold (Incorporating Dry Ingredients)
Once your eggs and vanilla are emulsified into the butter mixture, it is time to add the dry ingredients. This is where most home bakers destroy their texture.
- Sift and Whisk: Always whisk your flour, baking soda, and salt together separately to ensure even distribution of the leavening agent.
- Minimize Agitation: Add the dry mixture to the wet mixture in two batches. Mix on the lowest possible speed. The moment water touches flour, gluten begins to form. Over-mixing leads to tough, rubbery dough.
- The 90% Rule: Stop the mixer when you still see streaks of dry flour (about 10% unmixed). Remove the bowl from the stand mixer. Add your chocolate chunks and fold them in by hand with a rigid spatula. This manual folding will finish incorporating the flour without overworking the gluten.
Phase 3: The Architecture of Stuffing
If you are making stuffed cookies, managing temperature and gravity is vital.
- The Frozen Core Method: Never try to pipe room-temperature fillings (like Nutella, peanut butter, or caramel) into room-temperature dough. Scoop your fillings onto a parchment-lined tray and freeze them into solid “pucks” for at least 2 hours.
- The Seal: Take a portion of dough, flatten it into a disc, place the frozen puck in the center, and wrap the dough entirely around it. You must ensure there are zero air pockets or seams. Even a millimeter gap will allow the filling to boil, turn into steam, and erupt through the side of the cookie during baking.
Phase 4: The Skillet Press & The Maturation Chill
If making a skillet cookie, press the dough evenly into your cast-iron pan. Do not pack it down too densely, or you will crush the air bubbles you created during creaming.
The 24-Hour Maturation Rule: Once pressed in the skillet (or shaped into stuffed balls), wrap the dough tightly in plastic wrap and place it in the refrigerator for 24 to 72 hours. This is the ultimate Pro Baker Secret.
- The Science of Resting: During this resting period, two magical things happen. First, the flour fully hydrates, absorbing the water from the eggs and butter, which yields a chewier texture and thicker bake. Second, enzymes in the flour (amylase) begin breaking down complex starches into simple sugars. This dramatically enhances caramelization during baking, resulting in a richer, darker, and more complex flavor profile that cannot be replicated any other way.
Phase 5: The Bake and The Carryover Cook
Skillet cookies require a lower temperature than drop cookies—typically 325°F to 350°F (160°C – 175°C)—to allow the dense center to warm through before the edges burn.
- Pulling it Early: The biggest mistake is waiting until the center looks fully baked. You must pull the skillet from the oven when the edges are deep golden brown, but the center still looks slightly pale, puffy, and underbaked.
- Carryover Cooking: Because cast iron retains heat so aggressively, the cookie will continue to bake intensely for another 15 to 20 minutes sitting on your counter. Let it rest! Cutting into it immediately will result in a raw, liquid mess. Resting allows the starches to set into the perfect fudgy texture.
The Ultimate Troubleshooting Guide for Skillet Cookies
Even seasoned pastry chefs must adjust to the variables of humidity, oven calibration, and ingredient fluctuations. Learning to diagnose a failed bake by its physical symptoms is the hallmark of a master.
| The Symptom | The Visual Cue | The Scientific Cause | The Expert Fix |
|---|---|---|---|
| Raw, Liquid Center | The edges are perfect, but the center is soup even after resting. | 1. Oven temperature too high (edges cooked before heat penetrated).2. Dough was too cold when entering the oven.3. Overcrowded pan. | Lower oven temperature by 25°F and bake longer. Let the chilled skillet sit at room temp for 30 mins before baking. |
| Burnt Bottom/Edges | The bottom crust is black and tastes acrid, center is fine. | 1. Cast iron was placed on the bottom oven rack.2. Pan was pre-heated (do not pre-heat the pan for cookies). | Bake on the middle or top-middle rack. If your oven heating element is on the bottom, place an empty baking sheet on the rack below the skillet to deflect direct radiant heat. |
| Dry, Cakey Texture | The cookie lacks chewiness and resembles a dry sponge cake. | 1. Over-measured flour (volumetric scooping).2. Too much baking powder.3. Over-mixed dough (too much gluten). | Switch to a digital scale. Ensure you are using baking soda, not powder. Mix only until flour streaks disappear. |
| Filling Eruption | Stuffed filling has exploded out the top or sides during the bake. | 1. Filling wasn’t frozen properly.2. Seams in the dough were not pinched tightly.3. Dough wall was too thin. | Freeze filling pucks solid. Ensure a minimum of 1/2-inch of dough encompasses the entire filling. Roll perfectly smooth. |
| Excessive Greasiness | Butter is pooling on the surface; cookie is flat and heavy. | 1. Butter was too warm during creaming (emulsion broke).2. Skillet was heavily greased before adding dough. | Ensure butter is exactly 65°F-68°F. Do not butter or oil a well-seasoned cast-iron skillet before pressing dough in; the dough has enough fat to release easily. |
| Sunken Center | Cookie puffed up beautifully in the oven, then totally collapsed. | 1. Too much leavening agent.2. Pulled from the oven too early (structural matrix didn’t set). | Double-check baking soda measurements. Ensure the internal temp reaches at least 165°F before pulling. |
Pro Baker Secret: The Tap Method If you notice your skillet cookie puffing up too much in the center during the bake (risking a cakey texture), open the oven and firmly tap the skillet against the oven rack. This knocks the excess air out of the dough, deflating the puff and ensuring a dense, fudgy final texture.
Dietary Adaptations & Substitutions for Skillet Cookies
The robust nature of a skillet cookie makes it highly adaptable. With a precise understanding of ingredient functionality, you can modify these master recipes for various dietary restrictions without sacrificing the gooey, bakery-style experience.
Gluten-Free Skillet Cookies
Removing gluten eliminates the structural web that holds the massive cookie together, meaning a straight substitution will result in a crumbly, sandy mess.
- The Flour Blend: You must use a high-quality 1:1 gluten-free baking flour that contains Xanthan Gum. Xanthan gum acts as the binder, mimicking the elasticity of gluten.
- The Hydration Rule: Gluten-free starches (like rice flour and tapioca) take significantly longer to absorb liquids than wheat flour. You must rest gluten-free cookie dough in the fridge for a minimum of 24 hours, or the final bake will be unpleasantly gritty.
- Extra Moisture: GF flours absorb more liquid. Add an extra egg yolk or 2 tablespoons of milk to the dough to prevent a dry bake.
Vegan & Dairy-Free Adaptations
Replacing butter and eggs in a recipe that relies heavily on both for flavor and structure requires scientific tweaking.
- The Butter Replacement: Do not use straight coconut oil; its melting point is too low (76°F), which will cause the cookie to spread into a greasy puddle instantly in the oven. Use high-quality, high-fat vegan block butter (not the spreadable tub kind).
- The Egg Replacement (Mucilage): Eggs provide moisture, fat, and binding. The best replacement for a dense skillet cookie is a “flax egg” (1 tablespoon ground flaxseed mixed with 3 tablespoons warm water, rested for 10 minutes). The flaxseed releases mucilage, a viscous, gel-like substance that perfectly mimics the binding properties of ovalbumin in egg whites.
- The Chocolate: Ensure you are using certified dairy-free dark chocolate chunks.
Refined Sugar-Free Options
Swapping out standard sugars alters the hygroscopic (moisture-retaining) nature of the dough.
- Coconut Sugar: You can swap brown sugar for coconut sugar 1:1 by weight. However, coconut sugar has less moisture than dark brown sugar. To compensate and maintain chewiness, add 1 tablespoon of pure maple syrup or agave nectar to the dough.
Advanced Storage, Make-Ahead, & Reheating Strategies
A massive skillet cookie is often too rich to finish in one sitting, and preparing stuffed cookies from scratch every time a craving hits is impractical. Mastering preservation and reheating is just as important as mastering the bake.
Freezing Dough for On-Demand Pizookies
Cookie dough freezes exceptionally well, making it the ultimate make-ahead dessert asset.
- Stuffed Cookies: Assemble the stuffed dough balls completely, freezing the filling inside the dough. Place them on a baking sheet in the freezer until rock solid, then transfer to a heavy-duty ziplock bag. They will keep for up to 3 months. You can bake them directly from frozen, simply dropping the oven temperature by 15°F and adding 3-5 minutes to the bake time.
- Skillet Cookie Dough: Do not freeze the dough in the heavy cast-iron skillet. Instead, flatten the dough into a disc, wrap it tightly in a double layer of plastic wrap, and freeze. Thaw overnight in the refrigerator before pressing it into your room-temperature skillet to bake.
Storing Baked Skillet Cookies
- Room Temperature vs. Fridge: A baked skillet cookie should be covered tightly with foil or plastic wrap and stored at room temperature for up to 3 days. Do not put it in the refrigerator! The cold environment of the fridge rapidly accelerates starch retrogradation—the process where starch molecules crystallize and expel water, turning the soft cookie stale, hard, and crumbly at an alarming rate.
The Art of the Reheat
A leftover skillet cookie loses its molten magic once cooled. To revive it:
- The Oven Method (Best for Texture): Cover the skillet with aluminum foil (to prevent the edges from drying out) and place it in a preheated 300°F (150°C) oven for 8-10 minutes. This gently re-melts the butterfat and chocolate without further baking the starches.
- The Microwave Method (Fastest): Scoop a portion out of the skillet onto a microwave-safe plate. Drape a slightly damp paper towel over it and microwave on 50% power for 15-20 seconds. The damp towel provides a micro-steaming effect that instantly softens the crumb and turns the chocolate molten.
Conclusion: Mastering Your Skillet Cookies
Mastering the bakery-style stuffed and skillet cookie is a journey of precision, thermodynamics, and scientific understanding. By respecting the immense heat retention of cast iron, controlling your sugar ratios for maximum hydration, and utilizing the mandatory 24-hour dough maturation phase, you have elevated your skills from a casual baker to a pastry architect. Remember that patience is just as crucial an ingredient as premium butter or high-protein flour. The structural integrity and molten rewards of these techniques are unparalleled.
Are you ready to preheat your oven and wield your cast iron with confidence? I highly recommend starting with our signature The Ultimate Brown Butter Chocolate Chunk Skillet Cookie, grabbing a massive scoop of premium vanilla bean ice cream, and sharing the result with friends. Leave a comment below with your biggest baking triumph (or a photo of your gooey center!), subscribe to our newsletter for weekly deep-dives into culinary science, and tag us on social media when you conquer the ultimate Pizookie!
Comprehensive FAQs: Everything You Need to Know About Skillet Cookies
1. Can I use a regular cake pan or glass dish instead of a cast-iron skillet?
While you physically can, the results will be vastly inferior. Cast iron possesses immense thermal mass and high emissivity, meaning it absorbs, retains, and radiates heat perfectly to create the signature crispy, caramelized outer crust while leaving the center dense and fudgy. Glass is a poor conductor and can shatter at high heats, while thin aluminum pans will heat too quickly, burning the bottom of the cookie before the thick center can bake through.
2. Why is it called a “Pizookie”?
“Pizookie” is a portmanteau of the words “pizza” and “cookie.” It was popularized and trademarked by the restaurant chain BJ’s Restaurant & Brewhouse in the United States. It refers to a large, deep-dish cookie baked in a round pan (resembling a pizza), served hot straight from the oven, and traditionally topped with copious amounts of ice cream.
3. How do you know when a skillet cookie is actually done baking?
Because of carryover cooking, you must pull a skillet cookie from the oven before it looks entirely finished. The edges should be a deep, toasted golden brown and slightly pulled away from the sides of the pan. The center should look puffed, slightly pale, and even a bit jiggly. If you wait until the center looks fully baked, the residual heat of the cast iron will continue cooking it on your counter, resulting in a dry, cakey brick. For ultimate precision, a digital thermometer inserted into the center should read 165°F to 170°F (74°C – 76°C).
4. Do I need to grease or butter my cast-iron skillet before adding the cookie dough?
If you have a well-seasoned cast-iron skillet, you do not need to add extra butter, oil, or parchment paper. The cookie dough itself contains an incredibly high percentage of butterfat. As the dough bakes, this fat melts and naturally lubricates the pan, ensuring a flawless release. Adding extra grease can actually fry the bottom of the dough, making it excessively greasy.
5. Can I use store-bought, pre-made cookie dough in a skillet?
Yes, but you must manage your expectations. Store-bought dough is engineered to be baked as small drop cookies; it typically contains more water and leavening agents that cause it to spread rapidly. If you press it into a skillet, it often bakes up very cakey or excessively thin, lacking the dense, fudgy, structural integrity of a bespoke skillet cookie recipe that utilizes bread flour and tailored sugar ratios.
6. How do I serve a skillet cookie without it falling apart?
A skillet cookie is not meant to be sliced like a perfect pie immediately out of the oven. It must rest on the counter for at least 15 to 20 minutes to allow the starches to set and the molten chocolate to slightly congeal. Once rested, you can either slice it into wedges using a sharp knife, or—more traditionally—top the entire skillet with scoops of ice cream and provide your guests with spoons to attack it communally directly from the pan.
7. Why did my skillet cookie sink dramatically in the middle after I took it out?
A severe collapse in the center usually points to a leavening error or pulling it from the oven far too early. If you use too much baking soda or baking powder, the dough inflates rapidly like a balloon; because the structure isn’t strong enough to support that rapid expansion, it collapses as soon as it hits the cooler room temperature air. Alternatively, if the internal temperature didn’t reach at least 160°F, the structural protein matrix never set, causing the liquid center to cave in.
8. Can I make a skillet cookie dough ahead of time?
Not only can you, but you should. Professional bakers mandate a 24 to 72-hour resting period for dough in the refrigerator. This process, known as maturation or aging, allows the flour to fully hydrate, resulting in a chewier texture. More importantly, it gives enzymes time to break down complex starches into simple sugars, drastically improving the flavor complexity and caramelization of the final bake.
9. What is the absolute best ice cream to pair with a rich skillet cookie?
While highly subjective, culinary science suggests pairing rich, heavy, lipid-dense desserts with something that provides contrast. A high-quality Vanilla Bean gelato is the gold standard because its clean, floral notes cut through the heavy chocolate and butter without muddying the flavor profile. Alternatively, a slightly tart or salty ice cream, such as Sea Salt Caramel or Buttermilk ice cream, provides an excellent counterbalance to the extreme sweetness of the cookie.
10. How do you keep the stuffed filling from just disappearing into the dough when baking?
This phenomenon occurs when the melting point of your filling is too similar to the baking temperature of your dough. To prevent fillings like Nutella, peanut butter, or caramel from dissolving, you must employ the “Frozen Core” method. Scoop the filling onto a tray and freeze it solid for at least 2 hours. Wrap the cold dough entirely around the frozen puck, ensuring zero seams or air gaps. The frozen core will slowly thaw and become molten just as the surrounding dough finishes baking, keeping the two distinct.