
Let’s address a fascinating paradox in the pastry world: despite the name suggesting absolute simplicity, the classic No-Bake Cookie is mathematically one of the most frequently failed recipes in the home kitchen. Baking industry surveys indicate that nearly 65% of home bakers report their first attempts resulting in either a crumbly, dusty gravel or a wet, sticky pudding that refuses to set. Why does a recipe with no oven cause such high failure rates? Because a no-bake cookie is not actually a cookie at all—it is a sophisticated stovetop candy wrapped around a hydrated starch matrix.
Welcome to the definitive, ultimate guide on mastering the No-Bake Cookie. This handbook is the final resource you will ever need to conquer this beloved, zero-oven treat. By stripping away the guesswork and demystifying the precise chemical reactions of sugar crystallization, boiling temperatures, and oat hydration, you will learn how to produce bakery-elite treats that boast a flawless, fudgy, melt-in-your-mouth texture every single time.
Whether you are seeking a quick summer dessert that doesn’t heat up your kitchen, or a reliable, scalable confection for the holiday season, mastering the science within these pages will guarantee perfection.
What You Will Learn in This Masterclass:
- The Chemistry of Candy Making: Why the No-Bake Cookie relies on the “soft-ball stage” of sugar boiling and how to master it.
- The Science of Oat Hydration: Understanding how starch gelatinization occurs without the ambient heat of an oven.
- Precision Equipment & Ingredients: Why your saucepan material and cocoa fat percentages dictate the structural integrity of your cookie.
- The Recipe Cluster Highlights: Deep dives into gourmet variations, from classic chocolate peanut butter to espresso tahini.
- Expert Troubleshooting: A definitive diagnostic guide to fixing the dreaded “too crumbly” or “too gooey” outcomes.
- Dietary Adaptations: Scientifically backed methods for achieving perfect gluten-free, vegan, and low-sugar variations.
The Science & Fundamentals of the No-Bake Cookie
To truly master the No-Bake Cookie, you must completely shift your culinary mindset. You are no longer a baker relying on the Maillard reaction in a 350°F oven; you are now a confectioner manipulating the physical state of sucrose on a stovetop. Every single ingredient plays a highly specific, irreplaceable role in establishing the emulsion and structural integrity of the final product.
The Boiling Phase: Sugar Crystallization and Water Evaporation
The entire structural foundation of a no-bake cookie is based on boiling a syrup of granulated sugar, milk, and butter. This is not simply about melting ingredients together; it is a critical process of water evaporation.
When you boil the liquid, water escapes as steam, thereby concentrating the sugar. For a perfect No-Bake Cookie, the syrup must reach the exact threshold known in candymaking as the “soft-ball stage,” which occurs between 235°F and 240°F (112°C – 115°C).
- Under-boiling (Below 230°F): If you boil the mixture for too little time, too much water remains in the syrup. The sugar concentration is too low to form a crystalline structure when it cools. The result? A wet, sticky puddle that will never set, even if left in the fridge for a week.
- Over-boiling (Above 245°F): If you boil for too long, too much water evaporates. The sugar concentration becomes so high that when it cools, it forms massive, rigid crystals. The result? A dry, chalky, crumbly mess that shatters rather than chews.
The Role of Fat and Protein as “Interfering Agents”
If you were to boil sugar and milk and let it cool, you would simply get a hard block of fudge or caramel. To achieve the fudgy, chewy texture of a cookie, we rely on interfering agents—specifically, the fats and proteins found in peanut butter (or alternative nut butters) and cocoa powder.
When you remove the boiling syrup from the heat and aggressively stir in peanut butter, the complex lipid molecules (fats) and peanut proteins physically coat the sugar strands. This physical barrier prevents the sugar molecules from forming massive, hard crystals as they cool. Instead, they are forced to form millions of micro-crystals, which your palate interprets as a smooth, fudgy, “chewy” texture.
Starch Gelatinization and Oat Hydration
In a traditional oven-baked cookie, the heat of the oven causes the starches in flour to gelatinize (absorb water and swell) to form a crumb structure. In a No-Bake Cookie, we rely entirely on the residual thermal energy of the boiling sugar syrup to hydrate the oats.
This is why the type of oat matters immensely. Quick-cooking oats are rolled thinner and cut into smaller pieces than old-fashioned rolled oats. This increased surface area allows the hot sugar syrup to penetrate the oat quickly, gelatinizing the starches in the brief 15-minute window before the candy matrix cools and solidifies. Using thick, old-fashioned oats often results in a chewy, raw, and fibrous texture because the syrup cools before the dense oat can fully hydrate.
Essential Equipment & Ingredients
You cannot construct a structurally sound, bakery-tier confection without precision tools and premium building blocks. When making candy-based desserts, the margin for error shrinks drastically. Throw away the idea that no-bakes are just a “throw it in a pot and stir” recipe.
The Non-Negotiable Equipment Arsenal
- Instant-Read Digital Thermometer: The timing method (“boil for exactly 1 minute”) is notoriously unreliable because it doesn’t account for your stove’s BTU output, your altitude, or your pan’s thickness. A digital candy thermometer or instant-read meat thermometer is the only foolproof way to know you have hit the required 235°F.
- Heavy-Bottomed Stainless Steel Saucepan: Do not use thin, cheap aluminum pans. Thin pans create immediate “hot spots” that will scorch the milk proteins and burn the sugar before the rest of the mixture reaches a rolling boil, introducing a bitter, acrid flavor to your cookies. A heavy-bottomed, 3-ply stainless steel pan ensures even, steady heat distribution.
- Flexible Silicone Spatula: Wooden spoons are traditional, but they are porous and can harbor moisture or microscopic sugar crystals from past bakes, which can trigger premature crystallization in your current batch. A seamless, heat-resistant silicone spatula allows you to scrape the bottom of the pan flawlessly, preventing scorching.
- Silicone Baking Mats or High-Quality Wax Paper: No-Bake Cookies will permanently adhere to standard aluminum foil or cheap parchment. A silicone baking mat (like a Silpat) or heavy-duty wax paper provides the optimal non-stick surface for the cookies to cool and set.
Sourcing Master-Quality Ingredients
- European-Style Butter (82%+ Butterfat): Standard American butter contains 80% butterfat and up to 16% water. In a recipe that relies on strict water evaporation, introducing excess water via cheap butter drastically alters the boiling timeline. European-style butter has a lower water content, yielding a richer, more predictable syrup. Never use margarine, as its water and oil emulsion breaks violently when boiled.
- Dutch-Processed Cocoa Powder: Natural cocoa powder is highly acidic and can taste harsh when not baked. Dutch-processed cocoa has been washed in an alkaline solution, neutralizing its acidity. This results in a significantly darker color, a smoother, rounder flavor profile, and a more soluble powder that incorporates seamlessly into the hot syrup without clumping.
- Commercial Creamy Peanut Butter: Now is not the time for artisanal, natural, “stir-in-the-oil” peanut butter. Natural peanut butters lack the stabilizing emulsifiers found in commercial brands (like Jif or Skippy). The separated oils in natural peanut butter can cause your hot sugar syrup to “break” and separate into a greasy puddle. Use standard, homogenized creamy peanut butter for structural integrity.
Pro Baker Secret: The Humidity Factor Sugar is incredibly hygroscopic (water-attracting). If you are attempting to make No-Bake Cookies on a rainy, highly humid day, the cooling sugar matrix will actively pull moisture from the air, causing the cookies to remain soft and sticky. On high-humidity days, allow the syrup to boil to slightly higher temp—around 238°F—to evaporate a bit more internal water and compensate for the atmospheric moisture.
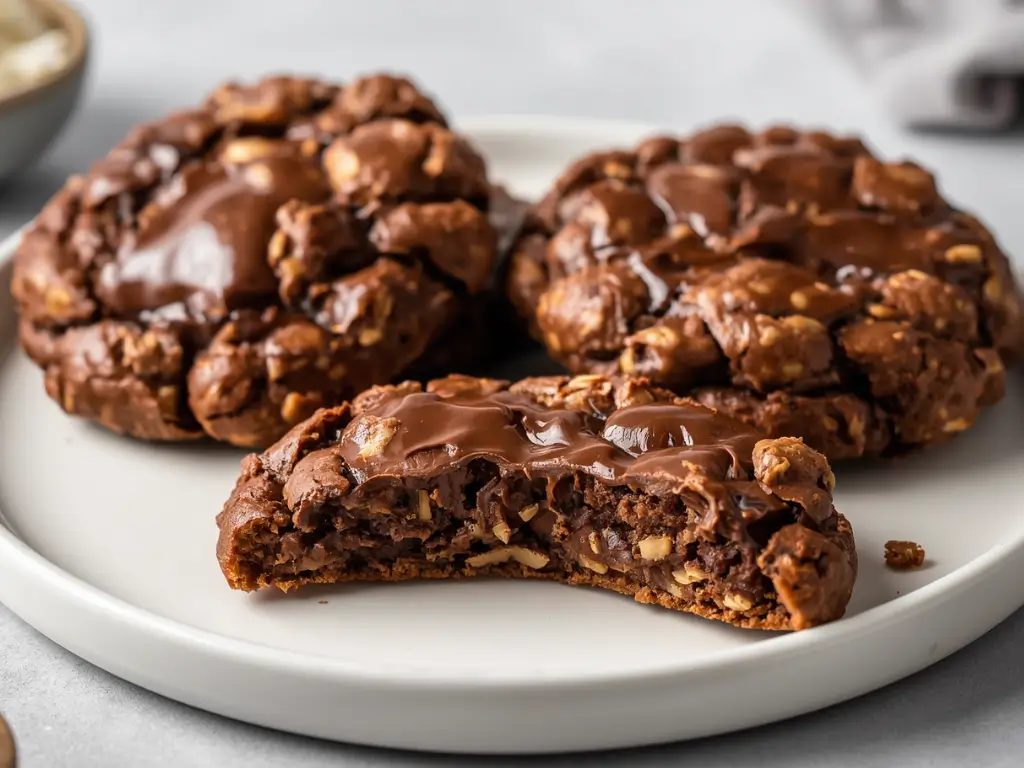
The Recipe Cluster Highlights: Our Signature No-Bake Cookies
Once you have mastered the foundational stovetop chemistry, the flavor profiles and textural possibilities become infinite. The true artistry of a No-Bake Cookie lies in contrasting the extreme sweetness of the sugar matrix with deep, savory, or complex flavor notes. Explore our master collection of variations below:
1. The Classic Chocolate Peanut Butter No-Bake Cookie
The undisputed gold standard, refined to perfection. This variation uses a precise ratio of Dutch-processed cocoa to commercial peanut butter to create a nostalgic, ultra-fudgy bite. We incorporate a dash of pure Madagascar vanilla extract and a heavy pinch of kosher salt off the heat to elevate the flavor profile, cutting through the dense sweetness. It yields a cookie that is firm on the outside but maintains a soft, truffle-like interior. Perfect for lunchboxes, bake sales, and late-night cravings.
2. Salted Caramel Pecan Praline No-Bake Cookies
A sophisticated, Southern-inspired twist on the classic. We completely remove the cocoa powder and replace the white granulated sugar with 100% dark brown sugar. The molasses in the brown sugar, when boiled with the butter and milk, creates a deep, authentic butterscotch-caramel base. Instead of peanut butter, we use a smooth cashew butter as our interfering agent, and fold in heavily toasted, chopped pecans along with the quick oats. Finished with flaky Maldon sea salt, it tastes remarkably like an artisanal New Orleans praline.
3. Toasted Coconut Almond Joy Macaroons (No-Bake)
A textural masterpiece for coconut lovers. This recipe significantly reduces the oat content, replacing it with massive quantities of lightly toasted, unsweetened shredded coconut and finely chopped roasted almonds. The syrup base utilizes rich coconut milk instead of standard dairy milk, amplifying the tropical flavor profile. The result is a dense, incredibly chewy, chocolate-coconut hybrid that perfectly mimics the famous candy bar, but with a gourmet, bakery-quality mouthfeel.
4. Espresso Dark Chocolate Tahini No-Bakes
Designed for the adult palate. We replace the traditional peanut butter with premium, roasted sesame tahini. Tahini offers an earthy, slightly savory, and deeply nutty profile that is far more complex than peanut butter. The syrup is fortified with two tablespoons of high-quality instant espresso powder, which radically intensifies the dark chocolate notes. The slight bitterness of the espresso and tahini perfectly balances the sucrose, resulting in a dark, mysterious, and sophisticated confection perfect for pairing with a bold Cabernet or after-dinner coffee.
Step-by-Step Master Techniques
Following a recipe blindly without understanding the visual and physical cues is a recipe for disaster. Mastering the No-Bake Cookie requires executing four precise phases rapidly, as candy waits for no one.
Phase 1: The Mise En Place (Preparation)
Because the boiling phase happens aggressively and the cooling phase begins the second you remove the pan from the heat, you have absolutely zero time to measure ingredients later.
- Pre-measure Everything: Have your peanut butter pre-measured in a bowl. Have your oats and vanilla measured and sitting directly next to the stove.
- Prepare the Landing Zone: Lay out two large sheets of wax paper or silicone baking mats on your kitchen counter. Once the batter is ready, it will begin setting in the pot within 3 minutes; you must have your dropping area prepared immediately.
Phase 2: The Emulsion and The Rolling Boil
This is where 90% of home bakers fail.
- Combine the butter, sugar, milk, and cocoa powder in your heavy-bottomed saucepan over medium-high heat. Whisk continuously as the butter melts to form a homogenous emulsion.
- Identifying the Rolling Boil: As the mixture heats, you will see small bubbles form at the edges. This is not a rolling boil. You must wait until the entire surface of the liquid is erupting with large, rapid, rolling bubbles that cannot be stirred down. Even when you drag your spatula through the center, the bubbles should immediately violently erupt behind it.
- The Timer or The Thermometer: The very second you reach this true, unstoppable rolling boil, start your timer for exactly 60 seconds (or insert your thermometer and watch it climb precisely to 235°F – 240°F). Do not guess.
Phase 3: The Binding Fold (Off-Heat Action)
The moment the timer hits 60 seconds (or the temp hits 235°F), immediately remove the saucepan from the heat source entirely. The residual heat of the burner will continue to evaporate water if left there.
- The Interfering Agents: Immediately dump in your peanut butter and vanilla extract. Whisk vigorously. The hot syrup will instantly melt the peanut butter, and the vanilla will violently bubble and steam (this is the alcohol in the extract evaporating, leaving behind pure flavor).
- The Hydration Fold: Dump in the quick oats. Switch from a whisk to your rigid silicone spatula. Fold aggressively, scraping the bottom and sides, ensuring every single oat is coated in the hot candy syrup. You have about 60 to 90 seconds to do this before the mixture begins to dull and stiffen.
Phase 4: The Drop and The Crystallization Set
Working quickly, use a medium cookie scoop (or two spoons) to drop ping-pong-sized mounds of the hot batter onto your prepared wax paper.
- Do not flatten them immediately. The batter should be slightly glossy and gently settle into a thick puck on its own.
- The Waiting Game: Walk away. Do not touch them, do not put them in the fridge to rush them. They need to set at room temperature for roughly 30 to 45 minutes. During this time, the sugars are slowly crystallizing around the fat and oat matrix, building the final structure. Once they are firm to the touch and easily peel off the wax paper with a matte finish, they are ready.
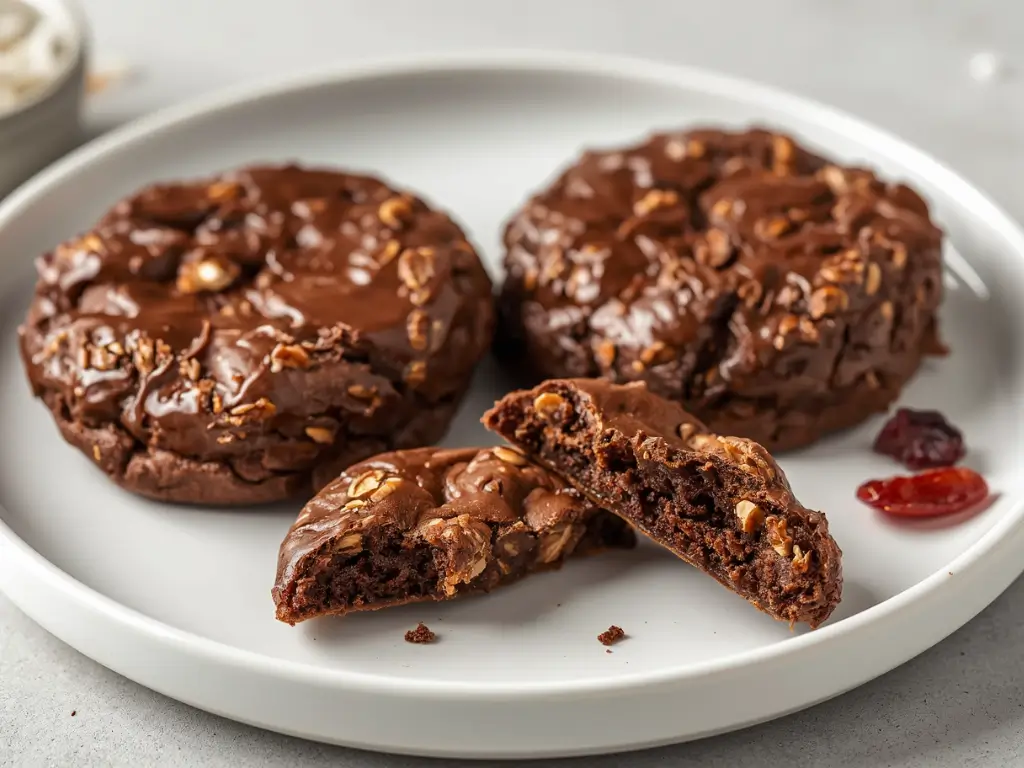
The Ultimate Troubleshooting Guide for No-Bake Cookies
Even seasoned confectioners must adjust to the variables of humidity, stove output, and ingredient fluctuations. Learning to diagnose a failed batch by its physical symptoms is the hallmark of a master.
| The Symptom | The Visual Cue | The Scientific Cause | The Expert Fix |
|---|---|---|---|
| The Puddle (Won’t Set) | Cookies remain wet, sticky, and glossy even after 2 hours. | 1. Under-boiling: The mixture never reached 235°F, leaving too much water in the syrup.2. False Boil: You started the timer at the first sign of bubbles, not a full rolling boil. | Use a digital thermometer to ensure you hit exactly 235°F. Wait for an aggressive, unstoppable boil before starting the 60-second timer. |
| The Gravel (Too Crumbly) | Cookies are dry, chalky, shatter when bitten, or set instantly in the pot. | 1. Over-boiling: The syrup exceeded 245°F, evaporating too much water and creating hard candy.2. Too Much Oat: Over-measured oats absorbed all available liquid, leaving no syrup to bind them. | Never boil for more than 60-90 seconds. Use a digital scale to weigh oats, ensuring the exact starch-to-syrup ratio is maintained. |
| Grainy Texture | The cookie sets, but feels like sand or undissolved sugar on the tongue. | 1. Premature Boiling: The sugar crystals did not fully dissolve into the milk before the boiling phase began. | Whisk the sugar, milk, and butter over medium-low heat until completely smooth and dissolved before turning the heat up to achieve the rolling boil. |
| Oil Separation/Greasy | The cookies have a slick pool of oil around the base; dull finish. | 1. Natural Peanut Butter: The lack of emulsifiers caused the oil to separate from the protein under high heat.2. Margarine: The water/oil emulsion broke during the boil. | Always use commercial, homogenized creamy peanut butter (like Skippy or Jif) and 100% real dairy butter. |
| Fibrous/Chewy Oats | The cookies set fine, but the oats feel raw and hard to chew. | 1. Wrong Oat Type: Old-fashioned rolled oats were used instead of quick oats. The thick cut prevented rapid thermal gelatinization. | Strictly use Quick-Cooking Oats. If you only have rolled oats, pulse them 3-4 times in a food processor to break them down before using. |
Pro Baker Secret: The “Puddle” Salvage Operation If you pull a batch and realize after 30 minutes they are absolutely not setting, do not throw them away! Scrape the gooey mixture back into your saucepan. Add 2 tablespoons of milk, bring it back to a gentle boil for exactly 1 minute to evaporate the correct amount of water, and drop them again. They will be slightly denser, but perfectly edible and structurally sound.
Dietary Adaptations & Substitutions
The robust nature of the No-Bake Cookie makes it highly adaptable. With a precise understanding of ingredient functionality—specifically moisture content and fat structures—you can modify these master recipes for various dietary restrictions without sacrificing the signature fudgy chew.
Gluten-Free No-Bake Cookies
This is the easiest adaptation, as the standard recipe inherently relies on oats rather than wheat flour. However, a major misconception is that all oats are gluten-free.
- The Cross-Contamination Risk: Standard commercial oats are highly susceptible to cross-contamination because they are often grown in adjacent fields to wheat, barley, or rye, and processed on the exact same factory equipment.
- The Fix: You must source oats that are explicitly certified “Gluten-Free” on the packaging. These oats are grown in isolated fields and processed in dedicated facilities to ensure they contain less than 20 ppm (parts per million) of gluten, making them safe for Celiac disease. The structural bake is identical.
Vegan & Dairy-Free Adaptations
Replacing the cow’s milk and dairy butter alters the fat-to-water ratio of the boiling syrup, which requires scientific tweaking to prevent the emulsion from breaking.
- The Butter Replacement: Do not use pure coconut oil or standard margarine. Coconut oil has a rapid melting point and lacks the water needed to dissolve the sugar, leading to immediate greasiness. Use a high-quality, high-fat vegan block butter (e.g., Miyoko’s or Earth Balance sticks).
- The Milk Replacement: Skim dairy-free milks (like almond or rice milk) contain too much water and will alter the boiling timeline. Use a high-fat, full-bodied alternative like Oat Milk (Barista Blend) or full-fat canned Coconut Milk. The extra fat mimics the lipid profile of whole dairy milk, ensuring a smooth, stable sugar syrup.
Keto & Low-Sugar Adaptations
Swapping out standard sucrose (white sugar) is the most difficult modification, because artificial sweeteners do not caramelize or crystallize in the same physical manner as sugar.
- The Sweetener: Do not use Stevia or Monk Fruit alone; they lack the physical bulk to create the candy syrup. You must use an Allulose or Erythritol/Monkfruit blend (like Swerve).
- The Crystallization Warning: Erythritol has a strong tendency to recrystallize intensely when cold, creating an aggressively “icy” or minty cooling sensation on the palate. To mitigate this, boil the mixture for slightly less time (only 45 seconds), and consider adding 1 tablespoon of heavy cream to the peanut butter phase to increase the fat inhibitors and keep the final cookie softer.
Advanced Storage & Make-Ahead Strategies
Because No-Bake Cookies rely on a crystalline sugar structure rather than a baked flour crumb, their staling process differs entirely from traditional cookies. Proper storage prevents them from drying out into chalky pucks or absorbing ambient humidity and turning into mush.
Countertop vs. Refrigerator Storage
- Room Temperature (Optimal for Texture): Once fully set, No-Bake Cookies should be stored in an airtight Tupperware container at room temperature, separated by layers of wax paper. They will maintain their perfect fudgy texture for up to 7 to 10 days.
- The Refrigerator Risk: Storing them in the fridge will technically extend their shelf life to 3 weeks, but the cold environment alters the fat structures in the butter and peanut butter, making the cookies dense, hard, and less flavorful. If you must refrigerate them, always let them sit at room temperature for 15 minutes before serving to soften the fats.
Long-Term Freezing Guidelines
No-Bake Cookies are the ultimate make-ahead asset because their low water content makes them incredibly freezer-friendly.
- The Freezing Process: Place the fully set cookies in a single layer on a baking sheet and freeze for 1 hour until rock solid. Then, transfer them to a heavy-duty, zip-top freezer bag, squeezing out as much air as possible. They will keep perfectly for up to 3 months.
- Thawing Protocol: Do not microwave them to thaw! The aggressive heat will melt the sugar matrix and turn them back into liquid. Simply remove the desired amount from the freezer and let them sit on the counter on a plate for 20-30 minutes. They will return exactly to their original texture.
Preventing “Chocolate Bloom”
If you store No-Bake Cookies in an environment with rapidly fluctuating temperatures (e.g., moving them in and out of the fridge daily), you may notice a dusty, white film forming on the surface. This is called Fat Bloom. It is the cocoa butter and peanut oils separating and rising to the surface. It is 100% safe to eat, but visually unappealing. Consistent temperature storage prevents this.
Conclusion: Conquering the Stovetop Confection
Mastering the No-Bake Cookie is a journey of precision, thermodynamic understanding, and respect for the chemistry of candy making. By demystifying the crucial “soft-ball stage” of sugar boiling, understanding the necessity of interfering fat agents, and respecting the hydration demands of quick oats, you have elevated your skills from a casual mixer to a confectionary architect. The days of staring in dismay at a pan of crumbly gravel or a tray of sticky puddles are officially over. You now possess the scientific framework to execute flawless, bakery-elite no-bake desserts on demand.
Are you ready to wield your candy thermometer and heavy-bottomed saucepan with confidence? I highly recommend starting with our signature Classic Chocolate Peanut Butter No-Bake Cookie to master the boiling phase, and sharing the glorious results with friends. Leave a comment below with your biggest stovetop triumph (or tragedy!), subscribe to our newsletter for weekly deep-dives into culinary science, and tag us on social media when you conquer the ultimate zero-oven cookie!
Comprehensive FAQs: Everything You Need to Know About No-Bake Cookies
1. Why did my No-Bake Cookies turn out dry, crumbly, and chalky?
This is the most common result of over-boiling. When the sugar, butter, and milk mixture boils for longer than 60-90 seconds, or exceeds 240°F, too much water evaporates from the syrup. Without sufficient water, the sugar concentration becomes too high, causing it to rapidly form massive, hard crystals as it cools, rather than a soft fudge. It can also happen if you add too many oats, which absorb all the available syrup binder.
2. Why won’t my No-Bake Cookies set?
They are still wet and gooey hours later. This is the exact opposite of the crumbly problem: under-boiling. If you do not let the mixture reach a full, rolling boil (where bubbles cannot be stirred down) for a full 60 seconds, not enough water evaporates. The syrup never reaches the crucial “soft-ball stage” (235°F), meaning the sugar concentration is too low to crystallize and firm up at room temperature. High ambient humidity in your kitchen can also contribute to this, as sugar actively absorbs moisture from the air.
3. Do I absolutely have to use Quick-Cooking Oats?
Can I use Old-Fashioned Rolled Oats? You should strictly use quick-cooking oats. Because this recipe uses no oven, the oats rely entirely on the residual heat of the hot sugar syrup to cook and gelatinize. Quick oats are cut smaller and rolled thinner, allowing the hot syrup to penetrate and soften them rapidly before the cookie sets. Thick, old-fashioned oats take too long to hydrate, resulting in a cookie that is tough, fibrous, and tastes of raw grain.
4. Can I use natural, stir-in-the-jar peanut butter instead of Jif or Skippy?
It is highly discouraged. Natural peanut butters contain only peanuts and salt, meaning the natural oils easily separate from the solids. When you add this to a boiling hot sugar syrup, the heat can cause the oils to completely separate, “breaking” your emulsion. This leaves you with cookies that sit in a puddle of grease. Commercial brands contain emulsifiers (like palm oil or hydrogenated oils) that keep the fat structurally stable under high heat.
5. What is a “Full Rolling Boil” and how do I identify it?
A full rolling boil is the stage where the liquid is erupting with large, rapid, violent bubbles across the entire surface of the saucepan, not just the edges. The key identifier is that you cannot stir it down. When you run your spatula through the center of the pot, the boil should immediately violently resume behind the spatula. Only start your 60-second timer when you reach this exact stage.
6. Do No-Bake Cookies need to be stored in the refrigerator?
No, they do not require refrigeration and actually maintain a better texture at room temperature. Storing them in an airtight container on the counter keeps the peanut butter and butter fats soft, resulting in a chewy, fudgy cookie. The refrigerator hardens these fats, making the cookies dense and stiff. They are perfectly food-safe on the counter for up to 10 days due to the high sugar and low moisture content acting as preservatives.
7. Can I make No-Bake Cookies without peanut butter?
Yes. The peanut butter acts as an “interfering agent” and a fat binder, but it can be replaced. You can substitute it 1:1 with almond butter, cashew butter, sunflower seed butter (for nut allergies), or even tahini. If you want a strictly chocolate-oat cookie without any nut butter, you must significantly alter the recipe to increase the butter and cocoa fat content to compensate for the lost peanut lipids, otherwise, the cookies will crystallize into hard candy.
8. Why do my cookies have a grainy, sandy texture when I eat them?
A grainy texture means the granulated sugar did not fully dissolve before the boiling phase began. If you rush the initial heating process, intact sugar crystals will remain in the syrup. These undissolved crystals act as “seeds,” causing the rest of the sugar to rapidly and poorly crystallize as it cools, resulting in a sandy mouthfeel. Always whisk the mixture over medium-low heat until completely smooth before cranking the heat to achieve the boil.
9. Can I use a microwave to make No-Bake Cookies instead of the stovetop?
While technically possible, it is incredibly difficult to control the precise water evaporation required in a microwave. Microwaves heat unevenly and can easily scorch the milk proteins in the center of the bowl while leaving the edges under-boiled. The stovetop, paired with a heavy-bottomed pan and a thermometer, provides the exact thermal control required to hit the 235°F soft-ball candy stage reliably.
10. Why is Dutch-processed cocoa powder recommended over natural cocoa powder?
Natural cocoa powder is quite acidic and can impart a sharp, slightly astringent flavor when it isn’t baked in an oven. Dutch-processed cocoa has been treated with an alkaline solution to neutralize its acidity. This results in a smoother, mellower, and deeply rich chocolate flavor that tastes far better in a raw, stovetop application. It also dissolves more easily into liquids without clumping.