
In a culinary landscape dominated by avant-garde flavor combinations and towering, over-the-top desserts, there is a profound, grounding comfort in returning to our roots. True baking heritage is defined by the reliable, deeply comforting treats our grandmothers used to make. If you are searching for the definitive masterclass on old fashioned cookie recipes, specifically focusing on the beloved titans of the cookie jar—oatmeal and peanut butter—you have arrived at the ultimate resource. Why do some oatmeal cookies turn out like dry hockey pucks while others are perfectly chewy? Why do some peanut butter cookies crumble into dust while others melt luxuriously on the palate?
This is the only guide you will ever need to master these nostalgic classics. We are moving beyond simple nostalgia and diving deep into the hard culinary science, hydration ratios, and ingredient chemistry that make these heritage recipes work. Whether you are aiming to recreate a cherished childhood memory or perfect a bakery-style staple for your modern repertoire, understanding the precise mechanics of oats, nut butters, and fat structures will elevate your baking from average to extraordinary.
What You Will Learn in This Guide:
- The exact scientific differences between rolled, quick, and steel-cut oats, and how they alter dough hydration.
- The molecular breakdown of commercial versus natural peanut butter and its impact on cookie spread and texture.
- Advanced techniques for preventing crumbly, dry doughs commonly associated with nut-butter baking.
- The essential science of the Maillard reaction as it pertains to peanut proteins and caramelized sugars.
- A comprehensive, master troubleshooting matrix for diagnosing and fixing any oatmeal or peanut butter cookie disaster.
- Expert-level storage and freezing protocols to maintain ultimate freshness and chewiness.
- Direct links to our specialized cluster recipes to help you build out your perfect heritage cookie tin.
The Science & Fundamentals of Old Fashioned Cookies
Baking is fundamentally applied chemistry. When dealing with hearty ingredients like oats and dense fats like peanut butter, the rules of standard drop cookies (like chocolate chip) change dramatically. To master these old fashioned cookie recipes, we must dissect the molecular behavior of our primary star ingredients.
The Science of Oat Hydration and Beta-Glucans
Unlike refined wheat flour, oats are a whole grain packed with complex carbohydrates, specifically beta-glucans (a type of soluble fiber) and high levels of starch. When oats are introduced to the wet ingredients in your dough (eggs, butter, water content from sugars), they act as powerful sponges.
- The Hydration Curve: Oats take significantly longer to hydrate than standard all-purpose flour. If you bake an oatmeal cookie dough immediately after mixing, the oats remain hard and draw moisture away from the crumb after baking, resulting in a dry, crumbly cookie.
- The Rest Period: Allowing oat-based dough to rest (or “age”) in the refrigerator for a minimum of 2 hours—ideally 24 hours—allows the beta-glucans to fully absorb the ambient moisture. This gelatinizes the starches slightly, resulting in a thicker, significantly chewier, and more cohesive cookie structure.
Peanut Butter Chemistry: Fat, Protein, and Emulsification
Peanut butter is not just a flavor addition; it is a structural component that replaces a portion of the butter or shortening in a recipe. However, its composition presents unique challenges.
- Protein Interference: Peanuts contain exceptionally high levels of protein. In a cookie dough, these peanut proteins compete with the wheat proteins (gluten) for moisture. Furthermore, the high fat content in peanut butter coats the flour particles, physically inhibiting gluten development. This is why a well-made peanut butter cookie is incredibly tender, “short,” and practically melts in your mouth. Overworking the dough is less of a risk here than in bread or sugar cookies, but dryness is a constant threat.
- Emulsifiers vs. Natural Separation: Commercial peanut butters (like Jif or Skippy) are homogenized and treated with hydrogenated vegetable oils to prevent the peanut oil from separating from the peanut solids. This creates a highly stable, predictable baking ingredient. “Natural” peanut butters (containing only peanuts and salt) are prone to separation and contain pure, liquid peanut oil. Using natural peanut butter drastically alters the hydration and fat-melting points of the dough, often causing the cookies to spread into thin, greasy puddles unless the recipe is specifically formulated with extra binders.
Sugar Ratios and Hygroscopy in Heritage Baking
The hallmark of an old-fashioned oatmeal cookie is its deep, rich, slightly caramelized chewiness. This is achieved through the precise manipulation of sugar types.
- The Power of Molasses: Brown sugar is essentially refined white sucrose with molasses reintroduced. Molasses is highly hygroscopic, meaning it aggressively attracts and holds onto water molecules from the surrounding environment. An oatmeal cookie relies heavily on a high ratio of dark brown sugar not just for its robust, toffee-like flavor, but to ensure the oats do not dry out the final bake.
- White Sugar for Structure: Conversely, peanut butter cookies often utilize a 1:1 ratio of white granulated sugar to brown sugar. The white sugar undergoes crystallization as the cookie cools, providing the necessary structural “snap” and crinkly edges that balance the dense, fatty interior of the peanut butter.
The Maillard Reaction and Baking Soda
Both oatmeal and peanut butter cookies benefit profoundly from the Maillard reaction—the chemical reaction between amino acids and reducing sugars that gives browned food its distinctive flavor. Peanut butter is naturally slightly acidic. To achieve proper browning and a tender lift, recipes often rely on a higher ratio of baking soda (sodium bicarbonate), which is highly alkaline. The baking soda neutralizes the acid in the peanuts and brown sugar, raising the pH of the dough, which in turn accelerates the Maillard browning process in the oven.
Essential Equipment & Ingredients
To execute these heritage recipes with professional consistency, precision in both your tools and your ingredient selection is non-negotiable.
The Non-Negotiable Tools
- High-Precision Digital Kitchen Scale: The single most important tool in any bakery. Measuring oats or peanut butter by volume (using cups) is wildly inaccurate. A tightly packed cup of oats versus a loosely scooped cup can vary by up to 40 grams. Peanut butter is notoriously difficult to measure accurately in measuring cups, leaving behind valuable grams of fat. Weighing your ingredients guarantees exact hydration ratios every single time.
- Heavy-Gauge, Light-Colored Aluminum Baking Sheets: Old fashioned cookies require even, sustained heat. Dark, non-stick baking pans absorb too much radiant heat and will scorch the bottoms of your cookies (especially sugar-dense oatmeal cookies) long before the centers are properly baked. Thick aluminum ensures gentle heat distribution.
- Sturdy Stand Mixer with Paddle Attachment: Creaming cold, dense peanut butter with butter and sugars requires significant mechanical torque. A stand mixer effortlessly creates the microscopic air pockets needed for proper leavening, which a hand whisk simply cannot achieve.
- Heavy-Duty Wire Cooling Racks: Because oatmeal cookies retain so much heat and moisture, leaving them to cool on the hot baking pan will cause them to overbake and dry out. Immediate transfer to a wire rack allows air to circulate underneath, stopping the baking process and preserving the chewy texture.
Decoding Ingredient Quality
- The Oat Hierarchy:
- Rolled Oats (Old Fashioned Oats): The gold standard for cookies. Whole oat groats are steamed and rolled flat. They provide the perfect textural chew and visual appeal without becoming mushy.
- Quick Oats: Rolled oats that have been chopped into smaller pieces. They hydrate much faster and yield a more uniform, softer, almost cake-like cookie. They can be used interchangeably with rolled oats by weight, but the texture will suffer.
- Steel-Cut Oats: Never use these in standard cookie recipes. They are unrolled, chopped groats that require extensive boiling to soften. They will break your teeth if baked directly into a cookie.
- Selecting the Right Peanut Butter: Unless a recipe explicitly calls for natural, stir-to-combine peanut butter, always default to commercial, homogenized brands (like standard Skippy or Jif). The hydrogenated oils in commercial brands act as shortening, providing structural stability that prevents the cookie from flattening excessively in the oven.
- Vanilla Extract vs. Artificial Essence: In recipes heavily reliant on robust flavors like roasted peanuts and earthy oats, cheap artificial vanilla essence will introduce a harsh, chemical undertone. Always use pure vanilla extract; its complex flavor profile acts as a bridge, harmonizing the fat and sugar notes perfectly.
The Recipe Cluster Highlights
To truly master the old fashioned cookie category, one must understand its most iconic variations. Below are the definitive, master-level recipes we have developed for our heritage collection.
Chewy Old-Fashioned Oatmeal Raisin Cookies
The undisputed king of the cookie jar. This recipe is meticulously engineered to banish dry, cakey oatmeal cookies forever. By utilizing a high percentage of dark brown sugar, an extra egg yolk for fat and emulsification, and a mandatory 2-hour hydration rest for the rolled oats, these cookies emerge from the oven with deeply caramelized, crispy edges and a thick, bendable, incredibly chewy center. The raisins are plumped in hot water (or dark rum) before being folded in, ensuring bursts of juicy sweetness in every single bite. [Link to Full Recipe: Ultimate Chewy Oatmeal Raisin Cookies]
Classic Peanut Butter Blossoms
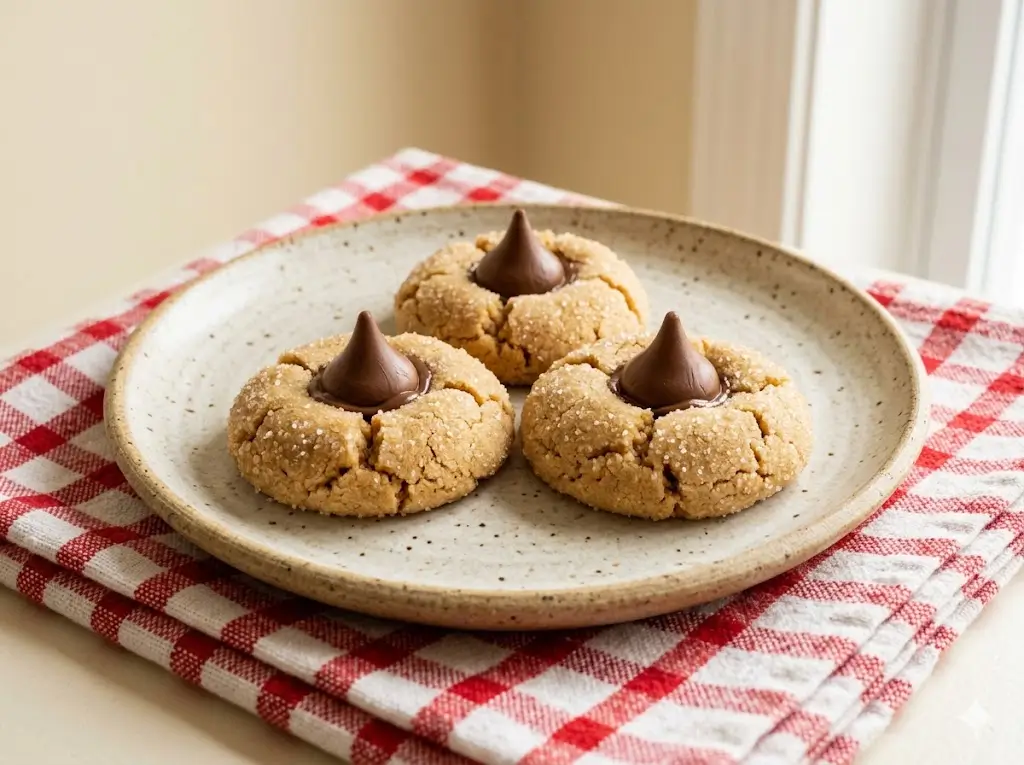
A mid-century masterpiece that relies on the perfect ratio of salty, savory peanut butter dough to sweet, milk chocolate. The dough is formulated to be slightly sturdier than a standard drop cookie, allowing it to hold its spherical shape when rolled in granulated sugar. Baked just until the edges crack, the cookies are immediately crowned with a chocolate kiss right out of the oven. The residual heat from the cookie gently melts the bottom of the chocolate, fusing them together into an iconic holiday and everyday staple. [Link to Full Recipe: Classic Peanut Butter Blossoms]
Bakery-Style Oatmeal Chocolate Chunk
For those who fundamentally reject the inclusion of raisins in baked goods, this is your sanctuary. We swap the dried fruit for massive, hand-chopped pools of 60% bittersweet couverture chocolate. To balance the intense sweetness of the chocolate, this dough features a slightly elevated salt content and a splash of pure vanilla bean paste. The oats provide a hearty, rustic architecture that holds up perfectly to the heavy pockets of molten chocolate, making this a favorite in high-end bakeries. [Link to Full Recipe: Bakery-Style Oatmeal Chocolate Chunk]
The 3-Ingredient Peanut Butter Miracle
Baking science stripped down to its absolute bare essentials. This gluten-free, dairy-free marvel requires only 1 cup of peanut butter, 1 cup of sugar, and 1 large egg. How does it work? The peanut butter provides the necessary fat and structure; the sugar acts as the tenderizer and creates the caramelized crust; and the egg acts as the sole binder and leavening agent (via the expansion of water vapor in the egg white). It mixes in one bowl in 60 seconds and yields an impossibly tender, intensely peanut-flavored cookie that practically dissolves on the tongue. [Link to Full Recipe: 3-Ingredient Peanut Butter Cookies]
Step-by-Step Master Techniques
Executing an old fashioned recipe requires an appreciation for technique. Proper ingredient handling is the difference between a mediocre bake and a sublime one.
1. The Perfect Emulsion (Creaming Method)
Because peanut butter is incredibly dense, achieving a proper emulsion with your butter and sugar is critical for leavening.
- Temperature Control: Both your butter and your peanut butter should be at ambient room temperature (approximately 68°F/20°C). If the butter is too cold, it won’t aerate; if it is too warm, the emulsion will collapse into a greasy puddle.
- The Process: In your stand mixer, combine the butter, peanut butter, and sugars. Beat on medium-high speed for a full 3 to 4 minutes. You must physically shear the fat to create microscopic air pockets. The mixture should transform from a dense, dark paste into a light, fluffy, pale aerated cloud. This is your primary source of mechanical leavening.
2. Plumping the Mix-Ins (Oatmeal Cookies)
Never add dry, hard raisins or dried cranberries directly to your oatmeal cookie dough. They act as desiccants, pulling moisture out of the surrounding dough as they bake, resulting in a drier cookie.
- The Plump: Submerge your measured raisins in very hot water (or warm bourbon/apple cider) for 15 minutes. Drain them thoroughly and pat them completely dry with a paper towel before folding them into the dough. This ensures they remain juicy and prevents them from stealing precious hydration from the flour and oats.
3. The Iconic Criss-Cross Pattern (Peanut Butter Cookies)
The fork marks on a peanut butter cookie are not just for aesthetic nostalgia; they are structurally necessary.
- The Science: Peanut butter cookie dough is inherently dense and heavy, lacking the moisture content of standard drop cookies. If baked in a thick ball, the edges will burn before the heat can penetrate the dense center.
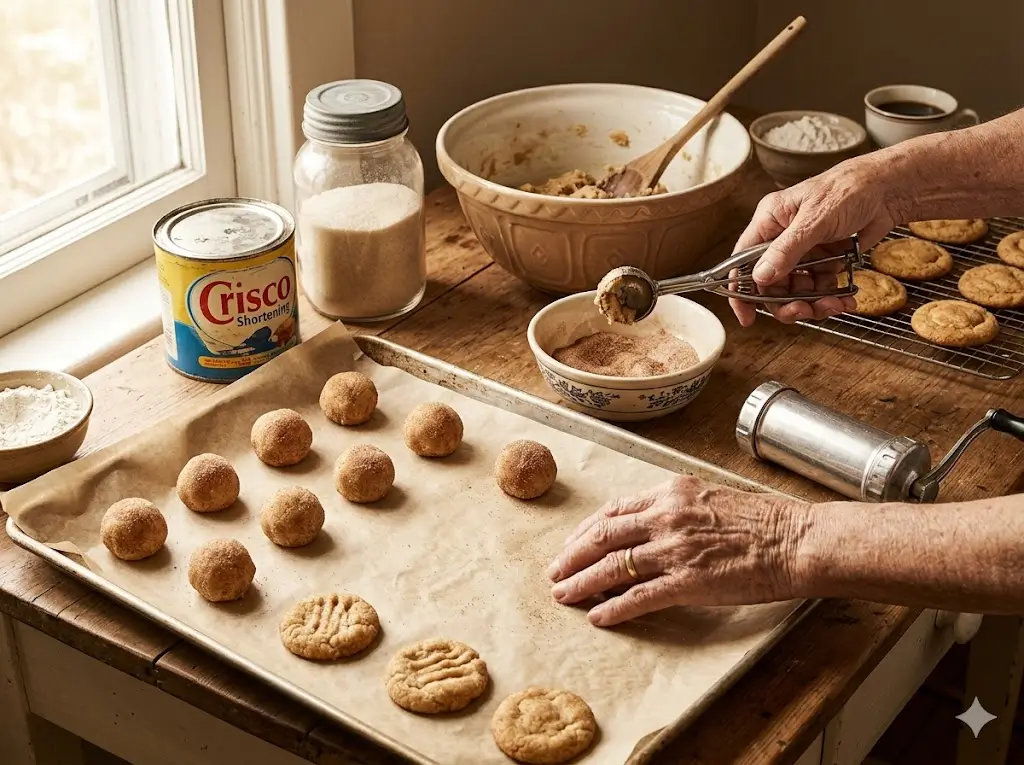
- The Technique: By pressing the dough down with the tines of a fork (dipped in granulated sugar to prevent sticking), you are physically flattening the dough to an even thickness, ensuring uniform heat distribution and a perfect, even bake. The ridges also create extra surface area, maximizing the crispy, caramelized Maillard browning on the top of the cookie.
4. The Essential Hydration Rest
As discussed in the science section, oat-based doughs must rest.
- The Rule: Once your oatmeal dough is mixed, cover the bowl tightly with plastic wrap directly touching the surface of the dough. Refrigerate for a minimum of 2 hours, or up to 48 hours. When you scoop the cold dough, you will immediately notice it is firmer, less sticky, and deeply aromatic. This simple step is the ultimate pro-baker secret to bakery-thick, chewy cookies that do not spread out like pancakes.
The Ultimate Troubleshooting Guide
Even heritage recipes can fall victim to modern kitchen mishaps. Use this comprehensive diagnostic matrix to solve the most common old fashioned cookie disasters.
| The Symptom | The Scientific Cause | The Expert Fix |
|---|---|---|
| Peanut butter cookies are extremely crumbly and fall apart. | Dough lacks sufficient hydration, or was overbaked. Peanut proteins inhibited gluten formation too much. | Ensure you are using commercial (homogenized) peanut butter, not natural/separated. Measure flour with a digital scale. Reduce bake time by 2 minutes. |
| Oatmeal cookies spread into thin, lacey flat puddles. | The dough was baked immediately without chilling, or the butter was partially melted during the creaming stage. | Implement a mandatory 2-hour chilling phase in the refrigerator before baking. Ensure butter is exactly 68°F (20°C) before mixing. |
| Oatmeal cookies are hard and dry like hockey pucks. | Too much flour was added (scooping instead of weighing), or you used quick oats instead of rolled oats, absorbing too much moisture. | Weigh all dry ingredients. Swap quick oats for rolled old-fashioned oats. Plump raisins in hot water before adding them to the dough to retain dough moisture. |
| Peanut butter cookies are greasy and spread too much. | Natural, oil-separated peanut butter was used in a recipe designed for commercial homogenized peanut butter. | Always default to commercial brands (Jif/Skippy). If you must use natural, thoroughly stir the oil back in and chill the dough for at least 4 hours to firm the fats. |
| Cookies baked unevenly (burnt edges, raw centers). | The dough balls were not flattened (for PB cookies), or dark non-stick pans were used. | Press PB cookies with a fork to 1/2-inch thickness. Use heavy, light-colored aluminum baking sheets. Verify your oven temperature with an independent thermometer. |
| Lack of flavor/blandness. | Insufficient salt to balance the sugars, or cheap artificial vanilla was used. | Old fashioned cookies require slightly more salt to contrast the heavy fats and oats. Increase kosher salt by 1/4 tsp and use only high-quality pure vanilla extract. |
| Chocolate Kisses fall off the Peanut Butter Blossoms. | The kisses were added too late, or the cookies were moved before the chocolate could cool and fuse to the dough. | Press the kisses into the cookies immediately upon removing them from the oven while the dough is molten. Let them sit completely undisturbed for 2 hours until the chocolate resets. |
Dietary Adaptations & Substitutions
Old fashioned baking is rooted in resourcefulness. Adapting these recipes for modern dietary restrictions requires careful structural manipulation.
Mastering Gluten-Free Oatmeal Cookies
Oats are naturally gluten-free, but they are highly susceptible to cross-contamination in processing facilities.
- Certified Oats: You must use certified gluten-free rolled oats.
- The Flour Swap: Replace the all-purpose flour with a high-quality 1-to-1 gluten-free baking flour blend that contains xanthan gum. Because GF flours lack structural integrity, the binding power of the oats becomes even more critical. You must allow GF oatmeal dough to rest in the fridge for a full 24 hours. GF starches take significantly longer to hydrate than wheat flour; skipping the rest period will result in an unpleasantly gritty, sandy texture.
Dairy-Free and Vegan Adaptations
- Replacing the Butter: In peanut butter cookies, half the fat is already plant-based. You can easily substitute the dairy butter with a high-quality, high-fat vegan block butter (such as Miyoko’s or Earth Balance sticks). Do not use tub margarine, as the water content is too high.
- Replacing the Eggs: Oatmeal and peanut butter are heavy, dense ingredients. A “flax egg” is the absolute best vegan binder for these specific recipes because its earthy, nutty flavor profile complements the oats and peanuts perfectly. Whisk 1 tablespoon of finely ground flaxseed meal with 3 tablespoons of warm water. Let it sit for 10 minutes until it forms a thick, gelatinous gel, then add it during the creaming stage.
Keto & Low-Carb Peanut Butter
Peanut butter is naturally relatively low-carb, making it an excellent base for keto baking.
- The Substitution: Use the “3-Ingredient” recipe framework. Swap the standard granulated sugar for a 1-to-1 granulated erythritol/monk fruit blend. Ensure you use an all-natural peanut butter (no added sugars). Keep in mind that erythritol does not melt and caramelize exactly like sucrose, so the cookies will not brown as deeply and will have a slightly more crystalline, fragile texture.
Advanced Storage & Make-Ahead Strategies
The tragedy of a great old fashioned cookie is staleness. Proper storage and freezing protocols preserve the hydration and chewiness you worked so hard to build.
The Ultimate Method: Freezing Unbaked Dough
The secret to bakery-fresh cookies on demand is freezing the dough, not the baked product.
- Portioning: Scoop your oatmeal dough into balls, or roll and press your peanut butter cookies with the fork criss-cross.
- Flash Freezing: Place the portioned dough on a parchment-lined baking sheet, close together but not touching. Freeze uncovered for 2 to 3 hours until rock solid.
- Long-Term Storage: Transfer the frozen dough pucks into a heavy-duty, zip-top freezer bag. Squeeze out as much ambient air as possible to prevent freezer burn. Shelf Life: Up to 3 months.
- Baking from Frozen: Do not thaw the dough! Place the frozen pucks directly onto your baking sheet. Lower your oven temperature by 15°F (to prevent the edges from burning while the frozen center melts) and add 2 to 4 minutes to your total baking time.
Maximizing Room Temperature Storage
Once baked, oatmeal and peanut butter cookies should be stored at room temperature in an airtight container.
- The Moisture Lock: Place a small slice of plain white sandwich bread or a halved apple into the container with the cookies. Both oats and brown sugar are highly hygroscopic; they will draw the moisture out of the bread/apple, keeping the cookies incredibly soft and chewy for up to 7 days, while the bread turns rock hard.
- Never Refrigerate: Never store baked cookies in the refrigerator. The cold, dry air of a refrigerator drastically accelerates starch retrogradation (crystallization), turning your chewy cookies hard and stale in a matter of hours.
Resurrecting Stale Cookies
If your cookies have been left out and become hard, you can reverse the starch crystallization using targeted steam. Wrap the stale cookie in a very lightly damp paper towel and microwave it on medium power for 8 to 12 seconds. The steam will permeate the crumb, re-gelatinizing the starches and rendering the cookie warm, pliable, and soft as if it just emerged from the oven.
Conclusion
Mastering old fashioned cookie recipes is a deeply rewarding culinary pursuit that bridges the gap between nostalgic comfort and precise baking science. By respecting the unique hydration requirements of rolled oats, understanding the complex fat and protein structures of peanut butter, and executing flawless creaming and resting techniques, you can banish dry, crumbly cookies from your kitchen forever. These aren’t just recipes; they are heritage techniques engineered for perfection.
Now it is time to tie on your apron and put this knowledge into practice. We invite you to explore our highly specialized cluster recipes linked above to begin your journey. Did you try the hydration rest for your oatmeal cookies? Did you attempt the 3-ingredient peanut butter miracle? Share your baking triumphs with us in the comments below, post your photos, and be sure to subscribe to our newsletter for more deep dives into the science of classic baking!
Comprehensive FAQs about Old Fashioned Cookies
1. Why do my peanut butter cookies always fall apart and crumble?
Crumbly peanut butter cookies usually lack sufficient binding agents or hydration. Peanut protein absorbs moisture rapidly, and the high fat content coats the flour, preventing gluten from forming to hold the cookie together. Ensure you are measuring flour by weight (not cups), don’t overbake them (they should look slightly raw in the center when pulled from the oven), and use a commercial peanut butter rather than a natural, separated oil variety.
2. Can I use quick oats instead of old-fashioned rolled oats?
You can, but the texture will change significantly. Quick oats are cut smaller and thinner, meaning they absorb liquid much faster. Substituting quick oats will result in a more uniform, softer, cake-like cookie. If you desire the classic, hearty, chewy texture with visible oat flakes, you must use old-fashioned rolled oats.
3. Why do recipes tell me to press peanut butter cookies with a fork?
Peanut butter dough is incredibly dense and lacks the hydration of a standard chocolate chip cookie. If baked as a round ball, the outside will burn long before the dense center cooks through. Pressing them with a fork flattens them to an even thickness for uniform baking, while the ridges create extra surface area for delicious, crispy Maillard browning.
4. My oatmeal cookies always spread into thin, flat puddles. What went wrong?
Spread is the enemy of a thick, chewy oatmeal cookie. This happens when the butter is too warm during the creaming stage, or when the dough is baked immediately after mixing. Oats require time to hydrate and absorb the liquids in the dough. You must chill the dough in the refrigerator for at least 2 hours (ideally overnight) to firm up the butter and allow the oats to soak up the moisture, which halts excessive spreading.
5. Should I use light brown or dark brown sugar for these recipes?
For old fashioned recipes, dark brown sugar is almost always superior. Dark brown sugar contains a higher percentage of molasses. This extra molasses provides a deeper, richer, toffee-like flavor profile that pairs beautifully with hearty oats and roasted peanuts. More importantly, the extra moisture from the molasses helps keep the cookies chewy for days.
6. Do I need to soak my raisins before adding them to oatmeal cookies?
Yes, highly recommended. Dry raisins act like little sponges in the oven, drawing moisture out of the cookie dough and making the final bake drier. Soaking them in hot water or warm apple cider for 15 minutes, then drying them thoroughly before folding them into the dough, ensures they stay plump and juicy without compromising the dough’s hydration.
7. Can I use natural (oil-on-top) peanut butter instead of commercial brands?
It is risky unless the recipe is explicitly designed for it. Natural peanut butter lacks the emulsifiers and hydrogenated oils found in commercial brands (like Jif or Skippy) that give the dough structural stability. Using natural peanut butter often results in cookies that are overly greasy, spread too much, and have a sandy texture. If you must use it, make sure the oil is completely and thoroughly mixed back into the solids, and chill the dough well.
8. How do I keep my cookies soft for more than a couple of days?
The key is moisture retention. Store baked cookies in an airtight container at room temperature, and place a small piece of plain white sandwich bread inside the container. The sugars and oats in the cookies are hygroscopic; they will steal the moisture from the bread, remaining incredibly soft and fresh while the bread turns hard.
9. Are oatmeal cookies considered healthier than regular cookies?
While they contain whole-grain rolled oats which provide dietary fiber (beta-glucans) and some trace minerals, standard oatmeal cookie recipes still rely heavily on butter and high amounts of sugar. They are a delicious treat, but the sugar and fat content means they should still be enjoyed in moderation rather than considered a health food.
10. Can I freeze peanut butter blossom cookies with the chocolate kiss on top?
Yes, but you must do it carefully to avoid “chocolate bloom” (the white, chalky streaks that appear on chocolate when exposed to temperature fluctuations). Ensure the cookie and the chocolate kiss are completely cooled and set at room temperature. Place them in a single layer in an airtight container, wrap the container in plastic wrap, and freeze. When thawing, let the container sit at room temperature for several hours before opening it to prevent condensation from forming on the chocolate.