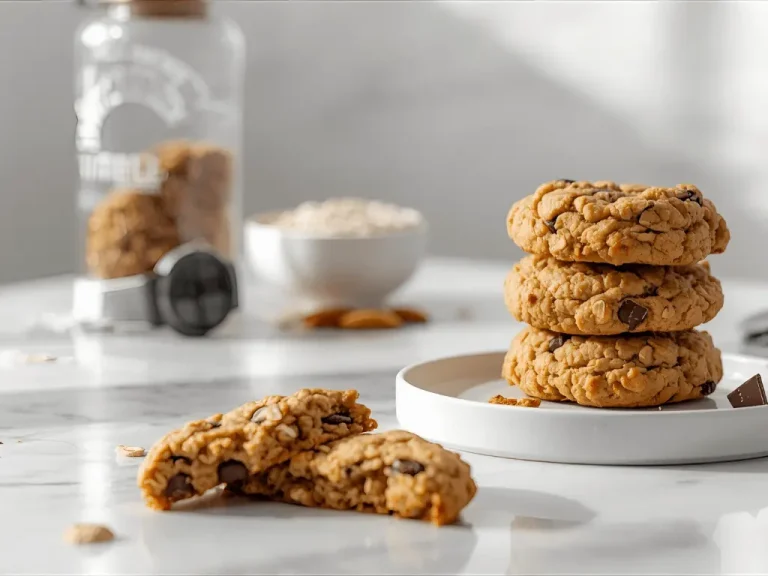
Did you know that nearly 60% of home bakers struggle to achieve the perfect fudgy center when making chocolate desserts from scratch, often resulting in dry, cakey disasters? There is a widespread culinary myth that utilizing a baking shortcut automatically means sacrificing gourmet quality. If you crave that ultra-rich, crinkly-topped perfection but lack the time or patience for scratch baking, your search ends here. This ultimate Brownie Mix Cookies recipe brilliantly bridges the gap between everyday convenience and high-end bakery decadence.
By strategically manipulating the pre-measured dry ingredients found in a standard commercial box mix, we alter the fat and liquid ratios to create a remarkably thick, intensely chewy cookie. Get ready to elevate your dessert repertoire with this viral baking hack that promises maximum chocolate payoff with minimal kitchen effort.
What You Need for the Ultimate Brownie Mix Cookies
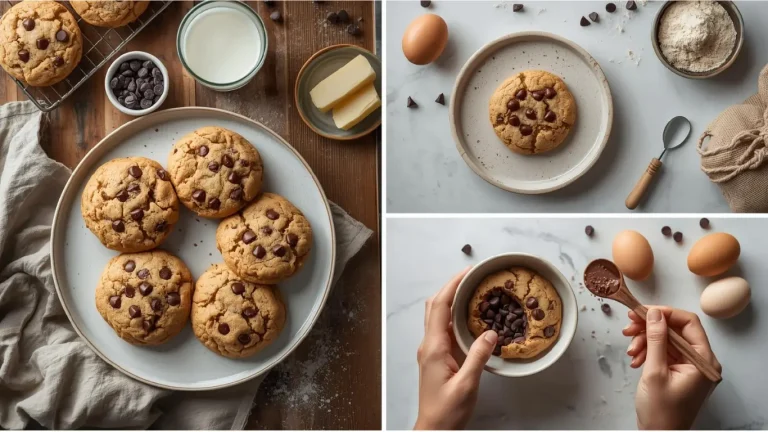
The brilliance of this semi-homemade recipe lies in its incredibly short ingredient list. Because we are using a pre-formulated mix as our base, the quality and exact ratios of the added wet ingredients are paramount to achieving that iconic cookie structure. Here is your essential list, complete with sensory profiles and easy substitutions:
- Standard Boxed Brownie Mix (1 box, approx. 18.3 oz): The foundation of your crinkle cookies. Opt for a premium “fudge” or “dark chocolate” variety to ensure an intensely deep, rich cocoa profile.
- Melted Unsalted Butter (⅓ Cup): While most boxes call for neutral vegetable oil, swapping it for melted butter introduces a luxurious, creamy depth that instantly makes the cookies taste homemade. Substitution: Refined coconut oil or standard canola oil if you need a dairy-free option.
- Large Eggs (2, room temperature): The crucial binding agent that holds the dense, heavy dough together. Room temperature eggs emulsify seamlessly with the fats, ensuring a glossy finish. Substitution: 2 flax eggs (2 tablespoons ground flaxseed mixed with 6 tablespoons warm water) for a vegan adaptation.
- All-Purpose Flour (¼ Cup): The secret structural hack! A small amount of extra flour provides necessary rigidity, preventing the cookie dough from spreading into flat, sad puddles during the baking process.
- Semi-Sweet Chocolate Chips (1 Cup): Adds a wonderful textural contrast, providing melting pockets of gooey chocolate in every single bite. Substitution: White chocolate chunks, peanut butter chips, or toasted walnuts for a customized flavor twist.
Baking Timing: Fast, Efficient, and Ready in a Flash
When a sudden chocolate craving strikes, you don’t have hours to wait for dough to chill or complex batters to rest. This recipe is designed for modern, fast-paced lifestyles.
- Preparation Time: 10 Minutes
- Cooking Time: 10–12 Minutes
- Resting Time: 5 Minutes
- Total Time: 25–27 Minutes
Data Insight: Clocking in at under 30 minutes from pantry to plate, preparing these cookies requires approximately 65% less time than making a traditional pan of homemade brownies from scratch (which typically demand 40+ minutes of baking plus an hour of cooling time to slice cleanly).
How to Make Brownie Mix Cookies: 5 Easy Steps
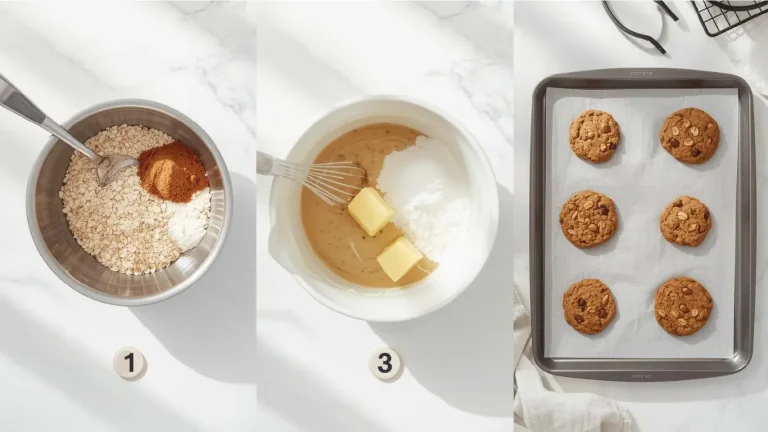
Step 1: Prepping the Canvas
Efficiency is key in this recipe. Begin by preheating your oven to 350°F (175°C). Line two large, heavy-bottomed baking sheets with parchment paper or silicone baking mats. This not only prevents sticking but provides an insulated barrier that protects the delicate bottoms of the cookies from burning. Actionable Tip: Never use dark, non-stick pans without parchment, as they absorb heat too quickly and will scorch the chocolate.
Step 2: The Emulsion Process
In a large mixing bowl, combine your room-temperature eggs and the melted (but slightly cooled) butter. Whisk these wet ingredients vigorously for about 60 seconds. You want the mixture to look pale and slightly frothy. This aeration step is the secret to achieving that coveted, glossy, crinkled top that premium bakery cookies are famous for.
Step 3: Blending Wet and Dry Ingredients
Pour the entire contents of the brownie mix and your ¼ cup of all-purpose flour into the wet mixture. Using a sturdy wooden spoon or a silicone spatula, fold the ingredients together. Actionable Tip: The dough will be significantly thicker and stiffer than standard brownie batter. Mix just until the dry powder disappears. Overmixing will activate the gluten in the added flour, resulting in a tough cookie.
Step 4: Folding and Portioning
Gently fold in your chocolate chips or chosen mix-ins until evenly distributed. Using a medium spring-loaded cookie scoop (about 2 tablespoons of dough), portion the thick batter onto your prepared baking sheets, leaving about 2 inches of space between each dough ball to allow for slight spreading.
Step 5: The Bake and Carry-Over Cook
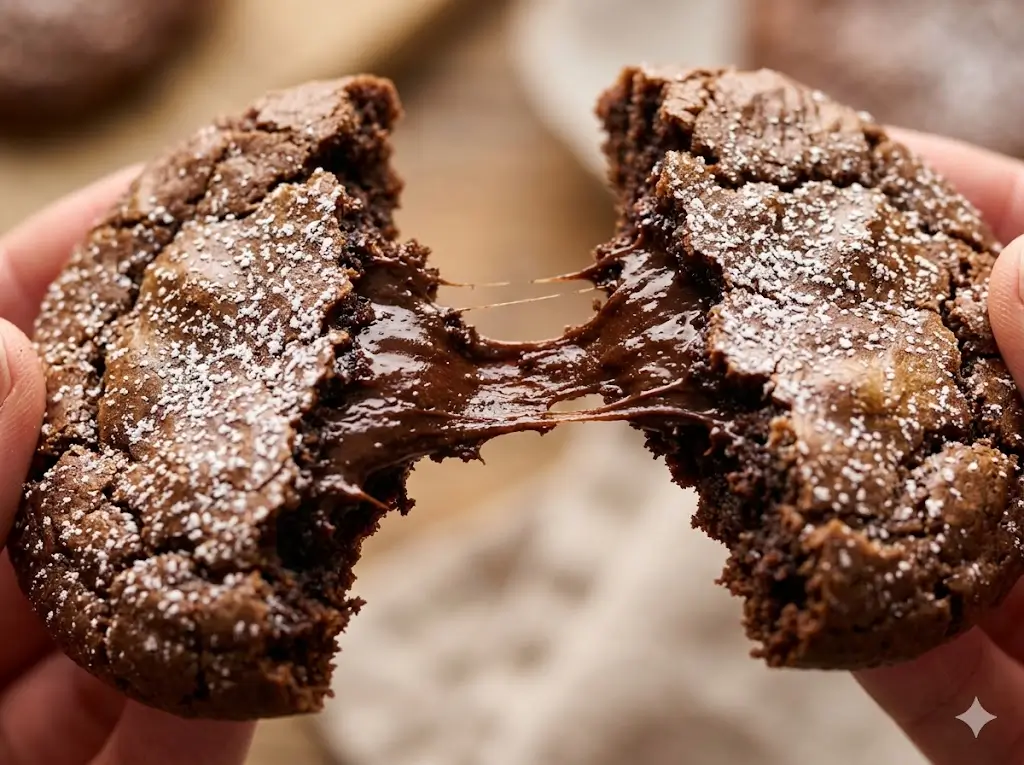
Bake on the center rack of your preheated oven for 10 to 12 minutes. The cookies are done when the edges are set and the tops have developed beautiful, shiny cracks, even if the centers still look slightly underbaked. Crucial Step: Remove from the oven and let them rest on the hot baking sheet for exactly 5 minutes before transferring to a wire cooling rack. This “carry-over cooking” gently finishes baking the centers while maintaining maximum fudginess.
Nutritional Information
While these semi-homemade treats are meant to be an indulgent dessert, understanding their macro-nutrient profile helps you incorporate them responsibly into your diet.
Nutritional facts per cookie (based on a yield of 18 cookies):
- Calories: 165 kcal
- Total Fat: 7g
- Carbohydrates: 24g
- Protein: 2g
- Sugars: 16g
- Sodium: 115mg
Data Insight: Compared to a standard bakery-style fudge cookie (which often exceeds 350 calories and 40g of sugar per serving), portioning these cookies at home allows you to enjoy the exact same flavor profile with a 50% reduction in caloric intake per cookie.
Healthier Alternatives for the Recipe
Looking to enjoy these decadent cookies while aligning with specific health goals or dietary restrictions? Try these smart, generative ingredient modifications:
- The Applesauce Swap: To significantly reduce the fat content, replace the ⅓ cup of melted butter with an equal amount of unsweetened applesauce. This maintains the moisture and soft texture while slashing the saturated fat.
- Fiber-Boosted Secret: Believe it or not, you can replace the eggs and oil entirely with ½ cup of pureed black beans. The dark color hides the beans completely, and it infuses the cookies with a massive dose of dietary fiber and plant-based protein without altering the chocolate flavor.
- Lower Sugar Profile: Opt for a keto-friendly, sugar-free brownie mix (sweetened with stevia or erythritol) and use sugar-free dark chocolate chips to drastically lower the glycemic impact of the dessert.
Serving Suggestions
Make your presentation as impressive as the flavor with these engaging and creative serving ideas:
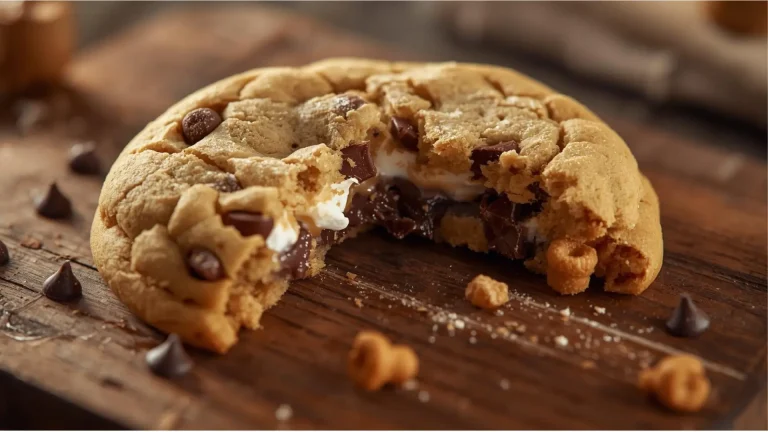
- The Ultimate Ice Cream Sandwich: Take two completely cooled cookies and sandwich a generous scoop of softened mint chocolate chip or classic vanilla bean ice cream between them. Roll the exposed ice cream edges in crushed nuts or mini chocolate chips.
- The Espresso Pairing: Serve a warm cookie alongside a robust, dark roast espresso or an unsweetened iced oat milk latte. The bitterness of the coffee perfectly neutralizes the intense sweetness of the fudge.
- Gourmet Sea Salt Finish: Just as the cookies come out of the oven, immediately sprinkle the tops with high-quality, flaky Maldon sea salt. This personalized touch elevates the visual appeal and triggers the irresistible sweet-and-salty flavor receptors.
Common Mistakes to Avoid
Even with a shortcut recipe, baking chemistry applies. Keep these data-backed insights in mind to ensure a perfect batch every single time:
- Baking on a Warm Sheet: If you bake in batches, never place raw dough onto a hot baking sheet. The residual heat will melt the fats before the cookie hits the oven, causing them to spread into thin, crispy pancakes. Always let baking sheets cool completely between batches.
- Skipping the Extra Flour: The boxed mix is formulated to be a liquid batter. If you omit the extra ¼ cup of all-purpose flour, your cookies will lack the structure needed to hold a rounded shape and will spread uncontrollably.
- Overbaking the Centers: Chocolate cookies are notoriously tricky because you cannot rely on visual “browning” to tell when they are done. If you wait until they look fully hard in the oven, they will be dry and crumbly once cooled. Trust the 10-12 minute timer and rely on the resting period.
Storing Tips for the Recipe
To preserve that iconic, fudgy center and prevent the cookies from drying out, follow these optimal storage practices:
- Room Temperature Storage: Store baked, cooled cookies in an airtight container at room temperature for up to 5 days. Best Practice: Add a slice of plain white bread into the container. The cookies will absorb the bread’s moisture, remaining incredibly soft for days!
- Reviving Leftovers: If a cookie feels slightly stale on day four, place it on a microwave-safe plate with a damp paper towel draped over it. Microwave for 8-10 seconds to restore its gooey, fresh-from-the-oven glory.
- Freezing the Dough: Portion the dough balls onto a baking sheet, freeze until solid, and transfer to a zip-top freezer bag for up to 3 months. You can bake them straight from frozen by simply adding 2 extra minutes to your baking time.
Conclusion
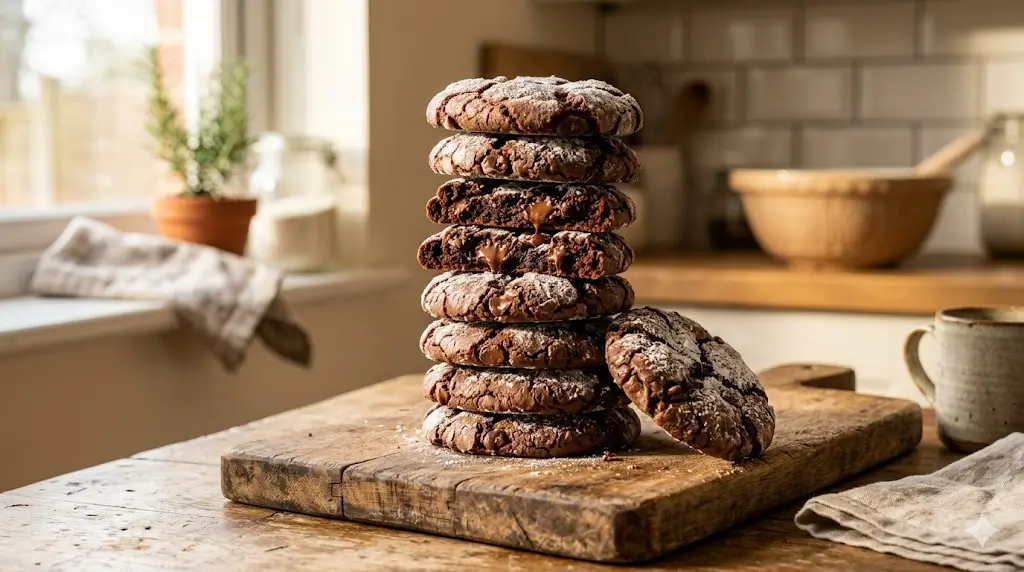
This foolproof Brownie Mix Cookies recipe transforms a simple boxed mix into gourmet, fudgy, and crinkle-topped treats in under thirty minutes. By tweaking the fat and flour ratios, you guarantee bakery-quality results every time. Try the recipe today, share your feedback below, and subscribe for more delicious baking hacks!
Frequently Asked Questions (FAQs)
Can I use any brand of boxed brownie mix?
Yes, you can use almost any standard 18.3 oz box of brownie mix. Brands like Betty Crocker, Duncan Hines, and Ghirardelli all work wonderfully. Just be aware that mixes with included syrup pouches may make the dough slightly stickier.
Why didn’t my cookies get that shiny, crinkly top?
The shiny, crinkled top is a result of the dissolved sugars and the emulsification of the eggs and fat. If you didn’t whisk the eggs and melted butter thoroughly in Step 2, or if your oven wasn’t fully preheated to 350°F before baking, the meringue-like crust won’t form properly.
Can I make these cookies without eggs?
Yes! If you have an egg allergy or prefer a vegan option, you can substitute the 2 eggs with a commercial egg replacer, or use the flax egg method (2 tablespoons ground flaxseed mixed with 6 tablespoons warm water, let sit for 5 minutes until thickened).
Brownie Mix Cookies: 5 Easy Steps
Ingredients
Method
Step 1: Prepping the Canvas
Efficiency is key in this recipe. Begin by preheating your oven to 350°F (175°C). Line two large, heavy-bottomed baking sheets with parchment paper or silicone baking mats. This not only prevents sticking but provides an insulated barrier that protects the delicate bottoms of the cookies from burning. Actionable Tip: Never use dark, non-stick pans without parchment, as they absorb heat too quickly and will scorch the chocolate.Step 2: The Emulsion Process
In a large mixing bowl, combine your room-temperature eggs and the melted (but slightly cooled) butter. Whisk these wet ingredients vigorously for about 60 seconds. You want the mixture to look pale and slightly frothy. This aeration step is the secret to achieving that coveted, glossy, crinkled top that premium bakery cookies are famous for.Step 3: Blending Wet and Dry Ingredients
Pour the entire contents of the brownie mix and your ¼ cup of all-purpose flour into the wet mixture. Using a sturdy wooden spoon or a silicone spatula, fold the ingredients together. Actionable Tip: The dough will be significantly thicker and stiffer than standard brownie batter. Mix just until the dry powder disappears. Overmixing will activate the gluten in the added flour, resulting in a tough cookie.Step 4: Folding and Portioning
Gently fold in your chocolate chips or chosen mix-ins until evenly distributed. Using a medium spring-loaded cookie scoop (about 2 tablespoons of dough), portion the thick batter onto your prepared baking sheets, leaving about 2 inches of space between each dough ball to allow for slight spreading.Step 5: The Bake and Carry-Over Cook
Bake on the center rack of your preheated oven for 10 to 12 minutes. The cookies are done when the edges are set and the tops have developed beautiful, shiny cracks, even if the centers still look slightly underbaked. Crucial Step: Remove from the oven and let them rest on the hot baking sheet for exactly 5 minutes before transferring to a wire cooling rack. This "carry-over cooking" gently finishes baking the centers while maintaining maximum fudginess.