Go Back
Baptism Cookies: How to Make Them in 4 Steps

Baptism Cookies: How to Make Them in 4 Steps

Need last-minute baptism cookies? Bake them in 4 stress-free steps today. Learn
Prep Time 15 minutes
Cook Time 15 minutes
Total Time 28 minutes
Servings: 4 people
Course: Appetizer, Dessert
Cuisine: American
Calories: 140

Ingredients
  

  • 2 ½ cups all-purpose flour
  • ½ teaspoon baking powder
  • ¼ teaspoon salt
  • 1 cup unsalted butter, softened
  • 1 cup granulated sugar
  • 1 large egg2 teaspoons vanilla extract
  • 2 cups powdered sugar (for icing
  • 2-3 tablespoons milk (for icing)
  • Food coloring (white or pastel, optional
  • Decorative sprinkles or edible pearls

Method
 

  1. Step 1: Whisk and Mix the Perfect No-Spread Dough

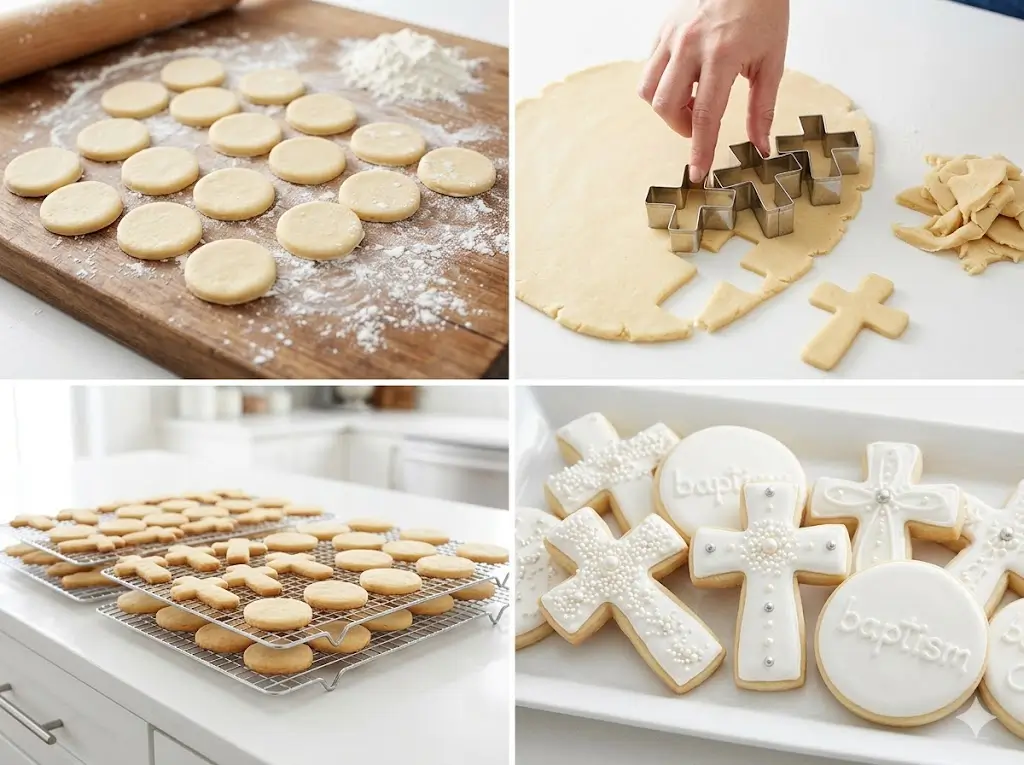
    Start by creaming the unsalted butter and granulated sugar in a stand mixer on medium speed for about 2 minutes. You want it light and fluffy, but avoid over-mixing, which introduces too much air and causes spreading later. Scrape down the sides of the bowl. Add the egg, vanilla extract, and almond extract, mixing until just combined. In a separate bowl, whisk together the all-purpose flour, baking powder, and salt. Gradually add the dry ingredients to the wet ingredients on low speed, stopping as soon as the dough pulls away from the sides of the bowl.
  2. Step 2: Roll, Chill, and Cut the Christening Shapes

    Divide the dough into two equal halves. Place one half on a sheet of parchment paper, top with another sheet, and roll it out to exactly 1/4-inch thickness. Repeat with the other half. Slide the rolled dough (still between the parchment) onto a baking sheet and chill in the refrigerator for at least 1 hour. Chilling is the ultimate secret to preventing spread. Once firm, peel off the top layer of parchment and use your favorite baptism cookie cutters—such as a cross, dove, angel, or onesie—to stamp out your shapes.
  3. Step 3: Bake to Golden Perfection

    Preheat your oven to 350°F (175°C). Transfer the cut-out cookies to a parchment-lined baking sheet, leaving an inch of space between each. Bake for 10 to 12 minutes. You will know they are ready when the centers are set and the edges just begin to show a faint golden hue. Let the cookies cool on the baking sheet for 5 minutes before transferring them to a wire cooling rack. Pro Tip: They must be 100% cooled before you even think about icing them!
  4. Step 4: Decorate with Flawless Royal Icing

    While the cookies cool, beat the powdered sugar, meringue powder, and warm water on high speed for 5 minutes until stiff peaks form. Divide the royal icing into smaller bowls to mix your desired gel colors (soft pastels like baby blue, blush pink, or elegant gold work beautifully). Thin the icing with a few drops of water until it reaches a "15-second consistency" (meaning if you draw a line through the icing, it takes 15 seconds to smooth out). Transfer to piping bags, outline your cookies, and then flood the centers. Use a toothpick to pop any air bubbles. Let them dry uncovered for 12 to 24 hours.