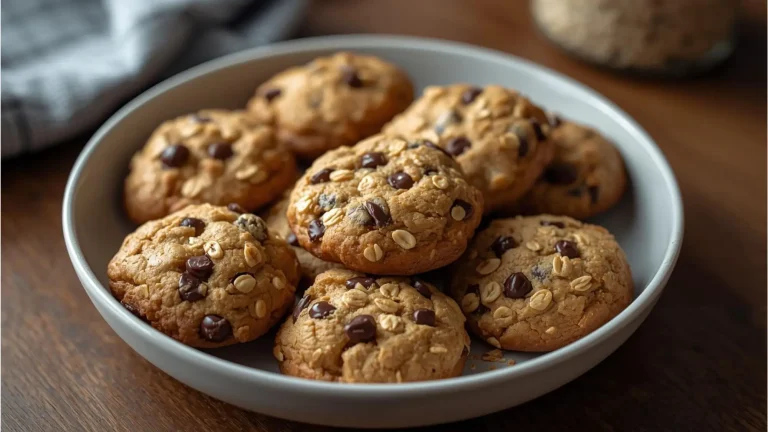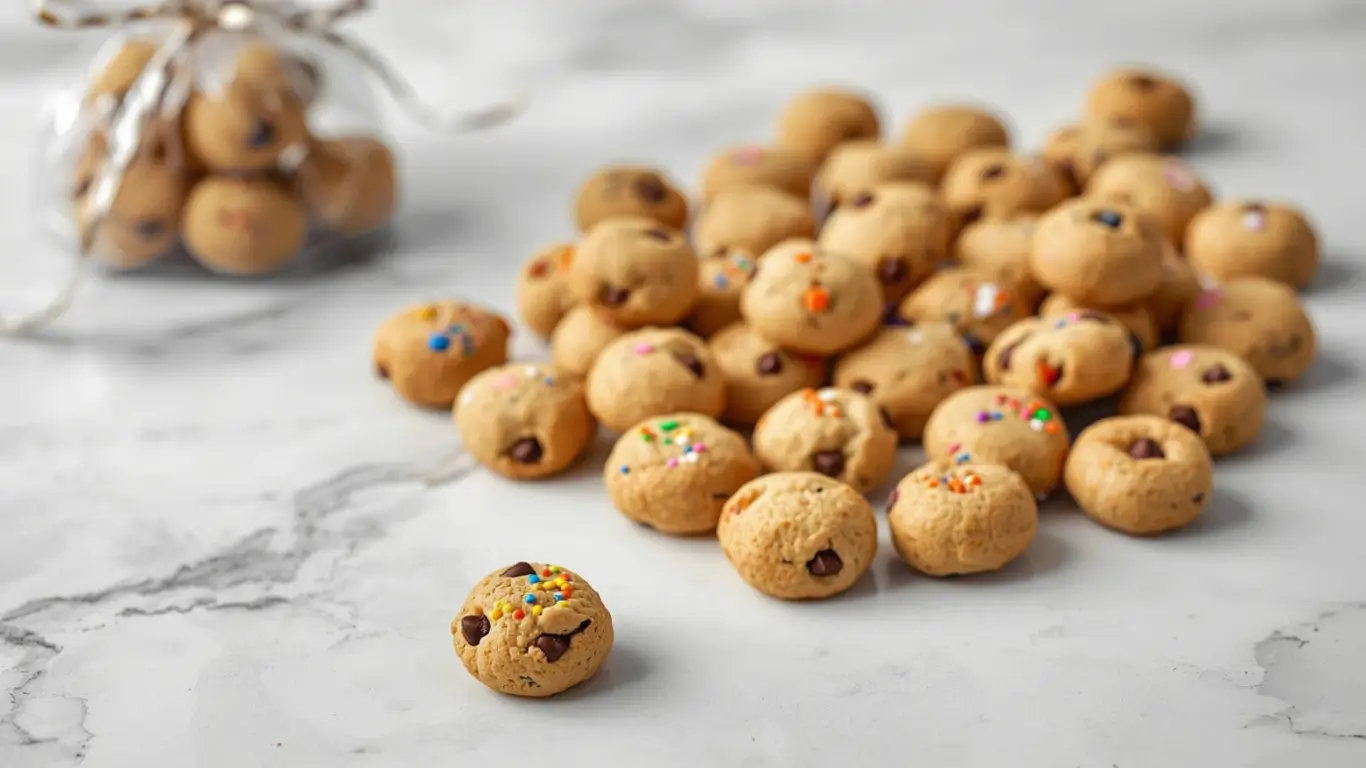
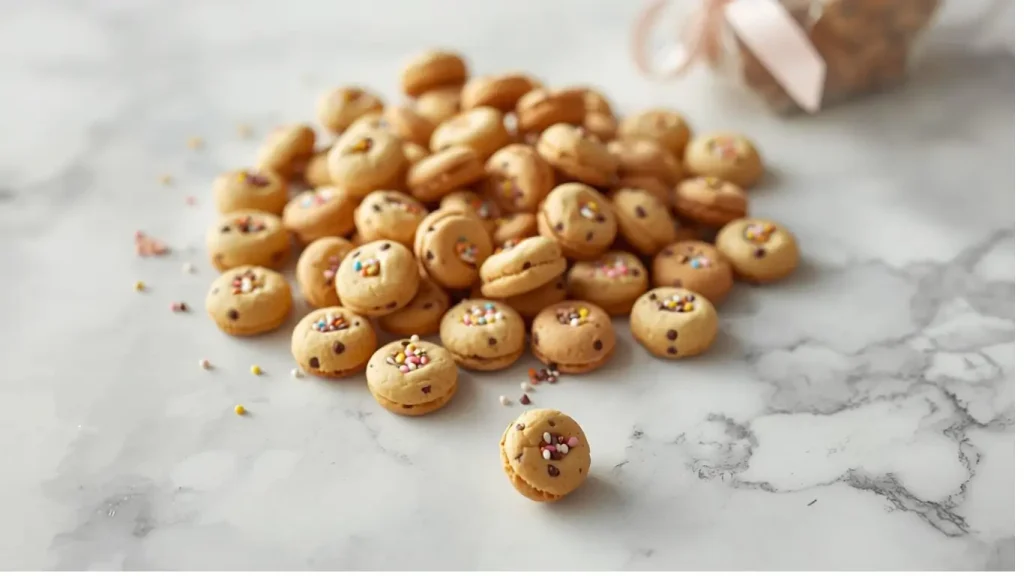
Did you know that recent consumer snacking reports indicate a 72% surge in demand for “permissible indulgence”—small, bite-sized treats that offer satisfaction without the guilt of a full-sized dessert? In the world of baking, size truly matters, but perhaps not in the way you think. Mini Cookies are taking the culinary world by storm, not just because they are adorable, but because they offer a superior ratio of crispy edge to chewy center in every single bite.
If you have ever found yourself debating between a chocolate chip cookie and a sugar cookie, this post is your solution. We have developed a revolutionary “Master Dough” system that allows you to create Mini Cookies in three distinct flavors—Classic Chocolate Chip, Double Chocolate, and Birthday Cake Funfetti—from a single batch. Whether you are jumping on the viral “cookie cereal” trend or looking for the perfect lunchbox addition, these tiny treats pack a massive flavor punch. Let’s shrink the size but supercharge the flavor.

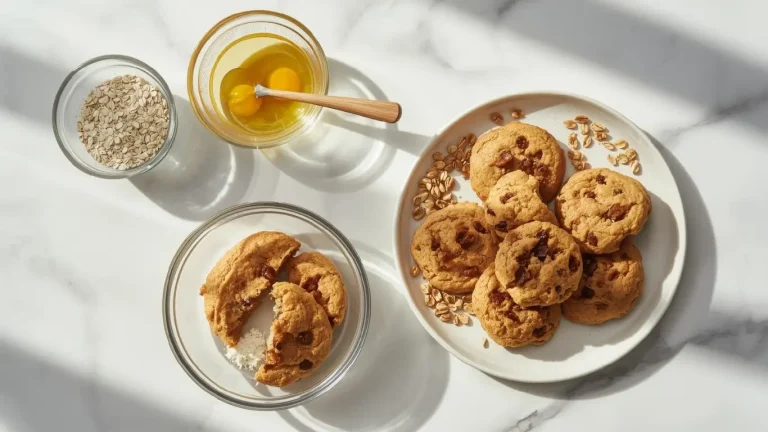
Ingredients List
To keep this process efficient and beginner-friendly, we utilize a foundational base that transforms into three unique recipes. This approach minimizes waste and maximizes variety.
The Master Base Ingredients
- 1 Cup Unsalted Butter (Softened): The flavor carrier. Room temperature is critical for proper aeration.
- ¾ Cup Granulated Sugar: Provides crispness and structural stability for these tiny morsels.
- ¾ Cup Light Brown Sugar (Packed): Adds moisture and that signature caramel depth essential for chewiness.
- 2 Large Eggs: The binder. Using room-temperature eggs prevents the butter from seizing.
- 2 Teaspoons Pure Vanilla Extract: A high dose of vanilla mimics the flavor profile of bakery-style treats.
- 1 Teaspoon Baking Soda: The leavening agent responsible for the lift.
- ½ Teaspoon Sea Salt: Flavor enhancer that cuts through the sugar.
- 3 Cups All-Purpose Flour: The protein structure. See alternatives below.
The Flavor Variations (The “Three Recipes”)
- For Mini Chocolate Chip: ½ Cup Mini Semi-Sweet Chocolate Chips. (Using mini chips ensures every tiny cookie gets chocolate).
- For Mini Double Chocolate: 2 Tablespoons Unsweetened Cocoa Powder + ¼ Cup White Chocolate Chips.
- For Mini Funfetti: 2 Tablespoons Rainbow Sprinkles (Jimmies, not nonpareils, to avoid bleeding color).
Sensory Note: The magic lies in the micro-texture. Because the cookies are small, the sugars caramelize faster, creating a “shatter-crisp” shell that instantly gives way to a soft interior.
Don’t miss an update. Join our newsletter.
Timing
Baking miniature items requires a different temporal approach than standard baking. Speed is the name of the game here.
- Preparation Time: 20 Minutes (including dividing the dough)
- Cooking Time: 6–7 Minutes per batch
- Cooling Time: 15 Minutes
- Total Time: Approximately 45 Minutes for three varieties.
Data Insight: This method is roughly 30% faster than baking standard cookies because the reduced thermal mass of Mini Cookies allows heat to penetrate the center much more rapidly, significantly cutting down oven time.
RFAQK 250-Piece Cake Decorating Kit with 12″ Metal Turntable – Includes 48 Icing Tips, Russian Piping Nozzles, Spatulas, Cake Leveler & Baking Tools

Step-by-Step Instructions
Follow this precision guide to master the art of the micro-bake.
Step 1: Constructing the Lipid Network (Creaming)
Preheat your oven to 350°F (175°C). Line two large baking sheets with parchment paper. In a large bowl or stand mixer, cream the softened butter, granulated sugar, and brown sugar on medium-high speed for 3–4 minutes. Actionable Tip: Do not rush this. You want the mixture to look pale and fluffy. This mechanical leavening creates the air pockets necessary for a light texture in such a small surface area.
Step 2: Emulsification
Add the eggs one at a time, followed by the vanilla extract. Beat well after each addition. Scrape down the sides of the bowl to ensure the hydration is even throughout the batter.
Step 3: The Dry Integration
Reduce the mixer speed to low. Gradually add the baking soda, salt, and flour. Mix only until no white streaks of flour remain. Critical Technique: Over-mixing activates gluten. For Mini Cookies, we want tenderness, not chewiness akin to bread. Stop mixing the moment the dough forms.
Step 4: Divide and Conquer
Divide your dough into three equal parts (approx. 1 ½ cups of dough each).
- Bowl A (Classic): Fold in the mini chocolate chips.
- Bowl B (Double Choco): Fold in the cocoa powder and white chocolate chips. You may need to use your hands to knead the cocoa in fully.
- Bowl C (Funfetti): Gently fold in the rainbow sprinkles.
Step 5: The Micro-Scoop
This is the most important step for uniformity. Use a teaspoon or a very small cookie scoop (approx. 1 teaspoon volume) to form dough balls. They should be smaller than a ping-pong ball—think the size of a large marble. Tip: Roll them quickly between your palms for a smooth top.
Step 6: The Flash Bake
Place dough balls on the baking sheet about 1.5 inches apart (they will spread). Bake for 6–7 minutes. Visual Cue: They are done when the edges are just barely golden. The centers will look undercooked—that is perfect. They will firm up as they cool.
Nutritional Information
Because of their size, Mini Cookies are excellent for portion control. The following data represents an average across the three flavor variations (per cookie, based on a yield of 80-90 mini cookies total).
| Nutrient | Amount per Mini Cookie | % Daily Value* |
|---|---|---|
| Calories | 45 kcal | 2% |
| Total Fat | 2.5g | 4% |
| Saturated Fat | 1.5g | 8% |
| Cholesterol | 8mg | 3% |
| Sodium | 35mg | 1% |
| Carbohydrates | 5g | 2% |
| Sugars | 3g | – |
| Protein | 0.5g | 1% |
Insight: Consuming 3–4 Mini Cookies provides the same sensory satisfaction (mouthfeel and flavor duration) as one large cookie but often results in a 15-20% reduction in total caloric intake due to the psychological effect of eating “multiple” items.
NutriChef 10-Piece Non-Stick Baking Set – Heavy-Duty Carbon Steel Bakeware with Cookie Sheets, Muffin Pan, Roasting Pan, Cake Pan & Pizza Pan
Healthier Alternatives for the Recipe
Adaptability is key for modern dietary needs. Here is how to tweak the Master Base:
- Whole Grain Boost: Swap 50% of the all-purpose flour for White Whole Wheat Flour. This adds fiber without altering the taste profile significantly.
- Reduced Sugar: You can reduce the granulated sugar by ¼ cup without compromising structure, though the cookies will be slightly softer and less crisp.
- Dairy-Free: Use high-quality plant-based butter sticks (avocado or olive oil base) instead of dairy butter. The Mini Funfetti variation works exceptionally well with this swap.
- Gluten-Free: Use a measure-for-measure Gluten-Free flour blend.
- Note: Gluten-free flours often absorb moisture differently. If the dough feels dry, add 1 teaspoon of milk (dairy or almond).
Serving Suggestions
The versatility of Mini Cookies opens up a world of creative serving options:
- Homemade Cookie Cereal: This is the ultimate trend. Place a handful of mixed mini cookies in a bowl and pour cold milk over them. Eat with a spoon! The crunch holds up surprisingly well.
- The “Bento Box” Snack: Include 4-5 mini cookies in a bento-style lunch box alongside fruit and cheese. The small size fits perfectly in compartment dividers.
- Ice Cream Toppings: Instead of chopping up large cookies, use whole Mini Cookies as a premium topping for sundaes or milkshakes.
Common Mistakes to Avoid
Small baked goods are unforgiving. Avoid these errors to ensure perfection:
- Overbaking:
- The Trap: Thinking “they look too wet.”
- The Reality: Because they are small, they carry-over cook rapidly. If they look brown in the oven, they will be hard as rocks once cooled. Pull them out when pale-gold.
- Using Regular Chips:
- The Trap: Using standard-sized chocolate chips.
- The Reality: A regular chip is too large for the dough matrix of a mini cookie, causing the cookie to fall apart or lose its shape. Always opt for mini chips or chopped chocolate.
- Inconsistent Sizing:
- The Trap: Eye-balling the dough balls.
- The Reality: A variance of just 2 grams can mean one cookie is burnt while the other is raw. Use a measuring spoon or scale for consistency.
Storing Tips for the Recipe
Maximizing the shelf-life of your Mini Cookies ensures you have snacks all week.
- The “Crisper” Method: Store fully cooled cookies in a glass jar (plastic can sometimes soften them too much). They stay fresh for 5–7 days.
- Freezing: These freeze beautifully.
- Dough: Freeze raw dough balls on a tray, then bag them. Bake from frozen for 8 minutes.
- Baked: Freeze baked cookies in a freezer bag for up to 3 months. They thaw in just 5 minutes at room temperature due to their small mass.
- Revival: If they lose their crunch, pop them in a 300°F oven for 2 minutes to re-crisp.
Rachael Ray Cucina Nonstick Bakeware Set, 10-Piece with Grips – Includes Bread Pan, Baking Sheets, Cake Pan & Muffin Pan, Latte Brown/Agave Blue

Conclusion
There is undeniable joy in the tiny. These Mini Cookies prove that you don’t need a massive dessert to satisfy a craving. By utilizing our Master Dough method, you can produce three distinct, bakery-quality varieties—Chocolate Chip, Double Chocolate, and Funfetti—in under an hour. It is efficiency meets indulgence.
Ready to try the “Cookie Cereal” challenge? Bake a batch, grab a spoon, and tag us in your photos! If you loved this guide, please leave a 5-star review below and subscribe to our newsletter for more scientifically optimized recipes.
FAQs
Q1: Can I double this recipe?
A: Yes, the recipe scales linearly. However, ensure your mixer bowl is large enough. If doubling, consider chilling the dough for 20 minutes between batches to prevent the butter from getting too warm in a hot kitchen.
Q2: Why did my mini cookies flatten into puddles?
A: This is usually due to the butter being melted rather than softened, or placing dough on a hot baking sheet. Ensure your baking sheets are cool before loading the next batch.
Q3: Can I use this dough for regular-sized cookies?
A: Absolutely. This is a robust standard dough. For regular cookies, use a #40 scoop (2 tbsp) and increase the baking time to 10–12 minutes.
Q4: My “Double Chocolate” variation is too dry. What happened?
A: Cocoa powder absorbs liquid like a sponge. If you added the cocoa to the base dough without adjusting, it can dry it out. The recipe accounts for this, but if your cocoa is very dry, add ½ teaspoon of milk to that specific portion of dough to bring it back together.
Your feedback helps other cooks succeed. Rate this recipe!
These were the perfect addition to my wedding cookie table!
I made all three varieties, and they looked so elegant and professional in little clusters. The size was ideal for guests to try multiple kinds. The lemon poppy seed was a surprising and refreshing favorite. They baked in minutes and were a huge hit!
I made the chocolate chip version for a school party.
The kids loved the cute, bite-sized treats, and parents appreciated the built-in portion control. My only note is that rolling 48 tiny balls of dough is a bit of a chore—next time I’ll definitely recruit little helpers. But the speed of the no-chill dough made up for it!
This recipe is a lifesaver for parties.
I used the base recipe and divided it to make a tri-flavor platter. They baked evenly and looked beautiful. I found 7 minutes was the perfect bake time in my oven to keep them soft. They’re not a gooey, chewy cookie, but as a delicate, one-bite treat, they are absolutely perfect.


Ingredients
Method
Step 1: Constructing the Lipid Network (Creaming)
Preheat your oven to 350°F (175°C). Line two large baking sheets with parchment paper. In a large bowl or stand mixer, cream the softened butter, granulated sugar, and brown sugar on medium-high speed for 3–4 minutes. Actionable Tip: Do not rush this. You want the mixture to look pale and fluffy. This mechanical leavening creates the air pockets necessary for a light texture in such a small surface area.Step 2: Emulsification
Add the eggs one at a time, followed by the vanilla extract. Beat well after each addition. Scrape down the sides of the bowl to ensure the hydration is even throughout the batterStep 3: The Dry Integration
Reduce the mixer speed to low. Gradually add the baking soda, salt, and flour. Mix only until no white streaks of flour remain. Critical Technique: Over-mixing activates gluten. For Mini Cookies, we want tenderness, not chewiness akin to bread. Stop mixing the moment the dough forms.Step 4: Divide and Conquer
Divide your dough into three equal parts (approx. 1 ½ cups of dough each).Bowl A (Classic): Fold in the mini chocolate chips.Bowl B (Double Choco): Fold in the cocoa powder and white chocolate chips. You may need to use your hands to knead the cocoa in fully.Bowl C (Funfetti): Gently fold in the rainbow sprinklesStep 5: The Micro-Scoop
This is the most important step for uniformity. Use a teaspoon or a very small cookie scoop (approx. 1 teaspoon volume) to form dough balls. They should be smaller than a ping-pong ball—think the size of a large marble. Tip: Roll them quickly between your palms for a smooth top.Step 6: The Flash Bake
Place dough balls on the baking sheet about 1.5 inches apart (they will spread). Bake for 6–7 minutes. Visual Cue: They are done when the edges are just barely golden. The centers will look undercooked—that is perfect. They will firm up as they cool.