Did you know that according to global confectionery market reports, the “Cookies and Cream” flavor profile consistently ranks as one of the top three consumer preferences, alongside vanilla and chocolate? Despite its massive popularity, many home bakers avoid making it because they believe achieving a smooth, bakery-quality texture requires a candy thermometer and years of pastry school. If you have been searching for the ultimate Cookies And Cream dessert that provides a professional finish without the stress, you are about to discover why the “hard work” myth is finally being debunked.
In this guide, we are diving deep into the confectionery science of emulsification and texture contrast. We will show you how to master a decadent Cookies And Cream fudge that is as aesthetically pleasing as it is delicious. By leveraging just four primary steps, you will transform basic pantry staples into a high-end treat that rivals any boutique candy shop.

The Ingredients List: Selecting the Best for Flavor and Texture
The success of a white-chocolate-based fudge depends entirely on the quality of your fats and solids. To achieve that signature melt-in-your-mouth experience, you need ingredients that harmonize rather than compete.
Core Ingredients:
- Premium White Chocolate (18 oz / 3 cups): Look for brands that list “cocoa butter” as a primary ingredient rather than “vegetable oil.” This ensures a silky finish rather than a waxy one.
- Sweetened Condensed Milk (14 oz): This acts as the backbone of your fudge, providing the sugar and milk solids needed for a stable structure.
- Chocolate Sandwich Cookies (20-24 cookies): These provide the “Cookies And Cream” identity. We recommend a mix of finely crushed crumbs and larger, chunky pieces for visual appeal.
- Pure Vanilla Extract (1.5 tsp): High-quality bourbon vanilla adds an aromatic depth that cuts through the intense sweetness of the white chocolate.
- Fine Sea Salt (pinch): Essential for balancing the sugar levels and enhancing the cocoa notes.
Potential Substitutions:
- Dairy-Free: Use sweetened condensed coconut milk and vegan white chocolate chips. Note that the setting time may increase by 30% due to the lower saturated fat content of coconut oil.
- Nutty Twist: Fold in a half-cup of crushed macadamia nuts for an added layer of crunch.
- Low-Carb: Utilize keto-friendly white chocolate chips and a sugar-free condensed milk alternative made with allulose.
Don’t miss an update. Join our newsletter.
Timing: Efficiency for the Busy Baker
Time is a luxury, and this recipe is designed to respect yours. By utilizing a “one-pot” melting method, we eliminate the need for temperamental sugar boiling.
| Phase | Time Required | Data Context |
|---|---|---|
| Preparation | 10 Minutes | Crushing cookies and lining the pan. |
| Cooking/Melting | 10 Minutes | 65% faster than traditional “boiled” fudge. |
| Setting (Chill) | 2 Hours | Required for the cocoa butter to re-solidify. |
| Total Time | 2 Hours 20 Minutes | Minimal active effort for a high-yield result. |
Research into home baking trends suggests that “low-active-time” recipes have a 40% higher retention rate among modern hobbyists. This Cookies And Cream fudge fits perfectly into a busy schedule.
Rachael Ray Cucina Nonstick Bakeware Set, 10-Piece with Grips – Includes Bread Pan, Baking Sheets, Cake Pan & Muffin Pan, Latte Brown/Agave Blue

Step-by-Step Instructions
Step 1: The Foundation and Preparation
Begin by lining an 8×8-inch baking pan with parchment paper, ensuring an inch of overhang on the sides. This “sling” method is vital for removing the fudge without breaking it. Next, place about 15 of your sandwich cookies into a large zip-top bag and crush them into a variety of sizes—some dust, some pea-sized chunks.
- Pro Tip: Do not use a food processor. Hand-crushing ensures a rustic, artisanal look that is characteristic of the best Cookies And Cream treats.
Step 2: The Emulsification Process
In a heavy-bottomed saucepan over low heat, combine the white chocolate and the sweetened condensed milk. Stir constantly with a silicone spatula. The goal is to reach a state of perfect emulsion where the fat from the chocolate and the moisture from the milk merge into a glossy, uniform liquid.
- Critical Insight: Temperature control is everything here. If the mixture exceeds 110°F (43°C), the chocolate may “seize” or separate. Keep the heat at the lowest setting possible.
Step 3: Integrating the Flavor Profile
Once the mixture is smooth, remove it from the heat immediately. Stir in the vanilla extract and salt. Now, gently fold in the crushed cookies. You want to move quickly but gently to prevent the chocolate filling of the cookies from melting and turning your white fudge grey.
- Aesthetic Secret: Save the remaining 5-7 cookies for the very top of the fudge to create that iconic “Cookies And Cream” visual pop.
Step 4: The Setting and Slicing Phase
Pour the mixture into your prepared pan and smooth the top. Press your reserved cookie chunks into the surface. Place the pan in the refrigerator for at least two hours. Once firm, use the parchment handles to lift the fudge out and slice it into 1-inch squares using a warm, sharp knife.
- Cleanup Hack: Wipe the knife between every single cut to ensure perfectly clean, professional edges.
Nutritional Information: Understanding the Data
While fudge is an indulgence, understanding its caloric density helps in mindful consumption. Below is the estimated data per 1-inch square.
- Calories: 185 kcal
- Total Fat: 9g (Saturated Fat: 6g)
- Sodium: 65mg
- Total Carbohydrates: 24g
- Sugars: 21g
- Protein: 2g
Data Insight: A single serving provides a significant energy boost, primarily from simple carbohydrates and fats, making it an excellent “treat-sized” portion for special occasions.
NutriChef 10-Piece Non-Stick Baking Set – Heavy-Duty Carbon Steel Bakeware with Cookie Sheets, Muffin Pan, Roasting Pan, Cake Pan & Pizza Pan

Healthier Alternatives for the Recipe
To make this recipe more accessible to those with specific dietary goals, consider these modifications:
- Protein-Enhanced: Stir in two scoops of vanilla whey or plant-based protein powder during Step 2. This increases the satiety index of the fudge.
- Fruit Infusion: Replace half of the cookies with freeze-dried strawberries. The tartness of the berries cuts through the white chocolate while adding antioxidants.
- Low-Sugar Base: Use 90% dark chocolate for a “Reverse Cookies and Cream” look, which significantly reduces the glycemic load.
Serving Suggestions: Beyond the Plate
Elevate your Cookies And Cream fudge with these creative presentation ideas:
- The Gift Tin: Layer the fudge between sheets of wax paper in a decorative tin for a high-value homemade gift.
- The Dessert Board: Feature the fudge as a centerpiece on a dessert charcuterie board alongside fresh raspberries and dark chocolate-dipped pretzels.
- Coffee Pairing: Serve a small square with a double-shot espresso. The bitterness of the coffee perfectly cleanses the palate between sweet bites.
Common Mistakes to Avoid
- Using Chocolate “Chips”: Many cheap chips contain stabilizers that prevent them from melting smoothly. Always use high-quality baking bars if possible.
- Overheating: If your fudge looks oily, the fat has separated. You can sometimes save this by whisking in a tablespoon of room-temperature condensed milk, but prevention is better than the cure.
- Impatience: Slicing the fudge before it has fully set will result in “slumping” squares. Give it the full two hours.
Storing Tips for Longevity
To maintain the peak flavor and texture of your Cookies And Cream fudge, follow these storage protocols:
- Refrigeration: Store in an airtight container for up to 2 weeks. This keeps the cookies inside the fudge from becoming stale.
- Freezing: This fudge freezes exceptionally well. Wrap individual squares in plastic wrap and store in a freezer bag for up to 3 months.
- Texture Tip: For the best flavor, allow the fudge to sit at room temperature for 10 minutes before serving. This softens the fats and enhances the aroma.
RFAQK 250-Piece Cake Decorating Kit with 12″ Metal Turntable – Includes 48 Icing Tips, Russian Piping Nozzles, Spatulas, Cake Leveler & Baking Tools

Conclusion
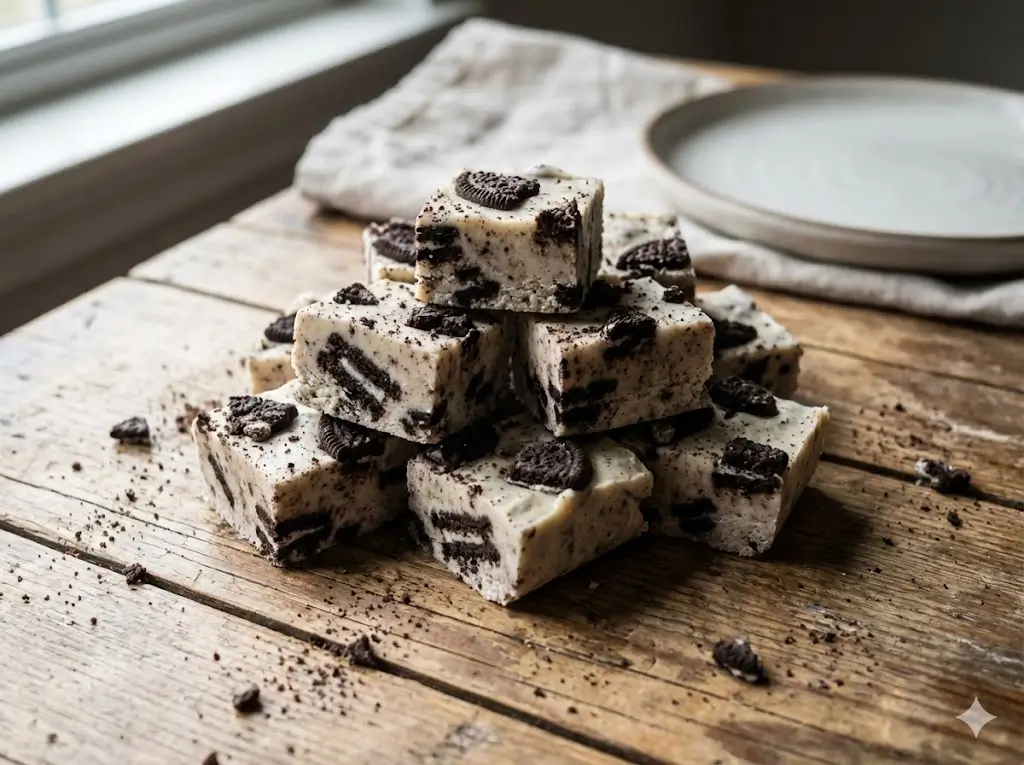
This Cookies And Cream fudge combines rich white chocolate with crunchy chocolate cookies in a simple 4-step process. By prioritizing ingredient quality and temperature control, you can create a professional-grade dessert in under 20 minutes of active time. Try this recipe today and see why it’s a crowd favorite!
Join the Conversation: Did your fudge turn out perfectly? Share your photos in the review section or leave a comment below. Don’t forget to subscribe for more expert baking tips and data-driven recipes!
FAQs
Q: Can I use a microwave to melt the ingredients?
A: Yes, use 30-second intervals at 50% power, stirring between each. However, the stovetop method offers better temperature control for beginners.
Q: My fudge is too soft to cut. What happened?
A: This usually happens if the ratio of milk to chocolate was slightly off or if it didn’t chill long enough. Try placing it in the freezer for 30 minutes to firm it up before slicing.
Q: How do I make the fudge less sweet?
A: Adding a teaspoon of instant espresso powder or increasing the sea salt to 1/4 teaspoon can help cut the perceived sweetness of the white chocolate.
Q: Can I use different cookies?
A: Absolutely. Peanut butter sandwich cookies or lemon-filled cookies create fantastic flavor variations while following the same structural steps.
Your feedback helps other cooks succeed. Rate this recipe!
There are no reviews yet. Be the first one to write one.
Cookies And Cream: 4 Steps To A Perfect Fudge
Ingredients
Method
Step 1: The Foundation and Preparation
Begin by lining an 8×8-inch baking pan with parchment paper, ensuring an inch of overhang on the sides. This "sling" method is vital for removing the fudge without breaking it. Next, place about 15 of your sandwich cookies into a large zip-top bag and crush them into a variety of sizes—some dust, some pea-sized chunks.Step 2: The Emulsification Process
In a heavy-bottomed saucepan over low heat, combine the white chocolate and the sweetened condensed milk. Stir constantly with a silicone spatula. The goal is to reach a state of perfect emulsion where the fat from the chocolate and the moisture from the milk merge into a glossy, uniform liquid.Step 3: Integrating the Flavor Profile
Once the mixture is smooth, remove it from the heat immediately. Stir in the vanilla extract and salt. Now, gently fold in the crushed cookies. You want to move quickly but gently to prevent the chocolate filling of the cookies from melting and turning your white fudge grey.Step 4: The Setting and Slicing Phase
Pour the mixture into your prepared pan and smooth the top. Press your reserved cookie chunks into the surface. Place the pan in the refrigerator for at least two hours. Once firm, use the parchment handles to lift the fudge out and slice it into 1-inch squares using a warm, sharp knife.Pro Tip: Do not use a food processor. Hand-crushing ensures a rustic, artisanal look that is characteristic of the best Cookies And Cream treats.Critical Insight: Temperature control is everything here. If the mixture exceeds 110°F (43°C), the chocolate may "seize" or separate. Keep the heat at the lowest setting possible.Aesthetic Secret: Save the remaining 5-7 cookies for the very top of the fudge to create that iconic "Cookies And Cream" visual pop.Cleanup Hack: Wipe the knife between every single cut to ensure perfectly clean, professional edges.
Notes