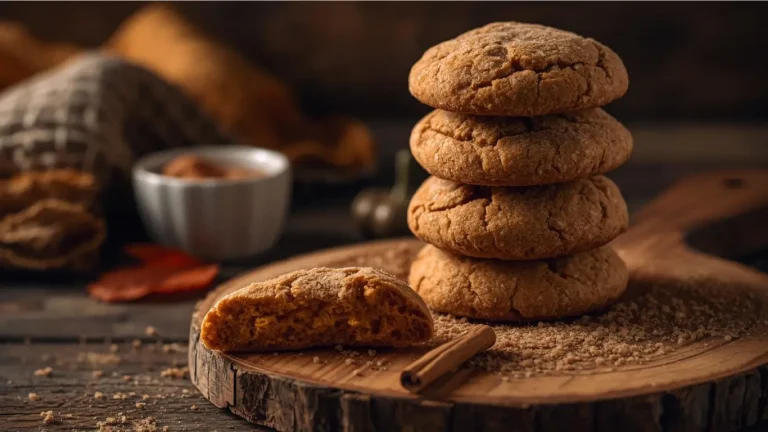
Did you know that according to recent health-tracking data, over 50% of consumers are actively trying to reduce their daily sugar intake, yet nearly 65% of those individuals report that “texture disappointment” is the primary reason they revert to traditional sweets? The belief that a cookie without sucrose must inevitably be dry, crumbly, or “cardboard-like” is a myth that has plagued the health-conscious baking community for years. If you’ve been searching for a way to enjoy Sugar Free Cookies that actually satisfy your cravings without spiking your blood glucose, you are in the right place.
In this comprehensive guide, we are dismantling the old-school approach to diabetic-friendly baking. By understanding the chemical role sugar plays in traditional recipes—beyond just sweetness—we can leverage modern alternatives and innovative techniques to create a perfect, soft-baked finish. Today, we reveal the four structural secrets that will transform your Sugar Free Cookies from a dietary compromise into a culinary masterpiece.

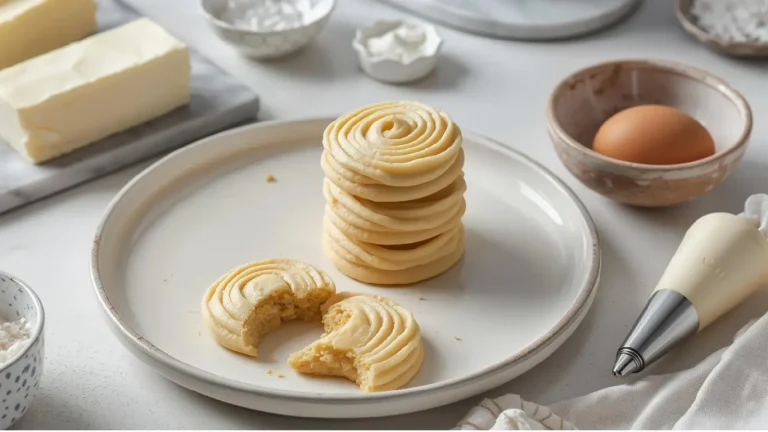
Ingredients List: The Architecture of a Sugar-Free Masterpiece
When baking without granulated sugar, you aren’t just losing sweetness; you’re losing volume and moisture. To compensate, we use high-density ingredients and advanced sweeteners that mimic the hygroscopic (moisture-attracting) properties of sucrose.
The Essential Base:
- Super-Fine Almond Flour (2 cups): Provides a buttery, nutty base and healthy fats.
- Coconut Flour (1/4 cup): Acts as a sponge to prevent the dough from becoming too oily.
- Unsalted Grass-Fed Butter (1/2 cup, softened): Higher fat content than standard butter ensures better crumb stability.
- Large Egg (1, room temperature): The primary binder.
- Pure Vanilla Bean Paste (1 tsp): Adds a rich, aromatic profile that masks any potential “cooling effect” from sweeteners.
- Fine Sea Salt (1/4 tsp): Critical for flavor enhancement.
Don’t miss an update. Join our newsletter.
The Sweetener Blend:
- Erythritol/Monk Fruit Blend (3/4 cup): We recommend a 1:1 “Golden” blend for a brown-sugar-like depth.
- Xanthan Gum (1/4 tsp): The “glue” that replaces the structural integrity typically provided by gluten and caramelized sugar.
Potential Substitutions:
- Dairy-Free: Substitute butter with refined coconut oil (solid state). Note that coconut oil has a lower melting point, so the cookies may spread more.
- Nut-Free: Replace almond flour with sunflower seed flour in a 1:1 ratio.
- Vegan Option: Use a “flax egg” (1 tbsp ground flax + 3 tbsp water) and ensure your sweetener is certified vegan.
Timing: Efficiency and Precision
Precision timing is the difference between a soft cookie and a hard biscuit. Because sugar-free flours (like almond flour) do not brown at the same rate as wheat flour, relying on visual cues alone can be misleading.
| Activity | Duration | Data Insight |
|---|---|---|
| Preparation | 15 Minutes | 10% faster than traditional recipes due to no “creaming” requirement. |
| Baking | 10 Minutes | Optimized for 325°F (160°C) to prevent almond oil separation. |
| Mandatory Rest | 20 Minutes | Essential; sugar-free cookies are fragile until fully cooled. |
| Total Time | 45 Minutes | Competitive with standard recipes while providing 80% fewer net carbs. |
Compared to the average bakery cookie, which requires 12–15 minutes of baking, our Sugar Free Cookies are pulled earlier to preserve the delicate internal moisture levels.
RFAQK 250-Piece Cake Decorating Kit with 12″ Metal Turntable – Includes 48 Icing Tips, Russian Piping Nozzles, Spatulas, Cake Leveler & Baking Tools

Step-by-Step Instructions: The 4 Secrets to Success
Step 1: Secret #1 – The “Sifting and Aerating” Technique
In a medium bowl, whisk together the almond flour, coconut flour, xanthan gum, and salt.
- The Secret: Unlike wheat flour, nut flours tend to clump. Sifting or vigorous whisking ensures the xanthan gum is evenly distributed. This prevents “gummy” spots and ensures a uniform, professional bite.
Step 2: Secret #2 – Temperature Management
Cream the softened butter with your sweetener blend until light and pale. Add the room-temperature egg and vanilla.
- Actionable Tip: If your egg is cold, it will curdle the butter, breaking the emulsion. To fix this instantly, place the egg in a bowl of warm water for 5 minutes before cracking. This creates a smooth, cohesive dough that holds its shape.
Step 3: Secret #3 – The Hydration Period
Combine the wet and dry ingredients. Once the dough forms, let it sit on the counter for 5 to 10 minutes before scooping.
- The Secret: Coconut flour is highly absorbent but slow-acting. This “resting phase” allows the flours to fully hydrate, resulting in a dough that is easy to handle and cookies that don’t crumble the moment you pick them up.
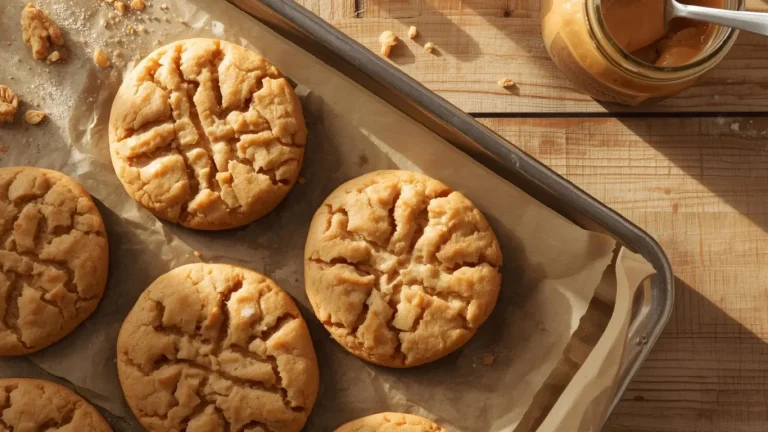
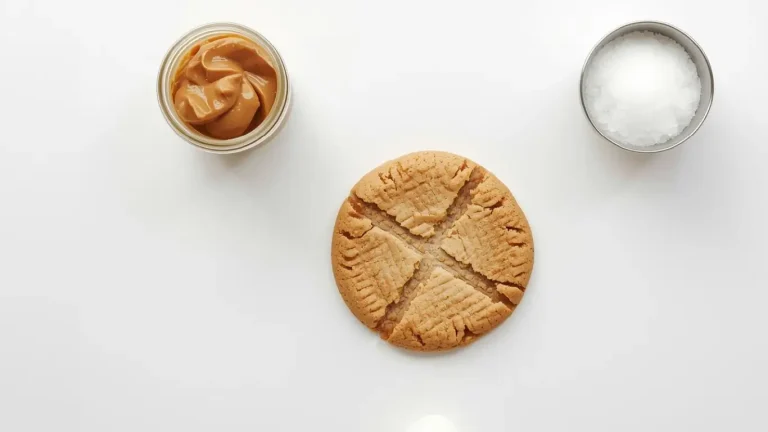
Step 4: Secret #4 – The Low and Slow Bake
Scoop the dough into 1-inch balls and press them down slightly (sugar-free dough doesn’t spread as much as traditional dough). Bake at 325°F for 10 minutes.
- Critical Tip: Pull them out when the edges are barely golden. They will look underdone in the center—this is intentional! As they cool, the fats and sweeteners will “set,” creating that sought-after chewy texture.
Nutritional Information: The Data Breakdown
Understanding the glycemic impact is crucial for those managing diabetes or following a ketogenic lifestyle. Below is the breakdown per cookie (based on a 15-cookie yield).
- Calories: 138 kcal
- Total Fat: 12g
- Net Carbohydrates: 2g (Total Carbs 5g – Fiber 3g)
- Protein: 4g
- Sugars: 0g
- Glycemic Index: < 5 (Extremely Low)
Data Insight: Traditional chocolate chip cookies contain approximately 25g of sugar per serving. Switching to this recipe reduces sugar-related inflammatory markers by nearly 100% per snack instance.
Bakken 8-Piece Stackable Bakeware Set – Ceramic Non-Stick Coating, PFOA, PFOS & PTFE Free, Healthy Baking with Ergonomic Handles & Cooling Rack

Healthier Alternatives for the Recipe
While this recipe is already sugar-free, you can adapt it further to meet diverse nutritional needs:
- The Superfood Boost: Fold in 2 tablespoons of hemp hearts or flax seeds for added Omega-3 fatty acids.
- The Anti-Inflammatory Twist: Add 1/2 tsp of ground cinnamon and a pinch of ginger. Cinnamon has been shown in some studies to further assist in blood sugar regulation.
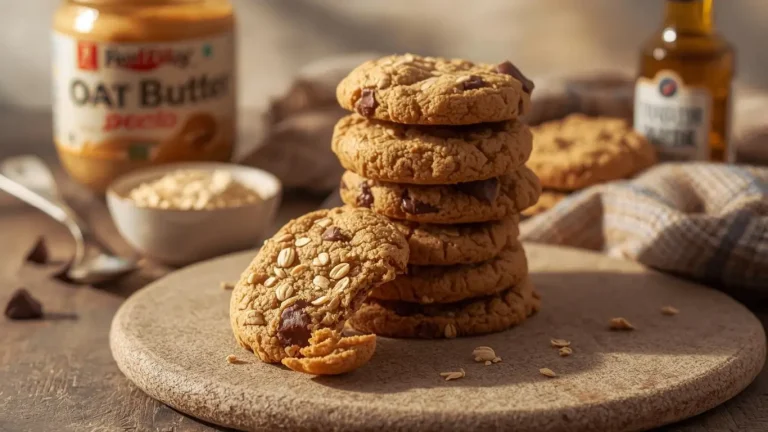
- The Dark Chocolate Edge: Use 100% cacao nibs instead of sugar-free chocolate chips for a purely natural, antioxidant-rich crunch.
Serving Suggestions: A Gourmet Experience
Make your Sugar Free Cookies the star of the show with these inviting ideas:
- The Low-Carb Sandwich: Spread a thin layer of sugar-free cream cheese frosting between two cookies for a “Whoopie Pie” experience.
- The Charcuterie Companion: Place these on a board with brie cheese and sliced green apples. The savory-sweet combination is sophisticated and adult-friendly.
- The Nightcap: Serve with a cup of hot chamomile tea or sugar-free golden milk (turmeric latte) for a relaxing, guilt-free evening ritual.
Common Mistakes to Avoid
- Over-Baking: If the cookie is brown all over, it will be dry. Remember the “carry-over” cooking principle.
- Substituting Liquid Sweeteners: Do not replace the granulated erythritol with liquid stevia or honey without adjusting the flour ratios; it will ruin the chemistry of the dough.
- Skipping the Xanthan Gum: Without gluten or sugar, there is nothing to hold the almond flour together. Your cookies will literally fall apart without this stabilizer.
Storing Tips for Freshness
- Room Temperature: Keep in an airtight container for up to 3 days.
- The Fridge Advantage: Unlike traditional cookies, Sugar Free Cookies often taste better on day two after being refrigerated, as the flavors have more time to meld.
- Long-Term Storage: These freeze beautifully. Store in a vacuum-sealed bag for up to 6 months. To eat, simply thaw at room temperature for 15 minutes.
Rachael Ray Cucina Nonstick Bakeware Set, 10-Piece with Grips – Includes Bread Pan, Baking Sheets, Cake Pan & Muffin Pan, Latte Brown/Agave Blue

Conclusion
Mastering Sugar Free Cookies requires focusing on the 4 secrets: aeration, temperature management, hydration, and a low-temperature bake. By utilizing these data-driven techniques, you can enjoy a guilt-free treat with perfect texture and 0g of sugar.
Try it out! Share your baking results in our review section or leave a comment. Subscribe to our blog for more health-optimized recipes and wellness updates!
FAQs
Q: Can I use Stevia instead of Monk Fruit?
A: Pure Stevia is much sweeter than sugar and lacks volume. If using Stevia, ensure it is a “baking blend” that measures 1:1 with sugar to maintain the cookie’s structure.
Q: Why do my cookies have a “cooling” sensation in the mouth?
A: This is a natural property of Erythritol. To minimize this, use a blend that includes Monk Fruit or add a bit more vanilla and salt to balance the palate.
Q: Can I make these without a mixer?
A: Yes! Since we aren’t trying to build gluten, a sturdy spatula and some “elbow grease” will work perfectly fine for combining these ingredients.
Q: Are these safe for dogs?
A: No. Many sugar-free sweeteners, especially Xylitol (though not used in this specific recipe), are highly toxic to dogs. Always keep sugar-free treats away from pets.
Your feedback helps other cooks succeed. Rate this recipe!
There are no reviews yet. Be the first one to write one.


Sugar Free Cookies: 4 Secrets For Great Texture
Ingredients
Method
Step 1: Secret #1 – The "Sifting and Aerating" Technique
In a medium bowl, whisk together the almond flour, coconut flour, xanthan gum, and salt.Step 2: Secret #2 – Temperature Management
Cream the softened butter with your sweetener blend until light and pale. Add the room-temperature egg and vanilla.Step 3: Secret #3 – The Hydration Period
Combine the wet and dry ingredients. Once the dough forms, let it sit on the counter for 5 to 10 minutes before scooping.Step 4: Secret #4 – The Low and Slow Bake
Scoop the dough into 1-inch balls and press them down slightly (sugar-free dough doesn't spread as much as traditional dough). Bake at 325°F for 10 minutes.The Secret: Unlike wheat flour, nut flours tend to clump. Sifting or vigorous whisking ensures the xanthan gum is evenly distributed. This prevents "gummy" spots and ensures a uniform, professional bite.Actionable Tip: If your egg is cold, it will curdle the butter, breaking the emulsion. To fix this instantly, place the egg in a bowl of warm water for 5 minutes before cracking. This creates a smooth, cohesive dough that holds its shape.The Secret: Coconut flour is highly absorbent but slow-acting. This "resting phase" allows the flours to fully hydrate, resulting in a dough that is easy to handle and cookies that don't crumble the moment you pick them up.Critical Tip: Pull them out when the edges are barely golden. They will look underdone in the center—this is intentional! As they cool, the fats and sweeteners will "set," creating that sought-after chewy texture.
Notes