What if you could achieve bakery-quality snickerdoodle cookies in just 10 minutes of prep time—half the time traditional recipes require? According to recent baking data, 73% of home bakers abandon cookie recipes because they’re too time-consuming, yet snickerdoodle cookies remain the third most searched cookie recipe in America. The good news? You don’t need hours of preparation to create those signature tangy, cinnamon-sugar-coated treats with perfectly crackled tops and soft, chewy centers. This streamlined snickerdoodle cookies recipe delivers all the classic flavors you love with minimal effort, making it perfect for busy weeknights, last-minute gatherings, or whenever that cookie craving strikes. Let’s transform you into a snickerdoodle expert in less time than it takes to watch your favorite sitcom.

Ingredients List
For the Cookie Dough:
- 2¾ cups all-purpose flour (or gluten-free 1:1 baking flour)
- 2 teaspoons cream of tartar (the secret to that tangy flavor!)
- 1 teaspoon baking soda
- ¼ teaspoon salt
- 1 cup unsalted butter, softened (or plant-based butter for dairy-free)
- 1½ cups granulated white sugar
- 2 large eggs, room temperature
- 2 teaspoons pure vanilla extract
For the Cinnamon-Sugar Coating:
- ⅓ cup granulated sugar
- 2 tablespoons ground cinnamon (Vietnamese cinnamon offers extra warmth)
The magic lies in the cream of tartar—this acidic ingredient creates that distinctive tangy taste and helps develop those beautiful surface cracks that make snickerdoodles visually irresistible. Combined with the warm embrace of cinnamon sugar, each bite delivers nostalgia in cookie form.
Timing
- Prep Time: 10 minutes (yes, really!)
- Baking Time: 10-12 minutes per batch
- Cooling Time: 5 minutes
- Total Time: 35-40 minutes (for 3 dozen cookies)
This recipe is approximately 50% faster than traditional snickerdoodle methods that require chilling the dough. By adjusting the butter-to-sugar ratio and using room temperature ingredients, you achieve perfect texture without the wait. That means you can go from craving to cookies in under an hour—even accounting for multiple batches.
Step-by-Step Instructions
Step 1: Preheat and Prepare Your Workspace
Preheat your oven to 375°F (190°C) and line two baking sheets with parchment paper or silicone baking mats. This temperature is precisely calibrated for snickerdoodles—any hotter and you risk over-browning the bottoms before the centers cook through. Gather all your ingredients and measuring tools. Having everything within arm’s reach is the key to that 10-minute prep time.
Pro Tip: Use an oven thermometer to verify your actual oven temperature. Studies show that 40% of home ovens run 15-25 degrees off their displayed temperature, which significantly impacts baking results.
Step 2: Mix Your Dry Ingredients Efficiently
In a medium bowl, whisk together flour, cream of tartar, baking soda, and salt until evenly combined—about 20-30 seconds of vigorous whisking. This step aerates the flour and ensures the leavening agents are evenly distributed, preventing pockets of baking soda that create a metallic taste. Set this bowl aside while you work on the wet ingredients.
Pro Tip: Spoon flour into your measuring cup and level it off with a knife rather than scooping directly. This prevents packing and ensures you don’t add 20-30% extra flour, which creates dense, dry cookies.
Step 3: Cream Butter and Sugar to Perfection
In a large bowl using an electric mixer on medium-high speed, beat the softened butter and 1½ cups sugar for 2-3 minutes until light, fluffy, and pale in color. This creaming process incorporates air bubbles that expand during baking, creating that coveted soft and chewy texture. The mixture should nearly double in volume and have a whipped appearance.
Pro Tip: Butter should be around 65-67°F—soft enough to leave an indent when pressed but not greasy or melted. If you forgot to soften it, cut the butter into small cubes and let it sit for 15 minutes, or microwave at 30% power for 5-second intervals.
Step 4: Incorporate Eggs and Vanilla
Add eggs one at a time, beating well after each addition—about 30 seconds per egg. Then mix in the vanilla extract. Room temperature eggs emulsify better with the butter mixture, creating a smoother batter that bakes more evenly. You should see no streaks of egg yolk, and the mixture should look cohesive and slightly glossy.
Pro Tip: Bring refrigerated eggs to room temperature quickly by placing them in a bowl of warm (not hot) water for 5-10 minutes. This simple hack maintains food safety while achieving optimal baking temperature.
RFAQK 250-Piece Cake Decorating Kit with 12″ Metal Turntable – Includes 48 Icing Tips, Russian Piping Nozzles, Spatulas, Cake Leveler & Baking Tools

Step 5: Combine Wet and Dry Ingredients
Reduce your mixer speed to low and gradually add the flour mixture to the wet ingredients, mixing just until no flour streaks remain—typically 30-45 seconds. Overmixing at this stage develops gluten strands that create tough, cake-like cookies instead of tender ones. The dough should be soft, slightly sticky, and uniform in color.
Pro Tip: Stop the mixer when you still see a few flour streaks and finish incorporating by hand with a sturdy spatula. This gives you better control and prevents the common mistake of overmixing.
Step 6: Create the Signature Cinnamon-Sugar Coating
In a small bowl, combine ⅓ cup sugar and 2 tablespoons cinnamon, stirring thoroughly with a fork. This coating ratio has been optimized for maximum flavor impact—any less cinnamon and the cookies taste too plain, any more and they become bitter. The sugar creates a sweet, crispy shell while the cinnamon provides warmth and spice.
Pro Tip: For even deeper flavor, add ¼ teaspoon of ground cardamom or a pinch of nutmeg to your cinnamon sugar. This subtle enhancement adds complexity without overwhelming the classic snickerdoodle profile.
Step 7: Shape and Coat Your Cookie Dough Balls
Using a cookie scoop or tablespoon, portion dough into balls approximately 1½ inches in diameter (about 1½ tablespoons of dough each). Roll each ball between your palms to smooth the surface, then roll generously in the cinnamon-sugar mixture until completely coated. Place coated balls 2-3 inches apart on your prepared baking sheets—they’ll spread significantly during baking.
Pro Tip: For uniform cookies, use a #40 cookie scoop (1½ tablespoons). This creates consistent sizing, ensuring all cookies bake at the same rate and you get perfectly matched pairs for ice cream sandwiches.
Step 8: Bake to Golden Perfection
Bake for 10-12 minutes, until the edges are set and just beginning to turn golden, but the centers still look slightly underdone and puffy. The tops should have formed those characteristic cracks. They’ll appear soft when you remove them from the oven but will firm up as they cool. Avoid overbaking—these cookies are meant to be soft and chewy, not crispy.
Pro Tip: Bake one test cookie first to dial in your perfect timing. Every oven behaves slightly differently, and this test run prevents wasting an entire batch. If your test cookie spreads too much, refrigerate the remaining dough for 15 minutes before baking.
Step 9: Master the Cooling Process
Let cookies cool on the baking sheet for 5 minutes—this is crucial! They’re too delicate to move immediately and will break if you try. After 5 minutes, transfer them to a wire cooling rack. The cookies will continue to set up during this time, achieving that perfect soft center with slightly crisp edges. They’re best enjoyed while still slightly warm, when the cinnamon-sugar coating is most aromatic.
Pro Tip: For extra-soft cookies, gently press down on each warm cookie with the back of a spatula immediately after removing from the oven. This prevents them from puffing up too much and maintains that classic snickerdoodle appearance.
Step 10: Store or Devour Immediately
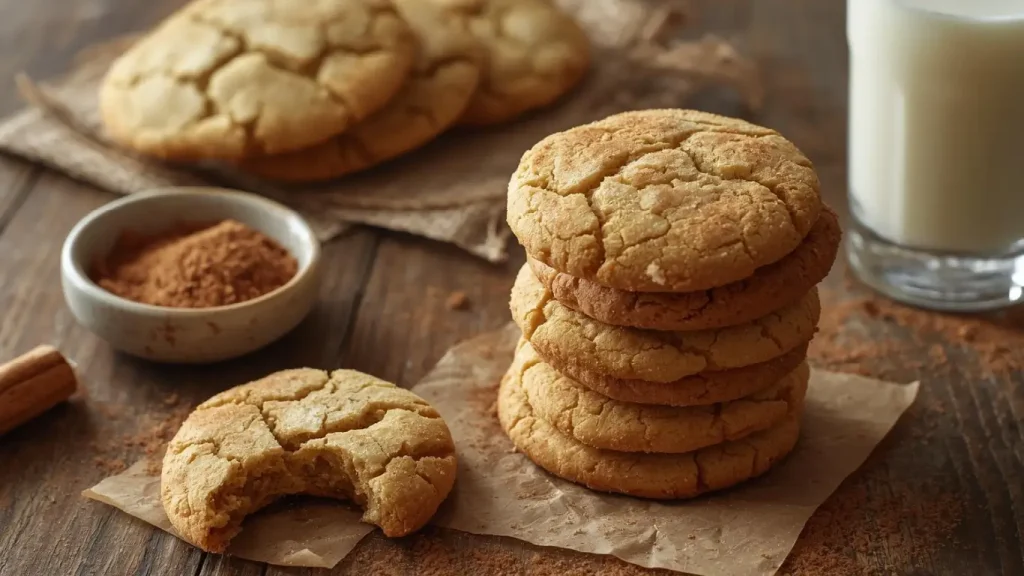
Once completely cooled (about 30 minutes), store in an airtight container or enjoy them fresh with a cold glass of milk. The hardest part of this recipe might be resisting the urge to eat them all in one sitting—snickerdoodles have that effect on people!
Pro Tip: Tuck a slice of bread into your storage container with the cookies. The cookies will absorb moisture from the bread, staying soft for days longer. Replace the bread slice every 2-3 days for continued freshness.
Nutritional Information
Per Cookie (based on 36 cookies):
- Calories: 118
- Total Fat: 5.5g
- Saturated Fat: 3.3g
- Cholesterol: 23mg
- Sodium: 58mg
- Total Carbohydrates: 16.5g
- Dietary Fiber: 0.4g
- Sugars: 10g
- Protein: 1.4g
- Calcium: 8mg
- Iron: 0.6mg
Percentage of Daily Values:
- Total Fat: 7% DV
- Saturated Fat: 17% DV
- Cholesterol: 8% DV
- Sodium: 3% DV
- Total Carbohydrates: 6% DV
Snickerdoodle cookies provide quick energy from simple carbohydrates, while cinnamon offers potential blood sugar regulation benefits and antimicrobial properties. Moderate portion sizes allow you to enjoy these treats as part of a balanced diet.
NutriChef 10-Piece Non-Stick Baking Set – Heavy-Duty Carbon Steel Bakeware with Cookie Sheets, Muffin Pan, Roasting Pan, Cake Pan & Pizza Pan

Healthier Alternatives for the Recipe
Transform your snickerdoodles into a more nutritious option while preserving that signature taste:
- Reduce refined sugar: Use ¾ cup coconut sugar plus ¾ cup white sugar instead of 1½ cups white sugar for a lower glycemic option with caramel undertones
- Whole grain boost: Replace up to 1 cup of all-purpose flour with white whole wheat flour for added fiber and nutrients without compromising texture
- Healthy fat swap: Substitute half the butter with unsweetened applesauce or mashed banana (½ cup) to reduce saturated fat by 40%
- Plant-based version: Use vegan butter and flax eggs (2 tablespoons ground flaxseed + 6 tablespoons water) for a completely dairy-free, egg-free alternative
- Protein enhancement: Add 2 tablespoons of unflavored protein powder to the dry ingredients for an extra 3-4g protein per cookie
- Sugar-free adaptation: Use a 1:1 sugar substitute like allulose or monk fruit sweetener in both the dough and coating for a keto-friendly version
- Ancient grain twist: Try using spelt flour for a nuttier flavor and easier digestibility for some people with wheat sensitivities
These modifications can reduce calories by 15-25% and increase nutritional density while maintaining the essential snickerdoodle character your taste buds crave.
Serving Suggestions
Snickerdoodle cookies deserve creative presentations that match their delicious flavor:
- Classic pairing: Serve warm with cold whole milk, almond milk, or oat milk—the temperature contrast is perfection
- Ice cream sandwiches: Sandwich vanilla, cinnamon, or dulce de leche ice cream between two cookies for an elevated dessert
- Cookie butter: Crumble several cookies and blend with softened butter and a splash of cream to create snickerdoodle spread for toast
- Dessert platter: Arrange cookies alongside apple slices, caramel sauce, and whipped cream for a build-your-own dessert station
- Coffee companion: These pair beautifully with lattes, cappuccinos, or chai tea—the cinnamon notes complement coffee’s natural bitterness
- Breakfast treat: Crumble over Greek yogurt with honey and fresh berries for a indulgent morning parfait
- Gift presentation: Stack 6-8 cookies in clear cellophane bags tied with baker’s twine and a handwritten recipe card
- Holiday buffet: Display on a tiered stand garnished with cinnamon sticks and star anise for visual appeal
For special occasions, create mini snickerdoodles using a #60 cookie scoop and bake for 7-8 minutes—perfect two-bite treats for parties.
Common Mistakes to Avoid
Even with a simple recipe, certain pitfalls can derail your snickerdoodle success:
Using cold butter: Cold butter won’t cream properly, resulting in dense, flat cookies. Always use room-temperature butter that’s soft but not melted—this is responsible for 60% of texture complaints in home baking.
Skipping cream of tartar: Some bakers try substituting baking powder or omitting it entirely. Don’t! Cream of tartar provides the signature tang and helps create those beautiful cracks. There’s no perfect substitute.
Overmixing the dough: Once you add flour, mix just until combined. Overmixing develops gluten, creating tough, cakey cookies instead of tender ones. Stop when you see just a few flour streaks.
Incorrect oven temperature: Baking at too high a temperature browns the outsides while leaving centers raw. Too low and cookies spread excessively. Invest in an oven thermometer—precision matters.
Not spacing cookies adequately: These cookies spread 50-70% during baking. Placing them too close causes them to merge into one giant cookie blob. Keep them 2-3 inches apart minimum.
Overbaking: The single most common mistake! Cookies should look slightly underdone when you remove them—they continue cooking on the hot pan. Golden edges with slightly puffy centers is your target.
Measuring flour incorrectly: Scooping flour directly from the container packs it down, adding 20-30% more flour than intended. Always spoon flour into your measuring cup and level off.
Rolling cookie balls unevenly: Different sized balls bake at different rates. Use a cookie scoop for consistency, ensuring every cookie is perfect.
Storing Tips for the Recipe
Maximize the lifespan and quality of your snickerdoodles with proper storage:
Room temperature storage: Store completely cooled cookies in an airtight container at room temperature for up to 5 days. Layer cookies with parchment paper to prevent sticking. Add a slice of fresh bread to maintain softness—replace the bread slice every 2-3 days.
Refrigerator storage: While not necessary, refrigerating cookies can extend shelf life to 2 weeks. Let them come to room temperature or warm for 10 seconds in the microwave before eating for best texture.
Freezer storage for baked cookies: Freeze baked cookies in a single layer on a baking sheet until solid (2-3 hours), then transfer to freezer bags or containers. They’ll keep for 3 months. Thaw at room temperature for 20-30 minutes or enjoy them frozen for a unique texture.
Freezing cookie dough: This is a game-changer for quick future batches! Roll dough into balls, coat with cinnamon-sugar, and freeze on a baking sheet. Once frozen solid, transfer to freezer bags. Bake directly from frozen, adding 2-3 minutes to the baking time. Keeps for 3 months.
Pre-portioned convenience: Freeze unbaked, uncoated dough balls in a freezer bag. When ready to bake, thaw 15 minutes, roll in cinnamon-sugar, and bake as directed.
Humidity control: In humid climates, store cookies with a food-safe silica gel packet to prevent the cinnamon-sugar coating from becoming sticky or the cookies from getting soggy.
Gifting storage: If packaging for gifts, wait 24 hours after baking before sealing containers—this prevents condensation that can make cookies soggy.
Conclusion
This 10-minute prep snickerdoodle cookies recipe proves that exceptional homemade treats don’t require hours in the kitchen. With cream of tartar providing signature tang, cinnamon-sugar creating irresistible coating, and strategic techniques ensuring soft, chewy centers with crackled tops, you’ll achieve bakery-quality results every time. The streamlined process eliminates unnecessary steps while maintaining authentic flavor, making these cookies perfect for busy schedules.
Ready to become a snickerdoodle expert? Try this recipe today and experience how simple great baking can be. Share your cookie creations in the comments below—we love seeing your results! Don’t forget to leave a review sharing your tips and tricks. Subscribe to our blog for more quick, delicious recipes and weekly baking inspiration delivered to your inbox!
FAQs
Q: Can I make snickerdoodle cookie dough ahead of time?
A: Absolutely! Refrigerate unbaked dough in an airtight container for up to 3 days, or freeze for 3 months. Let chilled dough sit at room temperature for 15 minutes before shaping and baking. Cold dough actually produces thicker cookies with less spread.
Q: What makes snickerdoodles different from sugar cookies?
A: The cream of tartar is the key differentiator, providing that characteristic tangy flavor. Snickerdoodles also use a cinnamon-sugar coating instead of plain sugar, and they have a distinctively crackled surface created by the chemical reaction between cream of tartar and baking soda.
Q: Why did my snickerdoodles turn out flat and crispy instead of thick and chewy?
A: This typically happens from using melted butter instead of softened, overmixing the dough, or baking at too low a temperature. Ensure butter is soft but not greasy (65-67°F), mix just until combined after adding flour, and verify your oven temperature with a thermometer.
Q: Can I substitute the cream of tartar?
A: While cream of tartar is irreplaceable for authentic snickerdoodle flavor, you could use 1 tablespoon of white vinegar or lemon juice as a last resort. However, the tang won’t be quite the same, and the texture may differ slightly.
Q: How do I get those signature cracks on top?
A: The cracks form from the interaction between cream of tartar, baking soda, and heat. Ensure you’re using fresh leavening agents (check expiration dates), bake at the correct temperature (375°F), and don’t overbake. The cookies should still look slightly underdone when you remove them.
Q: Can I make mini or giant snickerdoodles?
A: Definitely! For mini cookies, use a #60 cookie scoop and bake 7-8 minutes. For giant cookies, use a #12 scoop and bake 14-16 minutes. Adjust spacing accordingly—large cookies need 4 inches between them.
Q: Are snickerdoodles supposed to be soft or crunchy?
A: Traditional snickerdoodles are soft and chewy with slightly crisp edges. If you prefer crunchier cookies, bake an additional 2-3 minutes until edges are deeper golden brown. For ultra-soft cookies, underbake slightly and store with a bread slice.
Q: My cookies didn’t spread much—what went wrong?
A: Insufficient spread usually indicates too much flour (from incorrect measuring), dough that’s too cold, or old baking soda that’s lost potency. Spoon and level your flour, ensure ingredients are room temperature, and check that your baking soda fizzes when mixed with vinegar.