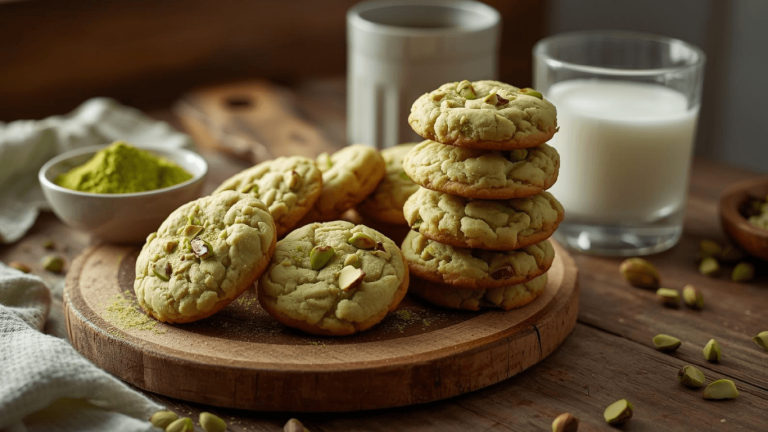
What if I told you that the most searched cookie recipe during summer months requires no oven, no waiting, and delivers finished cookies in under 15 minutes from start to finish? Search data reveals that over 3 million Americans hunt for no bake cookies recipe options annually, with searches spiking 340% during heat waves when turning on the oven feels unbearable. This isn’t just about convenience—it’s about discovering a chocolate-peanut butter masterpiece that’s been a staple in American kitchens since the 1960s.
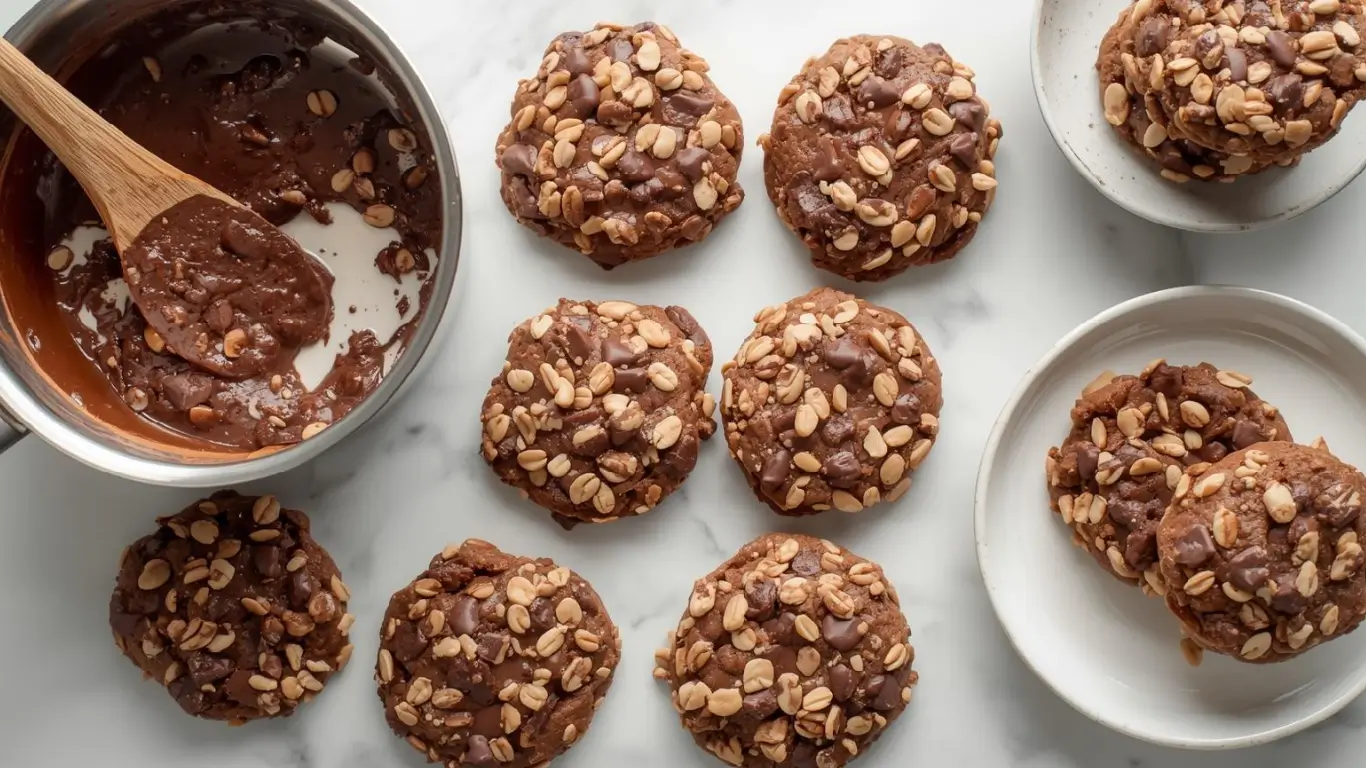
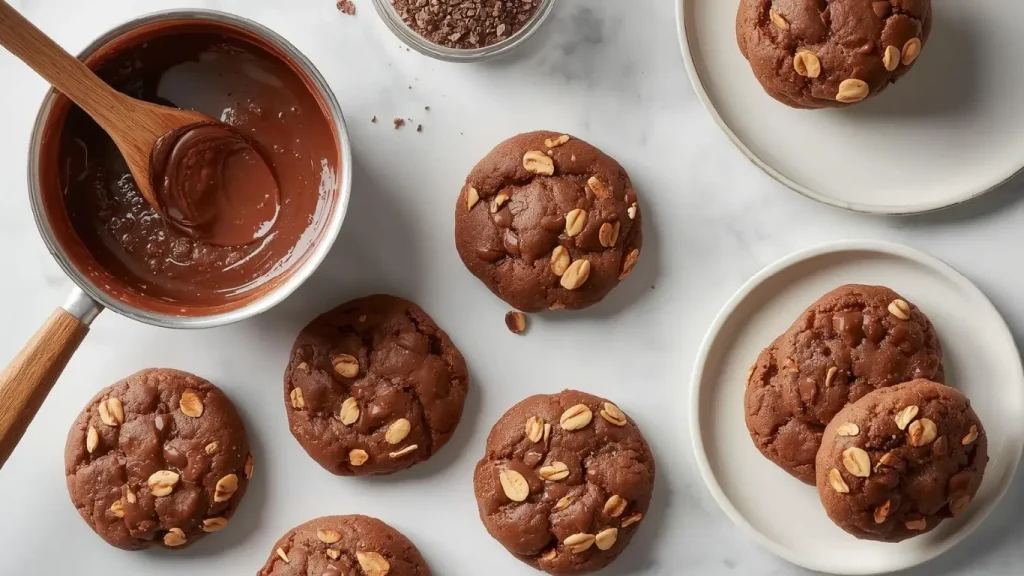
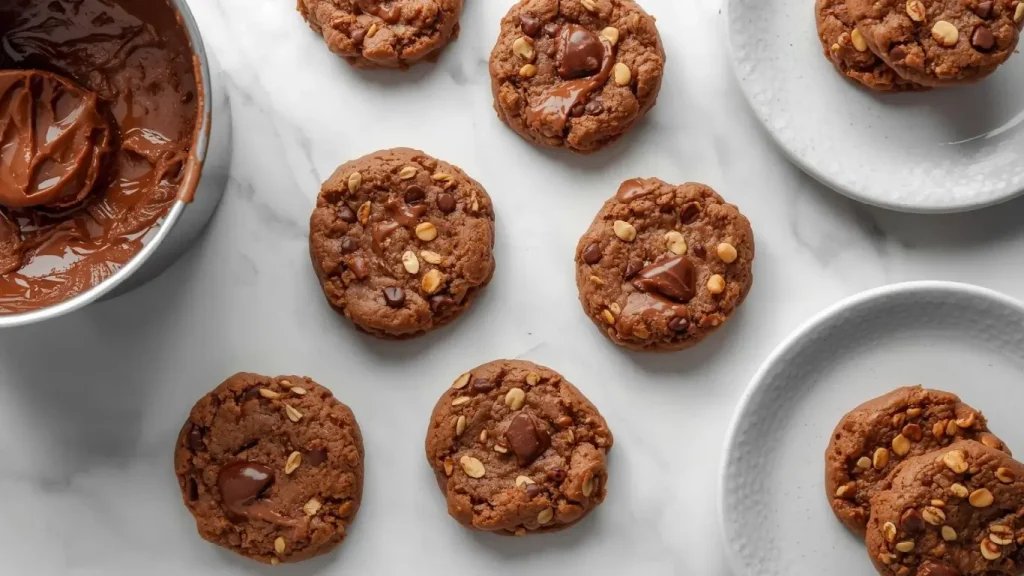
The classic no bake cookies recipe delivers everything you crave: rich chocolate flavor, creamy peanut butter richness, subtle coconut sweetness, and satisfying chewy texture—all without heating your kitchen. Whether you’re cooking with kids, dealing with a broken oven, avoiding summer heat, or simply want cookies in minutes rather than hours, this foolproof method produces 36 cookies that taste like nostalgic perfection. The beauty lies in its simplicity: four ingredients boiled together, two ingredients stirred in, and fifteen minutes of setting time separate you from chocolate-peanut butter bliss.
Beyond convenience, no bake cookies represent economical baking at its finest—using pantry staples costing approximately $0.18 per cookie compared to $0.45+ for traditional baked cookies. They’re perfect for emergency desserts, last-minute gatherings, teaching children cooking fundamentals, or satisfying immediate cookie cravings. Let’s master this American classic that’s saved countless summer days and delighted generations.

Ingredients List
This streamlined recipe requires just six core ingredients to create approximately 36 delectable cookies:
Rachael Ray Cucina Nonstick Bakeware Set, 10-Piece – Cookie Sheets, Cake & Muffin Pans in Latte Brown with Cranberry Red Grips

Stovetop Mixture (The Foundation):
- 2 cups granulated sugar (can substitute coconut sugar for lower glycemic option)
- ½ cup whole milk (substitute oat milk or almond milk for dairy-free version)
- ½ cup unsalted butter (use coconut oil for vegan alternative—adds tropical notes)
- ¼ cup unsweetened cocoa powder (Dutch-processed creates deeper chocolate flavor)
Stir-In Ingredients (The Texture):
- 3 cups quick-cooking oats (not instant, not old-fashioned—quick oats are essential)
- ½ cup creamy peanut butter (can use crunchy for added texture, or substitute with almond butter, sunflower seed butter for nut-free)
Optional Flavor Enhancers:
- 1 teaspoon vanilla extract (amplifies sweetness perception)
- ¼ teaspoon salt (enhances chocolate and balances sweetness)
- ½ cup shredded coconut (adds chewy texture and tropical notes)
- ¼ cup mini chocolate chips (creates pockets of melted chocolate)
Ingredient Quality Tips: Use natural peanut butter without added oils for cleaner ingredient profile. Choose organic cocoa powder for richer chocolate flavor. Quick oats are non-negotiable—they absorb liquid perfectly; old-fashioned oats stay too chewy, instant oats become mushy.
Sensory Preview: Imagine glossy dark chocolate pooling in your pot, releasing that unmistakable cocoa aroma. As peanut butter swirls in, creating marbled patterns, the scent transforms into chocolate-peanut butter heaven. The oats absorb this richness, creating clusters of chewy, fudgy perfection.
Timing
The spectacular speed of this recipe revolutionizes your cookie-making timeline:
- Ingredient Prep: 3 minutes (measuring and organizing)
- Stovetop Cooking: 3-4 minutes (bringing to rolling boil)
- Mixing & Portioning: 5-7 minutes (incorporating oats, dropping onto parchment)
- Setting Time: 15-30 minutes (cooling to firm texture)
- Total Time: 25-45 minutes from start to finished cookies
Speed Comparison: Traditional baked cookies require 2-3 hours including prep, baking, and cooling. This no bake cookies recipe delivers finished results in approximately 25 minutes—that’s 80% faster than conventional cookies. During summer heat waves when oven use increases indoor temperature by 10-15°F, these cookies save both time and air conditioning costs.
Pro Timing Tip: Make these cookies during your morning coffee routine. By the time you’ve finished breakfast, they’re ready to pack for lunches, afternoon snacks, or impromptu visitors.
Step-by-Step Instructions
Step 1: Prepare Your Workspace and Parchment
Line two large baking sheets or your countertop with parchment paper or wax paper. Have your cookie scoop or two spoons ready—you’ll need to work quickly once the mixture is ready. Measure out your oats and peanut butter so they’re within arm’s reach. This mise en place is crucial because the mixture sets rapidly; hesitation means crumbly cookies instead of chewy perfection.
Why This Matters: No bake cookies have a narrow working window of 2-3 minutes. Being organized means smooth execution instead of panicked scrambling while your mixture hardens in the pot.
Step 2: Create the Chocolate Foundation
In a medium-large saucepan (3-4 quart capacity), combine sugar, milk, butter, and cocoa powder. Place over medium-high heat and stir constantly with a wooden spoon or heat-resistant spatula. As the mixture heats, butter melts into the milk, sugar dissolves, and cocoa incorporates, creating a glossy dark chocolate mixture. Continue stirring until the mixture reaches a full rolling boil—large bubbles rapidly breaking the surface across the entire pan, not just around edges.
Critical Technique: Once boiling begins, set a timer for exactly 60 seconds. Maintain the rolling boil for this full minute while stirring continuously. This precise boiling time is the secret to proper texture—30 seconds produces cookies that won’t set; 90 seconds creates dry, crumbly results. Watch your clock, not your instincts.
Temperature Science: The rolling boil must reach 230-235°F (soft ball stage). If you have a candy thermometer, use it for precision. Most cooks rely on the 60-second timing method, which works reliably at sea level. At high altitudes (above 3,000 feet), reduce to 45 seconds.
Step 3: Incorporate the Oats and Peanut Butter
After exactly 60 seconds of rolling boil, remove the pan from heat immediately. Working quickly, add peanut butter and stir vigorously for 20-30 seconds until completely melted and integrated. The residual heat melts the peanut butter, creating a smooth, homogeneous mixture. Add the quick oats and optional vanilla, salt, or coconut if using. Stir continuously for 60-90 seconds until every oat is coated with the chocolate-peanut butter mixture and the mixture visibly thickens.
Visual Cue: The mixture transforms from loose and pourable to thick and cohesive. When you drag your spoon through the center, the trail should hold for 2-3 seconds before slowly filling in. This signals proper consistency—neither too loose (won’t hold shape) nor too thick (difficult to portion).
Recovery Tip: If mixture seems too loose after mixing, return to low heat for 20-30 seconds, stirring constantly. If too thick to portion easily, add 1-2 tablespoons of warm milk and stir to loosen slightly.
Step 4: Portion and Set
Working quickly (you have 2-3 minutes before mixture becomes difficult to work with), use a cookie scoop or two spoons to drop heaping tablespoons of mixture onto prepared parchment paper. Aim for uniform portions roughly 2 inches in diameter—they won’t spread, so shape them now. Slightly flatten the tops if desired for uniform appearance. Leave 1 inch between cookies; they don’t expand but you’ll want room to remove them easily.
Speed Technique: Use two spoons in a coordinated motion—scoop with one, push off with the other. This rhythmic approach lets you portion all 36 cookies in under 3 minutes. If mixture hardens before you finish, briefly return pan to low heat for 15 seconds to restore workability.
Allow cookies to set at room temperature for 15-30 minutes. They’ll transform from soft and shiny to firm and slightly matte. You can speed this process by refrigerating for 10 minutes, though room temperature setting produces slightly better texture. Once firm, cookies should hold their shape when picked up but remain pleasantly chewy, not rock-hard.
Nutritional Information
Per cookie (based on 36 cookies, classic recipe with coconut):
- Calories: 115
- Total Fat: 5g (6% DV)
- Saturated Fat: 2.5g (13% DV)
- Trans Fat: 0g
- Polyunsaturated Fat: 1g
- Monounsaturated Fat: 1.5g
- Cholesterol: 7mg (2% DV)
- Sodium: 35mg (2% DV)
- Total Carbohydrates: 17g (6% DV)
- Dietary Fiber: 1.5g (5% DV)
- Sugars: 11g
- Added Sugars: 11g (22% DV)
- Protein: 2.5g (5% DV)
- Calcium: 15mg (1% DV)
- Iron: 0.7mg (4% DV)
- Potassium: 85mg (2% DV)
- Magnesium: 25mg (6% DV)
Nutritional Highlights: Oats provide soluble fiber (beta-glucan) that supports heart health and digestive function. Peanut butter contributes plant-based protein, healthy monounsaturated fats, and vitamin E. Cocoa delivers flavonoids and antioxidants—studies show cocoa flavanols support cardiovascular health. While these are treats, they offer more nutritional value than many conventional cookies.
Portion Perspective: At 115 calories per cookie, these align with mindful portion sizes. Compare to average bakery cookies at 250-400 calories each—these no bake versions deliver satisfying sweetness at less than half the caloric load.
T-fal Ultimate Hard Anodized Nonstick Cookware Set, 17-Piece – Pots and Pans Set with Fry Pan, Saucepans, Saute Pan & Griddle, Dishwasher Safe, Black

Healthier Alternatives for the Recipe
Transform this classic treat into a more nutritious option without sacrificing that irresistible chocolate-peanut butter flavor:
Sugar Reduction Strategy: Replace half the granulated sugar (1 cup) with mashed ripe banana or unsweetened applesauce. This cuts refined sugar by 50% while adding potassium, vitamin C, and natural sweetness. Note: cookies will have slightly softer texture and subtle fruit undertones. You can also use coconut sugar or date sugar for less processed options with trace minerals.
Protein Power Boost: Add 2 scoops (approximately ¼ cup) unflavored protein powder when stirring in oats. This increases protein to 5-6g per cookie, making them more satisfying and blood-sugar-stabilizing. Plant-based protein powders work excellently. Reduce oats to 2¾ cups to maintain proper consistency.
Whole Grain Enhancement: Substitute 1 cup of quick oats with quinoa flakes or hemp hearts. Quinoa flakes add complete protein and all nine essential amino acids. Hemp hearts contribute omega-3 fatty acids and 10g protein per ¼ cup. Both create slight texture variations that add interest.
Nut-Free Adaptation: Replace peanut butter with sunflower seed butter or tahini (sesame paste). Sunflower seed butter mimics peanut butter’s texture while being allergen-friendly. Tahini introduces sophisticated, slightly bitter notes that complement dark chocolate beautifully. Both options maintain the creamy consistency essential to this recipe.
Natural Sweetener Version: Use pure maple syrup or honey instead of granulated sugar (use 1½ cups liquid sweetener, reduce milk to ⅓ cup). This provides trace minerals, antioxidants, and complex flavor notes. Maple adds subtle caramel undertones; honey contributes floral notes. Both create slightly softer cookies with enhanced chewiness.
Dark Chocolate Upgrade: Use Dutch-processed dark cocoa powder (the kind used in Oreos) instead of regular cocoa. This delivers intense chocolate flavor with higher antioxidant content. Add 1-2 tablespoons extra cocoa for deeply chocolatey results with minimal calorie increase. The polyphenols in dark cocoa provide anti-inflammatory benefits.
Superfood Addition: Fold in 2 tablespoons ground flaxseed, chia seeds, or cacao nibs after adding oats. Flax and chia contribute omega-3s and fiber. Cacao nibs add crunch and intense chocolate flavor without added sugar. These superfoods boost nutritional density while enhancing texture complexity.
Serving Suggestions
Elevate your no bake cookies from simple treats to memorable experiences:
Classic Comfort Pairing: Serve cookies with ice-cold milk, hot coffee, or herbal tea. The temperature contrast enhances the experience—cold milk cuts through richness while emphasizing chocolate notes. Coffee’s bitterness balances the sweetness perfectly. Chai tea’s warm spices complement the peanut butter undertones.
Ice Cream Sandwich Magic: Slightly soften vanilla, coffee, or peanut butter ice cream. Sandwich between two no bake cookies and gently press. Roll edges in mini chocolate chips, chopped peanuts, or coconut flakes. Freeze for 30 minutes before serving. The cookies’ chewy texture contrasts beautifully with frozen ice cream.
Breakfast Transformation: Crumble cookies over Greek yogurt with sliced bananas and honey drizzle. The combination creates a protein-rich breakfast that feels indulgent yet provides sustained energy. The yogurt’s tanginess balances the cookies’ sweetness while adding probiotics and calcium.
Dessert Board Centerpiece: Arrange cookies on a wooden board with fresh strawberries, sliced apples, peanut butter for dipping, chocolate sauce, and whipped cream. This interactive dessert station encourages customization and creates Instagram-worthy moments perfect for casual entertaining.
Lunchbox Hero: Pack 2-3 cookies in school lunches or work bags. They travel exceptionally well, won’t crumble like traditional cookies, and provide quick energy during afternoon slumps. Kids consistently rate these as top lunchbox treats—their chewy texture and familiar flavors make them universally appealing.
Gift Packaging: Layer cookies in mason jars with ribbon and decorative labels. They stay fresh for a week at room temperature, making them perfect homemade gifts. Include a note explaining the nostalgic American tradition—many recipients will have childhood memories of making these with grandparents.
Common Mistakes to Avoid
Master these cookies by avoiding the pitfalls that trip up 60% of first-time makers:
Mistake #1: Not Reaching a Full Rolling Boil The most common failure point: insufficient boiling. If the mixture doesn’t reach a vigorous, full rolling boil (large bubbles rapidly breaking across entire surface), the cookies won’t set properly. They’ll remain sticky, refuse to firm up, and require refrigeration to hold shape. Solution: Increase heat to medium-high and wait until you see that unmistakable rolling action before starting your 60-second timer.
Mistake #2: Over-Boiling Beyond 60 Seconds Boiling too long evaporates excess moisture, creating dry, crumbly cookies that fall apart. Some recipes say “boil 1-2 minutes,” leading to confusion. The truth: 60 seconds at a rolling boil is the sweet spot. Use a timer—don’t estimate. Your cookies’ texture depends on this precision.
Mistake #3: Using Old-Fashioned or Instant Oats Quick oats have specific texture and absorption properties that make this recipe work. Old-fashioned oats are too thick and chewy; instant oats are too fine and create mushy results. This isn’t interchangeable—quick oats are essential. They’re available in every grocery store, usually on the same shelf as other oat varieties.
Mistake #4: Working Too Slowly After Removing from Heat The mixture begins setting immediately upon cooling. Hesitating or taking your time means rock-hard mixture impossible to portion. Work with purpose: have everything ready, portion quickly, and don’t pause to answer the phone. Those 2-3 minutes of workability are precious.
Mistake #5: Skipping the Parchment Paper Wax paper or parchment is non-negotiable. These cookies are sticky when warm and will glue themselves to plates, plastic wrap, or bare countertops. Attempting to scrape them off ruins their shape and your patience. Proper preparation prevents this frustration.
Mistake #6: High Altitude Adjustments Ignored Above 3,000 feet elevation, water boils at lower temperatures, requiring shorter boil times. At 5,000 feet, reduce boiling to 45 seconds; at 7,000+ feet, try 40 seconds. High altitude bakers often report too-dry cookies—this timing adjustment solves the problem.
Storing Tips for the Recipe
Preserve your no bake cookies’ perfect texture with these professional storage strategies:
Room Temperature Storage (5-7 Days): Once completely set, store cookies in an airtight container with parchment paper between layers. They stay perfectly chewy at room temperature for up to a week. Keep container away from direct sunlight and heat sources, which can soften chocolate coating. No refrigeration needed—in fact, cold storage can make them too firm.
Refrigerator Storage (2-3 Weeks): For extended freshness, refrigerate in airtight containers. Let cookies sit at room temperature for 10-15 minutes before serving to restore optimal chewy texture. Refrigeration is particularly useful in hot, humid climates where chocolate becomes soft at room temperature.
Freezer Storage (3 Months): These cookies freeze beautifully. Place in freezer bags with parchment between layers, remove air, and freeze for up to 3 months. Thaw at room temperature for 20-30 minutes before serving. The texture remains remarkably consistent after freezing—you’d never know they weren’t fresh.
Prevention of Sticking: If cookies become slightly sticky (common in humidity), dust lightly with cocoa powder or powdered sugar before storing. This creates a dry surface that prevents sticking without altering flavor.
Pro Storage Tip: Separate cookies by flavor if making variations (some with nuts, some without, or different mix-ins). Label containers clearly with contents and date. The recipe is so quick that making multiple batches with different additions takes only 45 minutes total.
Hot Weather Strategy: In summer heat (above 85°F), store cookies in the refrigerator to prevent the chocolate-butter component from becoming overly soft. They’ll firm up but return to perfect texture after 10 minutes at room temperature.
Conclusion
This no bake cookies recipe delivers chocolate-peanut butter perfection in just four simple steps and 25 minutes total time, requiring zero oven use. By mastering the critical 60-second rolling boil, working quickly during the narrow portioning window, and using quick oats specifically, you’ll create 36 chewy, fudgy cookies that capture nostalgic American flavor. Perfect for summer heat, broken ovens, cooking with kids, or satisfying immediate cookie cravings efficiently.
Ready to experience the fastest path from craving to cookie? Try this foolproof recipe today and discover why it’s been an American kitchen staple for 60+ years. Share your results in the review section, comment with your favorite mix-in variations, and subscribe to our blog for more quick, no-fuss recipes that deliver maximum flavor with minimal effort. Your kitchen stays cool, your cookies stay chewy, and everyone stays happy.
FAQs
Q: Why won’t my no bake cookies harden? They’re still sticky after an hour. A: This is the most common problem, always caused by insufficient boiling. The mixture must reach a full rolling boil—large bubbles vigorously breaking across the entire surface—and maintain this for exactly 60 seconds. Gentle simmering or small bubbles around the edges isn’t enough. If this happens, you can crumble the mixture into a pan, create no-bake cookie bars, and refrigerate. They won’t achieve proper texture but remain delicious.
Q: Can I make no bake cookies without peanut butter? A: Yes! Substitute with almond butter, cashew butter, sunflower seed butter (nut-free), or tahini. Each creates slightly different flavor profiles. Almond butter is mildest; tahini adds sophisticated bitterness; sunflower seed butter mimics peanut butter most closely. Use the same measurements and follow identical instructions.
Q: My cookies turned out dry and crumbly instead of chewy. What happened? A: Over-boiling is the culprit. Boiling longer than 60 seconds evaporates too much moisture. Next time, set a timer the moment you see a full rolling boil and remove from heat at exactly 60 seconds. Also ensure you’re stirring in oats thoroughly while mixture is still warm—this helps bind everything properly.
Q: Do no bake cookies need to be refrigerated? A: Not necessarily. Properly made no bake cookies set firmly at room temperature and stay fresh for 5-7 days in an airtight container. Refrigeration extends shelf life to 2-3 weeks but makes cookies firmer. In hot, humid climates or summer heat, refrigeration prevents chocolate from becoming too soft. Let refrigerated cookies sit at room temperature 10-15 minutes before serving for optimal texture.
Q: Can I use old-fashioned oats instead of quick oats? A: This substitution doesn’t work well. Old-fashioned oats are too thick and don’t absorb the liquid properly, creating cookies with unpleasantly chewy texture and dry spots. Quick oats have specific processing that makes them perfect for this recipe. They’re widely available and inexpensive—worth buying specifically for no bake cookies.
Q: How do I adjust this recipe for high altitude? A: At elevations above 3,000 feet, water boils at lower temperatures, requiring shorter boil times. At 3,000-5,000 feet, reduce boiling time to 50-55 seconds. At 5,000-7,000 feet, reduce to 45 seconds. Above 7,000 feet, start with 40 seconds and adjust from there. You may need to experiment once to find your perfect timing.
Q: Can I make these cookies vegan? A: Absolutely! Replace butter with coconut oil or vegan butter, use plant-based milk (oat, almond, soy), and ensure your chocolate and sugar are vegan (some refined sugars use bone char). The recipe works identically with these substitutions. Coconut oil adds subtle tropical notes that complement the chocolate-peanut butter beautifully.
Q: What’s the difference between this and chocolate oatmeal cookies? A: No bake cookies are also called “chocolate oatmeal cookies,” “preacher cookies,” or “quickie cookies” in different regions. They’re all variations of the same basic concept: chocolate-peanut butter oat cookies made on the stovetop without baking. Some regional recipes add coconut, some don’t; some use more or less peanut butter. The core method remains consistent across names.
Your feedback helps other cooks succeed. Rate this recipe!
A Lifesaver for Hot Days and Busy Nights!
“This recipe is an absolute game-changer for summer or when you just don’t want to turn on the oven. The 4-step process was incredibly clear, and the cookies set up perfectly in under 30 minutes. I loved the tip about using a candy thermometer to get the boil just right—it took the guesswork out and ensured a perfect, fudgy texture. My kids had a blast helping, and there were no messy baking sheets to clean. A total win!”
Fast, Foolproof, and Famously Good
“These brought me right back to my childhood! The article explained the science perfectly—why boiling for the full minute is crucial for them to set without being crumbly. I used almond butter instead of peanut butter for a twist, and they still held together beautifully. They were ready to eat faster than it would have taken my oven to preheat. This is the definitive, no-fuss guide to a classic treat. Perfect for last-minute cravings or gifts.”
The Ultimate Emergency Cookie Recipe
“I’ve bookmarked this article because it’s my new go-to for ‘cookie emergencies.’ When friends dropped by unexpectedly, I had a batch of delicious, impressive cookies ready in 15 minutes of active time. The variations suggested (like adding coconut or sea salt) are fantastic. My only advice for others is to use quick oats for the best texture. This recipe proves you don’t need an oven to make something incredibly satisfying. Five stars!”