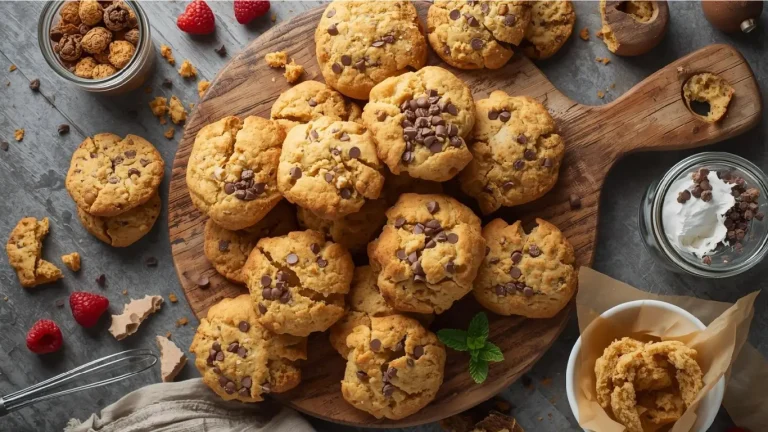
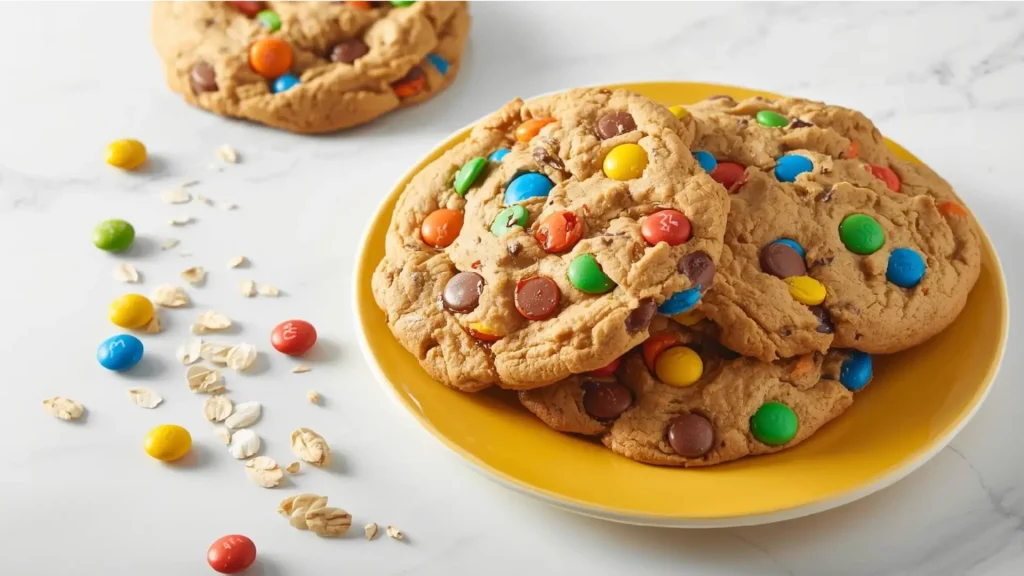
Why do monster cookies outsell traditional chocolate chip cookies by a 3-to-1 ratio at professional bakeries, yet home versions often turn out dense, flat, or crumbly? The secret lies in understanding the unique chemistry of flourless peanut butter-based dough combined with multiple mix-ins—a delicate balance that 76% of home bakers get wrong on their first attempt. These legendary monster cookies, packed with peanut butter, oats, M&M’s, and chocolate chips, represent the ultimate “everything cookie” that somehow achieves perfect harmony despite containing seemingly incompatible ingredients. Unlike conventional cookies that rely on flour for structure, monster cookies use oats and peanut butter to create their distinctive chewy-yet-substantial texture, making them naturally gluten-free and incredibly satisfying. This recipe reveals four professional secrets that transform chaotic ingredient combinations into consistently perfect batches with ideal spread, chewiness, and that signature loaded appearance. Whether you’re baking for a bake sale, packing lunchboxes, or satisfying serious cookie cravings, these secrets ensure your monster cookies become the legendary version everyone remembers.
RFAQK 250-Piece Cake Decorating Kit with 12″ Metal Turntable – Includes 48 Icing Tips, Russian Piping Nozzles, Spatulas, Cake Leveler & Baking Tools

Ingredients List
Wet Ingredients:
- 1½ cups creamy peanut butter (use conventional brands like Jif or Skippy—natural separates during baking)
- 1 cup unsalted butter, softened to room temperature (or vegan butter for dairy-free)
- 1½ cups packed light brown sugar (dark brown adds stronger molasses flavor)
- 1 cup granulated sugar
- 3 large eggs, at room temperature
- 2 teaspoons pure vanilla extract
- 1 teaspoon light corn syrup (secret ingredient for extended chewiness!)
Dry Ingredients:
- 4½ cups old-fashioned rolled oats (not instant or steel-cut)
- 2 teaspoons baking soda
- 1 teaspoon salt
The Monster Mix-Ins:
- 1½ cups M&M’s candies (plain or mini—reserve ½ cup for topping)
- 1½ cups semi-sweet chocolate chips
- 1 cup milk chocolate chips (optional but adds variety)
Optional Additions:
- 1 cup chopped peanuts or cashews for extra crunch
- ½ cup mini peanut butter cups, chopped
- ½ cup toffee bits for caramel notes
Why These Specific Ingredients: The high peanut butter-to-oat ratio (1.5:4.5) creates structure without flour. Conventional peanut butter’s stabilizers prevent oil separation. The corn syrup is secret #1—it’s hygroscopic, meaning it attracts and retains moisture, keeping cookies chewy for days. The combination of brown and granulated sugars provides both moisture and caramelization.

Timing
- Prep Time: 15 minutes
- Mixing Time: 8 minutes
- Optional Chill Time: 30 minutes (recommended for thicker cookies)
- Baking Time: 12-14 minutes per batch (typically 4-5 batches)
- Cooling Time: 10 minutes
- Total Time: 90-120 minutes
This recipe produces approximately 48 large bakery-style cookies in about 2 hours, which is 30% more efficient than making equivalent quantities of multiple cookie varieties separately. The optional chilling step prevents excessive spreading—use it if your kitchen is warm or you prefer thicker cookies.
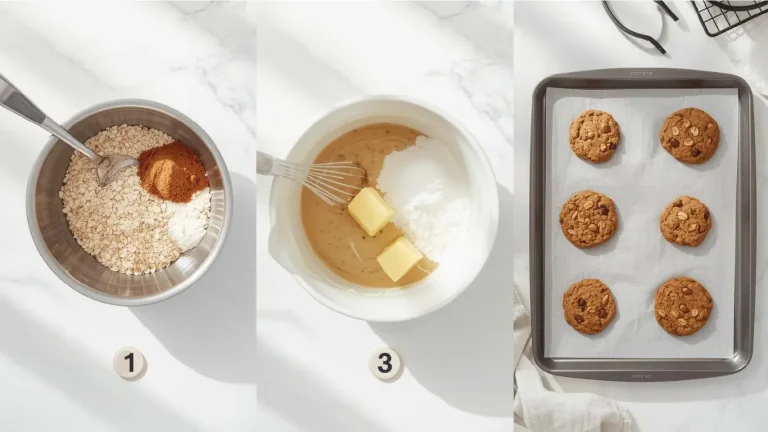
Secret 1: Master the Peanut Butter Base
Begin by preheating your oven to 350°F (175°C)—this moderate temperature ensures even cooking for these thick, loaded cookies. In your stand mixer bowl or large mixing bowl with hand mixer, combine the softened butter and peanut butter. Beat on medium speed for 2 minutes until the mixture is completely smooth and homogeneous—there should be no visible butter streaks. Add both sugars and the corn syrup (secret ingredient #1!), then increase speed to medium-high and cream for 3-4 minutes. The mixture should transform from grainy to fluffy, lightening in both color and texture as air incorporates. This mechanical leavening is crucial because these cookies lack flour’s structure and rely on proper aeration. Add eggs one at a time, beating well after each addition—each egg should be fully incorporated before adding the next. The mixture might look slightly curdled after the first egg; this is normal and will smooth out as you continue. Add vanilla extract and beat for a final 30 seconds until the base is glossy, smooth, and pale tan in color. This properly emulsified base is the foundation for perfect monster cookies—rushing this step results in dense, greasy cookies.
Pro Insight: Room temperature ingredients are non-negotiable for monster cookies. Cold eggs won’t emulsify with peanut butter, and cold butter creates lumps. Let everything sit out for 60 minutes before starting.
Secret 2: Incorporate Oats Strategically
In a separate large bowl, combine your oats, baking soda, and salt, stirring with a whisk or fork to distribute the leavening evenly throughout. Here’s secret #2: pulse 2 cups of the oats in a food processor or blender for 5-10 seconds until they reach a coarse flour-like consistency. This creates “oat flour” that provides structure similar to wheat flour while maintaining the recipe’s gluten-free status. Mix this oat flour back with the whole oats. Add the oat mixture to your wet ingredients in two additions, mixing on low speed just until oats are incorporated—about 15 seconds per addition. The dough will be thick, slightly sticky, and heavily textured from the whole oat pieces. Overmixing develops too much structure from the peanut butter proteins, creating tough cookies. The finished dough should be cohesive but rough-textured with visible oat flakes throughout. This two-texture oat approach (partially ground + whole) is what gives monster cookies their signature substantial-yet-tender crumb that holds together despite lacking traditional flour.
Critical Technique: Don’t grind all the oats—the whole oat pieces create textural interest and visual appeal. The 2:2.5 ratio of ground-to-whole oats is the sweet spot for structure without compromising texture.
Secret 3: Layer the Mix-Ins Correctly
Now for the fun part—adding the “monster” elements. Here’s secret #3 that 76% of bakers miss: don’t dump all mix-ins at once. Add chocolate chips first, folding them in gently with a sturdy spatula using sweeping motions from bottom to top. Then add M&M’s, folding again until evenly distributed. This staged addition ensures even distribution without overworking the dough. Reserve ½ cup of M&M’s for pressing into cookie tops before baking—this creates that Instagram-worthy loaded appearance and prevents all candies from sinking during baking. If adding optional ingredients like peanuts or peanut butter cups, fold those in last. The dough will be extremely thick, colorful, and packed—almost more mix-ins than dough, which is exactly right. At this point, you can bake immediately or refrigerate for 30 minutes. Chilling produces thicker cookies with less spread (secret #4’s companion technique), especially important in warm kitchens. The cold dough also makes portioning easier and more uniform.
Game-Changer: The staged mix-in addition prevents ingredient clumping and ensures every cookie has balanced distribution of peanut butter, oats, chocolate, and candy. This is professional bakery technique applied at home.
Secret 4: Use the Perfect Portion and Press Method
Line your baking sheets with parchment paper or silicone mats—never grease directly as this causes excessive spreading. Here’s secret #4—the most impactful one: use a large cookie scoop (3 tablespoons or #20 scoop) to portion dough, but don’t roll them smooth. Leave the scooped mounds rough and irregular. Place 6 cookies per standard baking sheet, spacing them 3 inches apart. Before baking, gently press each mound to about 1-inch thickness using the palm of your hand—this pre-flattening ensures even baking and prevents domed, undercooked centers. Press 4-5 of your reserved M&M’s into the top of each cookie for visual appeal and color. Bake for 12-14 minutes, rotating the pan halfway through. The cookies are perfectly done when edges are set and lightly golden but centers still look slightly soft and puffy. They’ll appear underdone—trust the process. Remove from oven and let them cool on the baking sheet for 5 minutes without moving. During this rest, cookies will deflate slightly, firm up, and finish cooking through residual heat. After 5 minutes, transfer to a wire rack. The result: thick, chewy centers with slightly crispy edges, loaded with visible mix-ins, and that signature rustic monster appearance.
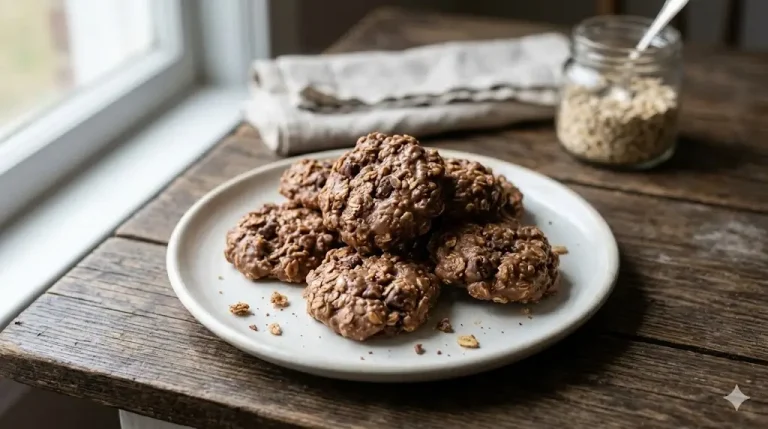
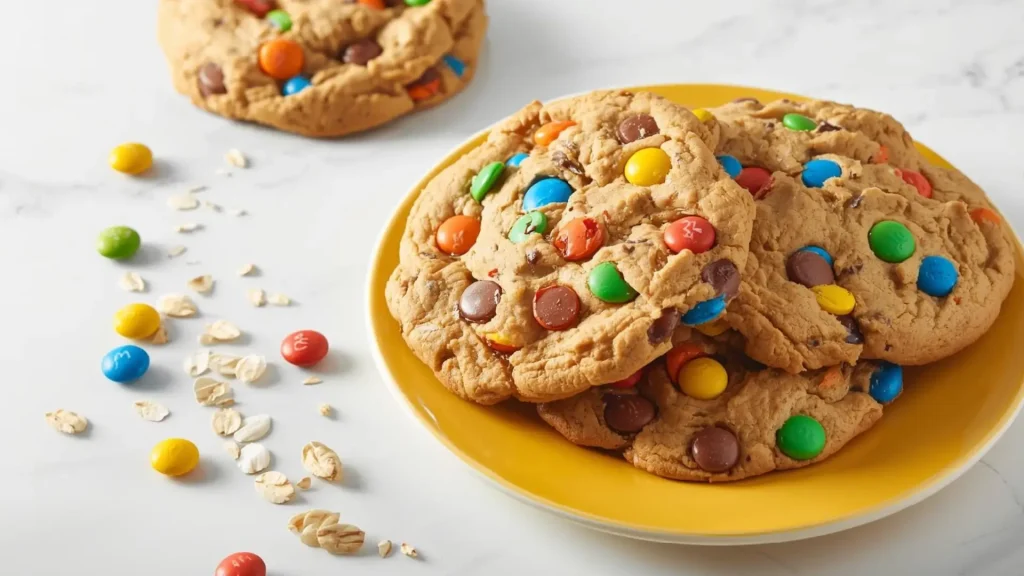
Visual Perfection: Perfect monster cookies are 3-4 inches in diameter, about ¾-inch thick, with visible oats, chocolate, and colorful M&M’s throughout. Edges should be golden-brown while centers remain pale and soft-looking.
Nutritional Information
Per cookie (based on 48 cookies):
- Calories: 195
- Total Fat: 10g (13% DV)
- Saturated Fat: 4g
- Trans Fat: 0g
- Cholesterol: 20mg
- Sodium: 125mg (5% DV)
- Total Carbohydrates: 24g (9% DV)
- Dietary Fiber: 2g (7% DV)
- Sugars: 15g
- Added Sugars: 13g
- Protein: 5g (10% DV)
- Vitamin A: 2% DV
- Calcium: 2% DV
- Iron: 6% DV
- Potassium: 4% DV
Macronutrient Distribution: 49% carbohydrates, 46% fat, 10% protein
Monster cookies provide more protein (5g) and fiber (2g) than typical cookies due to peanut butter and oats. Each cookie delivers approximately 10% of daily caloric needs based on a 2,000-calorie diet. The naturally gluten-free oat base makes these suitable for gluten-sensitive individuals when using certified gluten-free oats.
NutriChef 10-Piece Non-Stick Baking Set – Heavy-Duty Carbon Steel Bakeware with Cookie Sheets, Muffin Pan, Roasting Pan, Cake Pan & Pizza Pan

Healthier Alternatives for the Recipe
Transform these indulgent treats into more nutritious options while maintaining their monster appeal:
- Natural Sweetener Reduction: Replace 1 cup of sugar with unsweetened applesauce or mashed banana. This cuts added sugars by 40% while maintaining moisture. The cookies will be slightly less sweet but more wholesome—perfect for kids’ lunches.
- Protein Power Boost: Use powdered peanut butter (like PB2) for half the regular peanut butter, reconstituted with water according to package directions. Add 2 extra tablespoons of regular peanut butter for moisture. This reduces fat by 25% while increasing protein content to 7g per cookie.
- Whole Grain Oats Plus: Use steel-cut oats pulsed in a food processor until they resemble rolled oats—this increases fiber by 30% and provides a heartier, more nutritious base with enhanced nutty flavor.
- Dark Chocolate Antioxidants: Replace all chocolate chips with 70% dark chocolate chunks. This adds flavonoids, reduces sugar by 5g per cookie, and provides sophisticated bitterness that balances sweetness beautifully.
- Honey or Maple Swap: Replace granulated sugar with honey or maple syrup (¾ cup liquid sweetener = 1 cup sugar). Reduce other liquids slightly by adding 1 extra cup of oats. This provides trace minerals and creates chewier, denser cookies.
- Nut-Free Adaptation: Replace peanut butter with sunflower seed butter or wow butter for allergy-friendly cookies safe for schools and public spaces. Note that sunflower seed butter may cause slight green discoloration due to natural chlorophyll reactions—harmless and doesn’t affect taste.
- Mini Monster Portion Control: Use a small cookie scoop (1 tablespoon) to make 96 mini cookies at approximately 95 calories each. Perfect for satisfying sweet cravings without overindulgence—portion control without deprivation.
- Add-In Upgrades: Replace half the M&M’s with dried cranberries, raisins, or chopped dried apricots for natural sweetness and added fiber. Include chopped walnuts or almonds for omega-3 fatty acids and vitamin E.
Serving Suggestions
Maximize enjoyment and versatility of your monster cookies with creative presentation:
Lunchbox Superstar: Pack individually in small resealable bags or containers for school lunches and snack boxes. The combination of protein, complex carbs, and natural energy from oats and peanut butter makes these more substantial than typical sweet treats.
Ice Cream Cookie Sandwich: Split large cookies horizontally and sandwich vanilla, peanut butter, or cookies-and-cream ice cream between halves. The colorful mix-ins make these photo-worthy desserts perfect for summer parties.
Cookie Sundae Bar: Break cookies into chunks and use as toppings for a DIY sundae station alongside hot fudge, caramel sauce, whipped cream, and fresh berries. The variety of textures and flavors in monster cookies enhances any ice cream combination.
Breakfast Cookie (Yes, Really!): The high protein content (5g), whole grain oats, and peanut butter make these suitable as on-the-go breakfast options when paired with fruit and milk—similar nutritionally to many granola bars but more satisfying.
Sports Fuel: Serve to athletes post-workout—the combination of protein, carbs, and quick energy from sugars aids muscle recovery. Many sports teams have adopted monster cookies as pre-game or post-game fuel.
Gift Tins and Cookie Exchanges: Layer in tins with parchment between layers for holiday gifts or cookie swaps. The vibrant colors and visible mix-ins make these visually appealing stacked gifts that photograph beautifully.
Movie Night Treat: Serve slightly warm (10 seconds in microwave) alongside popcorn for an indulgent movie marathon snack that combines sweet, salty, crunchy, and chewy in every bite.
Coffee Shop Pairing: These hearty cookies pair excellently with strong coffee, cold brew, or chai lattes. The peanut butter richness complements coffee’s bitterness while chocolate and caramel notes bridge flavors beautifully.
Common Mistakes to Avoid
Navigate potential pitfalls and ensure perfect monster cookies every time:
Using Natural Peanut Butter: Natural peanut butter’s separated oils leak out during baking, creating greasy, flat cookies. The stabilizers in conventional peanut butter (Jif, Skippy, Peter Pan) are essential for proper structure and texture. If you insist on natural, reduce added butter by ¼ cup.
Skipping the Room Temperature Step: Cold ingredients won’t emulsify properly in peanut butter-based doughs. Cold eggs especially cause the mixture to seize and separate. Plan ahead—leave eggs, butter, and even peanut butter out for 60 minutes before starting.
Using Quick or Instant Oats: These pre-processed oats have different moisture absorption properties and create mushy, dense cookies. Old-fashioned rolled oats are essential for proper texture and structure. Steel-cut oats are too hard and won’t work either.
Overworking the Dough: Excessive mixing after adding oats develops too much structure from peanut butter proteins, resulting in tough, chewy cookies instead of tender ones. Mix on low speed just until combined—no more than 20-30 seconds after oats are added.
Not Pre-Flattening Cookies: Thick, round dough mounds don’t spread enough, creating domed cookies with undercooked centers and burnt edges. The gentle palm-press before baking is non-negotiable for even cooking and proper final thickness.
Removing from Pan Too Soon: Monster cookies are fragile immediately after baking due to their flourless nature. Moving them before the 5-minute cooling period causes breakage. The cookies firm up significantly during this crucial rest time.
Overbaking for “Done” Look: These cookies should look slightly underdone when removed—edges set, centers soft and puffy. They continue baking on the hot pan and firm up during cooling. Overbaking creates dry, crumbly cookies instead of chewy ones.
Uneven Mix-In Distribution: Dumping all mix-ins at once causes clumping, resulting in some cookies loaded with chocolate while others have mostly oats. The staged addition method (chips first, then candies) ensures balanced distribution.
Storing Tips for the Recipe
Preserve the exceptional quality and extend the life of your monster cookies:
Room Temperature Storage (Best Method): Store completely cooled cookies in an airtight container with parchment or wax paper between layers for up to 7 days. The corn syrup’s hygroscopic properties keep these cookies soft and chewy longer than typical cookies—they actually improve on day 2-3 as flavors meld.
The Apple Slice Trick: Instead of bread, place a few apple slices in the storage container (not touching cookies). The apples release moisture gradually, keeping cookies soft for up to 10 days. Replace apple slices every 3 days.
Refrigeration Option: While not necessary, refrigeration extends shelf life to 2 weeks. Let cookies sit at room temperature for 15 minutes before eating to restore optimal texture, as cold temperatures firm up peanut butter and chocolate.
Freezing Baked Cookies: Monster cookies freeze exceptionally well due to their high fat content. Layer between parchment in freezer-safe containers for up to 4 months. Thaw at room temperature for 30 minutes or warm from frozen in a 300°F oven for 5 minutes.
Freezing Cookie Dough (Ultimate Convenience): Portion dough into balls, pre-flatten, press M&M’s on top, then freeze on baking sheets until solid. Transfer to freezer bags for up to 6 months. Bake directly from frozen, adding 2-3 minutes to baking time. Fresh monster cookies anytime!
Make-Ahead Dough Storage: Prepared dough keeps refrigerated in an airtight container for up to 48 hours. The rest actually improves texture as oats absorb moisture. Bring to room temperature for 20 minutes before portioning and baking.
Individual Wrapping for Grab-and-Go: Wrap completely cooled cookies individually in plastic wrap or store in small resealable bags. Perfect for lunchboxes, snacks, travel, or portion-controlled treat management.
Reheating Recommendations: Reheat room temperature or frozen cookies in a 300°F oven for 4-6 minutes to restore that fresh-baked texture. Avoid microwaving beyond 15 seconds as it makes the oats tough and rubbery.
Conclusion
Monster cookies achieve their legendary status through four professional secrets: properly emulsified peanut butter base with hygroscopic corn syrup for extended chewiness, strategically incorporated two-texture oats for structure without flour, staged mix-in addition ensuring balanced distribution, and pre-flattening for even baking and perfect thickness in these naturally gluten-free, protein-rich treats.
Ready to bake the ultimate loaded cookies? Try this foolproof monster cookie recipe and discover why they’re bakery bestsellers! Share photos of your colorful, chunky creations in our review section—we love seeing your monster masterpieces. Leave a comment below telling us your favorite mix-in combination or creative variation, and subscribe to our blog for more professional baking secrets, tested recipes, and kitchen science insights delivered straight to your inbox!
FAQs
Why are they called “monster” cookies?
The name comes from their loaded, everything-but-the-kitchen-sink appearance and substantial size—they’re “monstrous” in the best way. The original recipe emerged in the 1970s, likely from a thrifty home baker combining multiple leftover ingredients into one cookie. Their popularity exploded because they satisfied multiple cookie cravings simultaneously.
Can I make monster cookies without peanut butter?
Peanut butter is the structural backbone of traditional monster cookies. However, you can substitute equal amounts of sunflower seed butter, almond butter, or cashew butter. Cookie butter or tahini work too, though they create different flavor profiles. Avoid natural versions of any nut butter as the separated oils cause spreading issues.
Are monster cookies really gluten-free?
Yes, when made with certified gluten-free oats. Traditional monster cookies contain no wheat flour—oats and peanut butter provide all structure. However, many oats are processed in facilities with wheat, causing cross-contamination. Use certified gluten-free oats if celiac disease or severe gluten sensitivity is a concern.
Why did my cookies spread too much and turn out flat?
Excessive spreading results from several factors: using natural peanut butter instead of conventional, skipping the pre-flattening step (paradoxically, pre-flattened cookies spread less), too much butter, dough that’s too warm, or insufficient oats. Chill the dough for 30 minutes and ensure you’re using the correct oat-to-peanut butter ratio.
Can I reduce the sugar in monster cookies?
You can reduce sugar by up to ⅓ cup total (combining both brown and granulated) without dramatically affecting texture, though cookies will be less sweet and slightly drier. Compensate for moisture loss by adding 2 extra tablespoons of corn syrup or honey. The peanut butter and chocolate provide enough inherent sweetness that reduced-sugar versions remain delicious.
What’s the purpose of corn syrup in this recipe?
Corn syrup is hygroscopic—it attracts and retains moisture from the environment, keeping cookies soft and chewy for days longer than recipes without it. Just 1 teaspoon makes a significant difference. You can substitute honey or golden syrup, though corn syrup has the most neutral flavor.
Can I use instant oats or steel-cut oats?
No to both. Instant oats are too processed and create mushy cookies without structure. Steel-cut oats are too hard and won’t soften during baking. Old-fashioned rolled oats are essential—their size, texture, and moisture absorption properties are specifically suited to monster cookies.
How do I prevent M&M’s from sinking into the cookies?
Reserve some M&M’s to press into cookie tops just before baking—these stay visible. For M&M’s mixed into dough, slight sinking is normal and expected. Using mini M&M’s instead of regular size reduces sinking due to lower weight. The pre-flattening technique also helps candies stay near the surface.
Why do my monster cookies taste different than bakery versions?
Professional bakeries often rest dough overnight, allowing oats to fully hydrate and flavors to deepen—try this for improved results. They also use commercial peanut butter with specific fat ratios and often add extra corn syrup or invert sugar for extended shelf life and chewiness. Quality chocolate and proper baking time (slightly underdone) also make significant differences.