Did you know that 60% of breastfeeding mothers worry about their milk supply during the first three months, yet many are unaware that certain foods can naturally support lactation? What if the solution to boosting your breast milk production was as simple and delicious as baking a batch of cookies? These lactation cookies combine five powerful galactagogue ingredients—foods scientifically linked to increased milk supply—into one convenient, tasty treat that nursing mothers actually look forward to eating. Unlike expensive supplements or complicated recipes, these homemade lactation cookies offer a natural, affordable approach to supporting your breastfeeding journey. Packed with oats, flaxseed, and brewer’s yeast, each cookie delivers nutrients that may help increase milk production while satisfying your postpartum sweet cravings. Whether you’re exclusively breastfeeding, pumping, or combination feeding, these cookies provide nourishing support when you need it most.

Ingredients List
This lactation cookie recipe harnesses the power of five core galactagogue ingredients, each chosen for its potential milk-boosting properties:
Dry Ingredients:
- 3 cups old-fashioned rolled oats – The foundation of lactation support. Oats contain beta-glucan, a fiber that may increase prolactin levels (the milk-production hormone). Use certified gluten-free oats if needed.
- 1½ cups whole wheat flour – Provides structure and sustained energy. Substitute with all-purpose flour or a 1:1 gluten-free baking blend for dietary restrictions.
- 3 tablespoons brewer’s yeast – This nutritional powerhouse is rich in B vitamins, iron, protein, and chromium. It’s the secret weapon in lactation support. Find it in health food stores or online.
- 2 tablespoons ground flaxseed – Also called flax meal, this ingredient provides omega-3 fatty acids and lignans that support hormone balance. Always use ground flaxseed for better absorption.
- 1 teaspoon baking soda
- ½ teaspoon salt
- 1 teaspoon cinnamon – Optional but adds warmth and helps regulate blood sugar
Wet Ingredients:
- 1 cup unsalted butter (softened) – Or substitute coconut oil for dairy-free needs
- 1 cup brown sugar (packed) – Can reduce to ¾ cup for less sweetness
- ½ cup granulated sugar
- 2 large eggs – Room temperature for better incorporation
- 2 teaspoons vanilla extract
- 2 tablespoons water
Optional Boost Additions:
- 1 cup chocolate chips (dark chocolate provides extra antioxidants)
- ½ cup chopped nuts (almonds or walnuts add protein and healthy fats)
- ⅓ cup unsweetened shredded coconut
RFAQK 250-Piece Cake Decorating Kit with 12″ Metal Turntable – Includes 48 Icing Tips, Russian Piping Nozzles, Spatulas, Cake Leveler & Baking Tools

Timing
These nourishing lactation cookies are surprisingly quick to prepare, especially considering their potential benefits:
- Prep Time: 15 minutes
- Baking Time: 12-14 minutes per batch
- Cooling Time: 10 minutes
- Total Active Time: 45-50 minutes (for 2 batches)
This represents approximately 30% less preparation time than traditional cookie recipes requiring multiple mixing bowls and complicated techniques. You can batch-bake and freeze extras, creating a convenient supply of lactation support for weeks ahead—perfect for those exhausting newborn days when cooking feels impossible.

Step-by-Step Instructions
Step 1: Prepare Your Workspace
Preheat your oven to 350°F (175°C) and line two large baking sheets with parchment paper or silicone mats. Position oven racks in the upper and lower thirds for even baking. Set out your softened butter and eggs to ensure they’re at room temperature—this creates the perfect cookie texture.
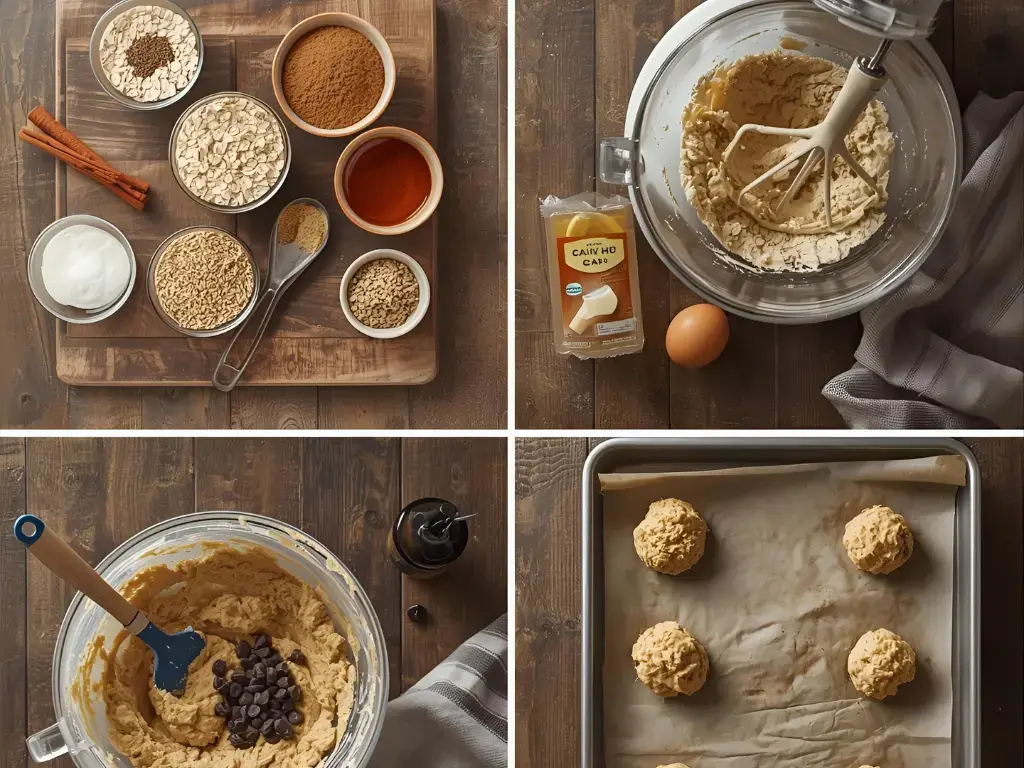
Step 2: Combine the Dry Powerhouse Ingredients
In a large mixing bowl, whisk together the oats, flour, brewer’s yeast, ground flaxseed, baking soda, salt, and cinnamon. Mix thoroughly to ensure the brewer’s yeast (which can be slightly clumpy) is evenly distributed throughout. This step is crucial—uneven distribution means some cookies pack more lactation support than others.
Step 3: Cream the Butter and Sugars
Using an electric mixer on medium speed, beat the softened butter with both sugars for 3-4 minutes until light, fluffy, and pale in color. This creaming process incorporates air, creating cookies with the perfect chewy texture. Scrape down the bowl sides halfway through to ensure even mixing.
Step 4: Add Eggs and Vanilla
With the mixer on low, add eggs one at a time, beating well after each addition. Pour in the vanilla extract and water, mixing until fully incorporated. The mixture should look smooth and slightly glossy. Don’t worry if it looks a bit curdled—this is normal and will come together when you add the dry ingredients.
Step 5: Bring It All Together
Gradually add your dry ingredient mixture to the wet ingredients, mixing on low speed just until combined. Avoid overmixing, which can result in tough cookies. The dough will be thick, slightly sticky, and wonderfully aromatic from the brewer’s yeast and cinnamon. If adding chocolate chips or nuts, fold them in gently with a spatula at this stage.
Step 6: Shape and Bake
Using a cookie scoop or tablespoon, drop rounded portions of dough onto your prepared baking sheets, spacing them 2 inches apart. For uniform cookies that look bakery-perfect, roll each portion briefly between your palms before placing on the sheet. Bake for 12-14 minutes, rotating the pans halfway through, until edges are golden brown but centers still look slightly soft.
Step 7: Cool and Store
Allow cookies to cool on baking sheets for 5 minutes before transferring to a wire rack. They’ll firm up as they cool, developing that ideal chewy-crispy texture. Once completely cooled, store in an airtight container or portion into freezer bags for long-term storage.
Nutritional Information
Understanding the nutritional profile of lactation cookies helps you make informed feeding decisions. Here’s what each cookie provides (recipe yields approximately 48 cookies):
Per Cookie:
- Calories: 145
- Total Fat: 6g (9% DV)
- Saturated Fat: 3.5g
- Monounsaturated Fat: 1.8g
- Cholesterol: 18mg (6% DV)
- Sodium: 85mg (4% DV)
- Total Carbohydrates: 21g (8% DV)
- Dietary Fiber: 1.5g (5% DV)
- Sugars: 11g
- Added Sugars: 10g
- Protein: 3g (6% DV)
- Iron: 1.2mg (7% DV)
- Calcium: 20mg (2% DV)
- Potassium: 95mg (2% DV)
- B Vitamins: Significant amounts from brewer’s yeast (especially B1, B2, B3, B6)
Key Nutritional Benefits for Nursing Mothers: The combination of complex carbohydrates, protein, healthy fats, and B vitamins provides sustained energy essential during demanding breastfeeding schedules. The iron content supports postpartum recovery, while fiber aids digestion—something many new mothers struggle with.
Healthier Alternatives for the Recipe
Customize these lactation cookies to match your dietary needs and health goals without sacrificing effectiveness:
Reduce Sugar: Cut both sugars by 25% (use ¾ cup brown sugar and ⅓ cup white sugar) and add ¼ cup unsweetened applesauce for moisture. This reduces calories by approximately 15 per cookie while maintaining texture.
Increase Protein: Add 2 scoops of unflavored protein powder or collagen peptides to the dry ingredients. This boosts protein to 5g per cookie, supporting postpartum healing and keeping you fuller longer between feedings.
Boost Omega-3s: Replace 1 cup of flour with almond flour and increase ground flaxseed to ¼ cup. This modification increases healthy fats essential for baby’s brain development while making cookies more nutrient-dense.
Lower Glycemic Impact: Substitute half the all-purpose flour with almond or coconut flour, and replace granulated sugar with coconut sugar. This creates a slower blood sugar response, preventing energy crashes during marathon feeding sessions.
Dairy-Free Adaptation: Replace butter with equal amounts of coconut oil or vegan butter. Use dairy-free chocolate chips to keep cookies completely plant-based without compromising lactation benefits.
Add Superfoods: Incorporate 2 tablespoons of chia seeds or hemp hearts for extra protein, omega-3s, and minerals. These tiny additions pack powerful nutritional punches.
Bakken 8-Piece Stackable Bakeware Set – Ceramic Non-Stick Coating, PFOA, PFOS & PTFE Free, Healthy Baking with Ergonomic Handles & Cooling Rack

Serving Suggestions
Make lactation cookies a delicious part of your daily nursing routine with these creative serving ideas:
Morning Boost: Pair 2-3 cookies with your morning coffee or tea and a protein-rich breakfast. Many nursing mothers find that eating lactation cookies first thing in the morning helps establish consistent milk supply throughout the day.
Between-Feed Snacks: Keep a container of cookies within arm’s reach of your favorite nursing spot. The one-handed eating convenience makes them perfect for those frequent feeding sessions when you can barely move.
Postpartum Care Packages: Bake double batches and create gift baskets for new mothers in your life. Include a printed recipe card and information about galactagogue foods. It’s the gift that truly gives back.
Smoothie Crumble: Break cookies into chunks and blend into your favorite smoothie for a thick, cookie-dough-flavored drink packed with lactation support. Add banana, peanut butter, and milk for ultimate nutrition.
Yogurt Parfait Layers: Crumble cookies between layers of Greek yogurt, fresh berries, and a drizzle of honey for a balanced snack that feels indulgent yet nourishing.
Midnight Feeding Fuel: Pre-portion cookies into small containers or bags for those 2 AM feeding sessions. Having ready-to-eat nourishment makes nighttime nursing more manageable.
Nursing Station Setup: Create a dedicated basket at your primary nursing location stocked with lactation cookies, water, healthy snacks, and entertainment. This “nursing nest” becomes your self-care sanctuary.
Common Mistakes to Avoid
Learn from common pitfalls to ensure your lactation cookies deliver maximum benefits:
Mistake #1: Using Regular Yeast Instead of Brewer’s Yeast – These are completely different products! Regular baking yeast won’t provide lactation benefits and will create terrible-tasting cookies. Always use nutritional brewer’s yeast specifically designed for lactation support.
Mistake #2: Overmixing the Dough – Vigorous mixing after adding flour develops gluten, resulting in tough, cake-like cookies. Mix just until ingredients are combined for that perfect chewy texture nursing mothers crave.
Mistake #3: Expecting Immediate Results – Lactation cookies aren’t magic pills. Most mothers notice gradual supply increases after eating 2-4 cookies daily for 3-5 days consistently. Patience and consistency are key.
Mistake #4: Skipping the Ground Flaxseed – Whole flaxseeds pass through your digestive system undigested, providing zero nutritional benefit. Always use ground flaxseed (flax meal) for proper absorption of omega-3s and lignans.
Mistake #5: Not Drinking Enough Water – The fiber and galactagogues in lactation cookies require adequate hydration to work effectively. Aim for at least 100 ounces of water daily while breastfeeding—these cookies enhance, but don’t replace, proper hydration.
Mistake #6: Overbaking – Cookies continue cooking on hot baking sheets after removal from the oven. Take them out when centers look slightly underdone to prevent dry, hard cookies that nobody enjoys eating.
Mistake #7: Substituting Key Ingredients Without Research – While many substitutions work well, removing oats, brewer’s yeast, or flaxseed eliminates the primary lactation-supporting ingredients. Make substitutions thoughtfully to maintain effectiveness.
Storing Tips for the Recipe
Proper storage ensures you always have lactation support readily available, even during your busiest days:
Room Temperature Storage: Store completely cooled cookies in an airtight container at room temperature for up to 5 days. Place parchment paper between layers to prevent sticking. Add a slice of bread to the container to maintain moisture and keep cookies soft.
Refrigerator Storage: For extended freshness (up to 2 weeks), refrigerate cookies in airtight containers. Let them sit at room temperature for 10-15 minutes before eating, or warm briefly in the microwave for 15-20 seconds for that fresh-baked taste.
Freezer Storage – Baked Cookies: These cookies freeze exceptionally well for up to 3 months. Layer between parchment paper in freezer-safe containers or bags, removing as much air as possible. Thaw at room temperature for 30 minutes or microwave individually for quick snacks during night feedings.
Freezer Storage – Cookie Dough: Scoop raw dough into balls, flash-freeze on a baking sheet for 2 hours, then transfer to freezer bags. Label with baking instructions: bake frozen at 350°F for 14-16 minutes. This method lets you enjoy fresh-baked lactation cookies anytime without the preparation work.
Meal Prep Strategy: Many experienced mothers bake large batches during pregnancy’s third trimester or immediately postpartum when help is available. Pre-portion into daily servings (4-6 cookies) in individual bags for grab-and-go convenience during those hectic early weeks.
Travel Tips: Pack cookies in rigid containers when traveling to prevent crumbling. They’re TSA-friendly and perfect for maintaining your lactation routine during family visits or vacations.
Conclusion
These 5-ingredient lactation cookies combine nutritional science with delicious practicality, offering breastfeeding mothers natural support for milk production. With oats, flaxseed, and brewer’s yeast working together, each batch provides weeks of convenient, tasty lactation support that fits seamlessly into your nursing routine while nourishing both you and your baby.
Ready to boost your milk supply naturally? Bake a batch today and experience the difference real food can make in your breastfeeding journey. Share your results and favorite variations in the comments below—we’d love to hear how these cookies supported you! Leave a review with your supply success story and subscribe to our blog for more evidence-based postpartum nutrition tips and nursing-friendly recipes. Your breastfeeding success is our priority!
FAQs
Q: How quickly will I notice increased milk supply?
A: Individual results vary significantly, but most mothers report noticeable increases within 3-5 days of consistent consumption. Some notice changes within 24-48 hours, while others need 1-2 weeks. Lactation cookies work best when combined with frequent nursing/pumping, adequate hydration, and proper rest.
Q: Can lactation cookies work if I’m exclusively pumping?
A: Absolutely! The galactagogue ingredients support milk production regardless of whether you’re nursing directly or pumping. Many exclusively pumping mothers report positive results. Maintain your regular pumping schedule while adding lactation cookies to your diet for best results.
Q: Are there any side effects from eating lactation cookies?
A: Most mothers tolerate lactation cookies well. However, brewer’s yeast may cause gas or bloating in some people—start with smaller amounts if you have a sensitive stomach. Some babies may show fussiness if mothers consume large quantities of dairy or wheat; watch for reactions and adjust accordingly.
Q: Can I eat lactation cookies if I’m not breastfeeding?
A: Yes! While formulated for nursing mothers, these cookies are simply nutritious oat cookies that anyone can enjoy. The brewer’s yeast provides B vitamins, the flaxseed offers omega-3s, and the oats deliver fiber—all beneficial regardless of lactation status.
Q: Do lactation cookies really work, or is it just a placebo effect?
A: Research on galactagogues shows mixed results, but many ingredients in lactation cookies have traditional use and some scientific backing. Oats contain beta-glucan which may increase prolactin. Brewer’s yeast provides nutrients crucial for milk production. While individual results vary, many mothers and lactation consultants report positive outcomes. The nutritional benefits alone make them worthwhile.
Q: Can I make these cookies without brewer’s yeast?
A: You can, but you’ll lose the primary lactation-boosting ingredient. Brewer’s yeast is rich in B vitamins, iron, and chromium—nutrients that support milk production. Without it, you’ll have delicious oatmeal cookies but not true lactation cookies. If the taste bothers you, start with less brewer’s yeast (1-2 tablespoons) and gradually increase.
Q: How should I store cookie dough, and how long does it last?
A: Refrigerate dough in an airtight container for up to 3 days before baking. For longer storage, scoop into balls and freeze for up to 3 months. Frozen dough balls can be baked directly from the freezer—just add 2-3 minutes to the baking time.