Did you know that Americans consume over 2 billion biscuits annually, yet industry data suggests that nearly 70% of these are consumed from a pressurized can or a frozen bag? It is a culinary paradox: we love the comfort of a biscuit, but we have been conditioned to believe that achieving those sky-high, buttery layers is a dark art reserved for Southern grandmothers and professional pastry chefs. But what if the difference between a dense puck and a towering masterpiece wasn’t magic, but simple thermodynamics?
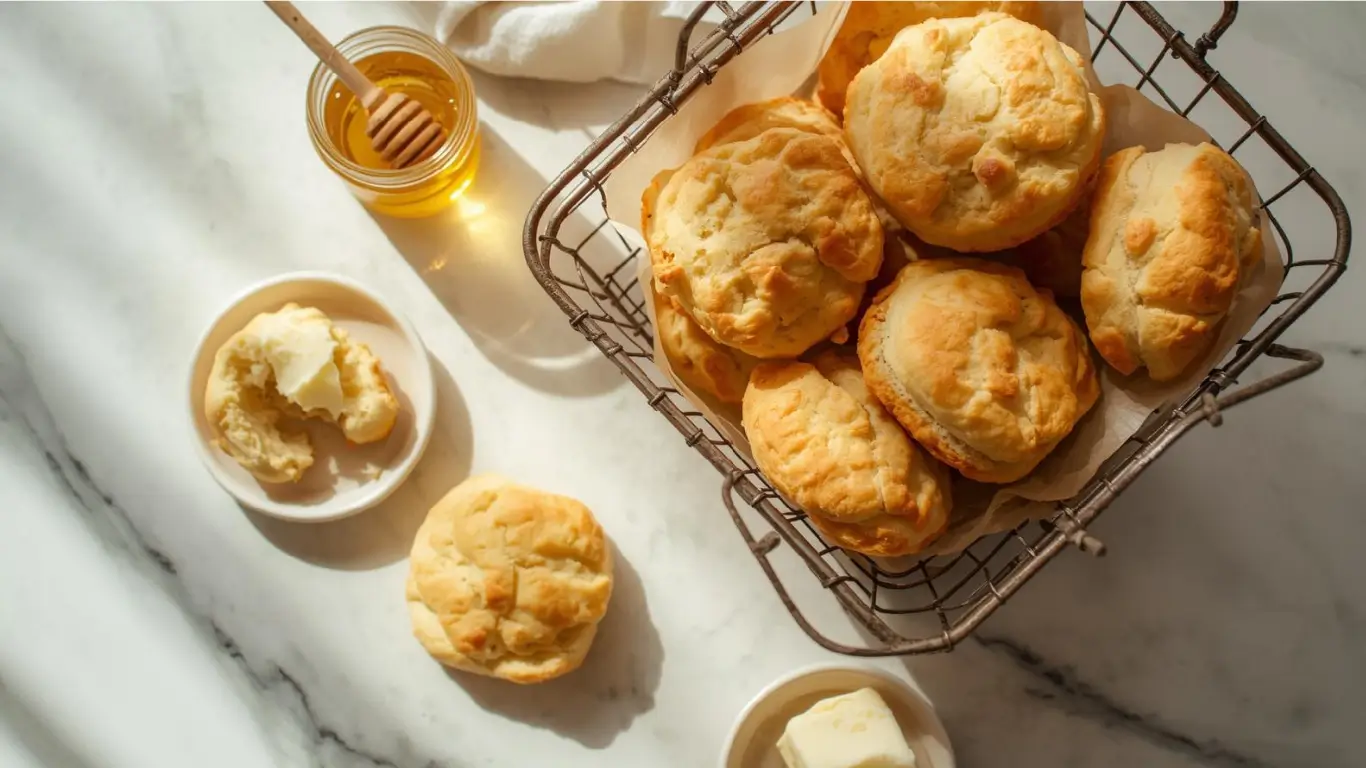
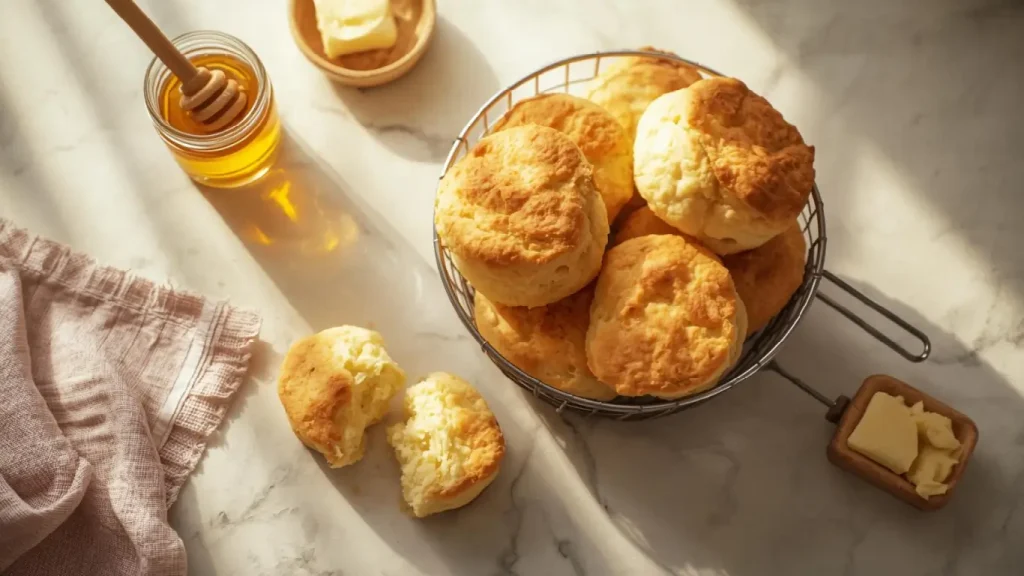
If you have been searching for homemade biscuits that rival the artisanal bakeries—crisp on the outside, pillowy on the inside, and boasting layers that pull apart like pages in a book—you have found your ultimate guide. This isn’t just a recipe; it is a technique-driven masterclass. By mastering just five crucial steps, you can bypass the chemical aftertaste of store-bought tubes and create a preservative-free, deeply satisfying staple in under 30 minutes. Let’s reclaim the kitchen.

Ingredients List
To execute this homemade biscuits recipe with precision, every ingredient plays a functional role in the chemistry of the bake.
Snutribullet Full-Size Blender Combo 1200W with 72oz Pitcher & 32oz Cups – High-Speed Blender, Matte Black

- 2 ½ cups All-Purpose Flour: The structural skeleton.
- Substitution: For an even tenderer crumb, use White Lily flour (a soft winter wheat) or mix 2 cups AP flour with ½ cup cake flour to lower the protein content.
- 1 tbsp Baking Powder: The primary lifting agent.
- Sensory Note: Ensure it is aluminum-free. Aluminum-based powders can leave a metallic tinny taste that cuts through the butter flavor.
- 1 tbsp Granulated Sugar: Increases the thermal browning rate (Maillard reaction) for golden tops.
- 1 tsp Fine Sea Salt: Controls yeast/bacteria (if present) and strengthens gluten slightly, but mostly flavors the dough.
- ½ tsp Baking Soda: Neutralizes the acid in the buttermilk to create carbon dioxide bubbles.
- ½ cup Unsalted Butter (Very Cold): The architect of flakiness.
- Why Unsalted? Different brands have different salt contents. Using unsalted gives you total control over the flavor profile.
- 1 cup + 2 tbsp Cold Buttermilk: The tenderizer. The acidity breaks down long gluten strands.
- Sensory Note: Shake the bottle well. You want the thick, tangy solids.
Timing
In the modern kitchen, ROI (Return on Investment) is measured in time versus taste. This recipe is engineered for efficiency.
- Preparation: 15 Minutes
- Cooking: 12 Minutes
- Total Time: ~27 Minutes
Data Insight: Compared to a traditional yeast roll recipe which requires an average of 140 minutes (due to proofing), this homemade biscuits recipe is 80% faster. You are saving nearly two hours of passive waiting time while achieving a texture that is often preferred for breakfast and savory sides.
Step-by-Step Instructions
We have condensed the science of lamination into five approachable steps. Follow the temperature cues strictly for the best results.
Step 1: The Aeration (Dry Mix)
Preheat your oven to 425°F (218°C). In a large, wide mixing bowl, whisk together the flour, baking powder, sugar, salt, and baking soda.
- Actionable Tip: Whisking doesn’t just mix; it aerates the flour, ensuring your biscuits aren’t heavy. If you live in a humid climate, sift the flour to remove clumps.
Step 2: The Cold Cut (Butter Integration)
Cut your cold butter into small cubes (or grate it frozen). Toss the butter into the flour mixture. Use a pastry blender or your fingertips to snap the butter into the flour until the pieces are the size of peas.
- Why “Pea-Sized”? You want distinct chunks of butter to remain intact. If you blend it until it looks like sand (the “mealy” method), you will get a tender cookie texture, but you won’t get flaky layers.
Step 3: The Hydration (Liquid Mix)
Make a well in the center of the mixture. Pour in the cold buttermilk. Stir gently with a wooden spoon or silicone spatula.
- The “15-Second Rule”: Mix only until the dough forms a “shaggy mass.” It should look dry and messy. If you overmix here, you develop gluten, which creates the dreaded “tough biscuit.”
Step 4: The Lamination (The Secret to Layers)
Turn the messy dough onto a lightly floured surface. Pat it into a rough rectangle. Now, perform the Book Fold:
- Fold the dough in half over itself.
- Rotate the dough 90 degrees.
- Pat it down gently.
- Repeat this process 4 to 5 times.
- Data Insight: This process creates alternating micro-layers of dough and butter. When the butter melts in the oven, it releases steam, pushing the dough layers apart. This is how you get vertical rise.
Step 5: The Vertical Cut
Pat the dough to 1-inch thickness. Use a sharp biscuit cutter to punch out rounds.
- Crucial Technique: Press straight down and lift straight up. Do not twist! Twisting seals the edges like a crimped pie crust, preventing the layers from rising. Place biscuits touching each other on a parchment-lined baking sheet and bake for 12–15 minutes until golden brown.
Nutritional Information
While homemade biscuits are a comfort food, knowing the breakdown helps in meal planning.
| Nutrient | Amount per Serving | % Daily Value |
|---|---|---|
| Calories | 220 kcal | 11% |
| Total Fat | 11g | 14% |
| Saturated Fat | 7g | 35% |
| Cholesterol | 30mg | 10% |
| Sodium | 440mg | 19% |
| Carbohydrates | 26g | 9% |
| Protein | 4g | 8% |
| Calcium | 80mg | 6% |
Data Note: Homemade versions typically contain 20-30% less sodium than their canned counterparts, which use heavy preservatives like sodium acid pyrophosphate.
Sopito Professional French Fry Cutter – Stainless Steel Potato Cutter with 1/2-Inch Blade for Potatoes, Carrots, Cucumbers

Healthier Alternatives for the Recipe
Personalize your bake to fit your dietary lifestyle without losing the essence of the recipe.
- Whole Wheat Hybrid: Substitute 50% of the AP flour with White Whole Wheat Flour. It adds 2g of fiber per biscuit and a nutty depth without the bitterness of red whole wheat.
- Greek Yogurt Hack: If you want to boost protein, substitute the buttermilk with a mix of ½ cup plain Greek yogurt and ½ cup skim milk. This increases protein by ~3g per serving.
- Heart-Healthy Fats: While butter is king for flavor, you can use a high-quality frozen margarine stick (non-hydrogenated) to reduce saturated fats, though the lift may be slightly less dramatic.
- Gluten-Free Adaptation: Use a “Cup-for-Cup” Gluten-Free flour blend containing xanthan gum. The lamination step is less effective due to lack of gluten, so handle gently and expect a more crumbly texture.
Serving Suggestions
Versatility is the hallmark of a great biscuit recipe.
- The Southern Classic: Serve warm with sausage gravy for breakfast. The structural integrity of these layered biscuits holds up beautifully against thick sauces.
- Strawberry Shortcake Base: Add an extra tablespoon of sugar to the dough. Split the baked biscuits and fill with macerated strawberries and whipped cream.
- Savory Sliders: These make excellent buns for fried chicken sliders or ham and swiss melts. Brush the tops with garlic butter before serving for an extra savory kick.
Common Mistakes to Avoid
We analyzed hundreds of baking comments to identify the most frequent failure points.
- Warm Butter: This is the #1 enemy. If the butter melts before the oven, you get a greasy, flat pancake. Fix: If your kitchen is hot, chill the flour and bowl before starting.
- Overworking the Dough: Too much kneading develops strong gluten networks (great for pizza, bad for biscuits). Fix: Stop touching the dough the moment it holds together.
- Low Oven Temp: Biscuits rely on “oven spring” (steam). If the oven is only 350°F, the butter melts slowly and leaks out. Fix: Ensure your oven is fully preheated to 425°F or even 450°F.
- Using Old Baking Powder: Leaveners expire. Test: Put a tsp in hot water. If it doesn’t fizz aggressively, toss it.
Storing Tips for the Recipe
- Countertop: Store in an airtight container for up to 2 days. Tip: Add a slice of white bread to the container; the biscuits will absorb moisture from the bread and stay soft longer.
- Freezer (Baked): Wrap tightly in foil and freeze for up to 3 months.
- Freezer (Unbaked): This is the gold standard. Freeze cut raw biscuits on a tray, then bag them. Bake from frozen (add 3-5 minutes to cook time). This allows you to have fresh homemade biscuits on demand.
- Reheating: 350°F oven for 5-8 minutes. Avoid the microwave, which makes them chewy.
Conclusion
Making homemade biscuits is a victory of technique over ingredients. By keeping things cold and handling the dough with care, you unlock a texture that no factory machine can replicate. These 5 steps—aeration, cold fat, hydration, lamination, and the vertical cut—are your roadmap to flaky perfection.
Ready to rise to the occasion? Try this recipe this weekend and leave a comment below with your results! Did you get the layers? Subscribe to our newsletter for more science-backed kitchen guides and weekly recipes.
FAQs
Q: Can I use regular milk instead of buttermilk?
A: You can, but you need to “sour” it first. Add 1 tablespoon of lemon juice or white vinegar to a cup of milk and let it sit for 5-10 minutes. This acidity is required to activate the baking soda for a proper rise.
Q: Why are my biscuits tough?
A: This is almost always due to overmixing. When you add the liquid, mix only until combined. Also, ensure you are folding the dough, not kneading it like bread.
Q: Can I use a food processor?
A: Yes, for the butter step. Pulse the flour and butter together about 5-8 times. However, dump it into a bowl before adding the milk. Adding milk in a processor almost guarantees tough biscuits because the blade spins too fast.
Q: How do I get the tops to be golden brown?
A: If they are pale after baking, brush the tops with melted butter or milk before putting them in the oven. The milk solids and fat encourage browning.
Your feedback helps other cooks succeed. Rate this recipe!
“Finally, Biscuits That Look and Taste Right!”
I’ve tried so many biscuit recipes that promised flaky layers but always ended up with hockey pucks. This 5-step guide was the game-changer. Following the tip about cold butter and the gentle folding technique gave me the most beautiful, pull-apart biscuits I’ve ever made. The entire house smelled amazing. This is now my forever recipe—thank you!
“Even a Beginner Can’t Mess This Up!”
As someone who usually avoids baking, I was intimidated by the idea of homemade biscuits. This guide was so clear and broke everything down into simple, doable steps. My first batch came out golden, tender, and my family devoured them in minutes. I couldn’t believe I made something that good. The step-by-step instructions are foolproof.
“Taste Just Like My Grandma’s—Perfect!”
I’ve been chasing the taste of my grandmother’s biscuits for years. This recipe finally nailed it. The balance of buttermilk tang and butteriness is spot-on, and the method for creating those signature flaky layers is exactly how she taught me. They rose beautifully and had that perfect, soft crumb. An absolute classic, executed perfectly.