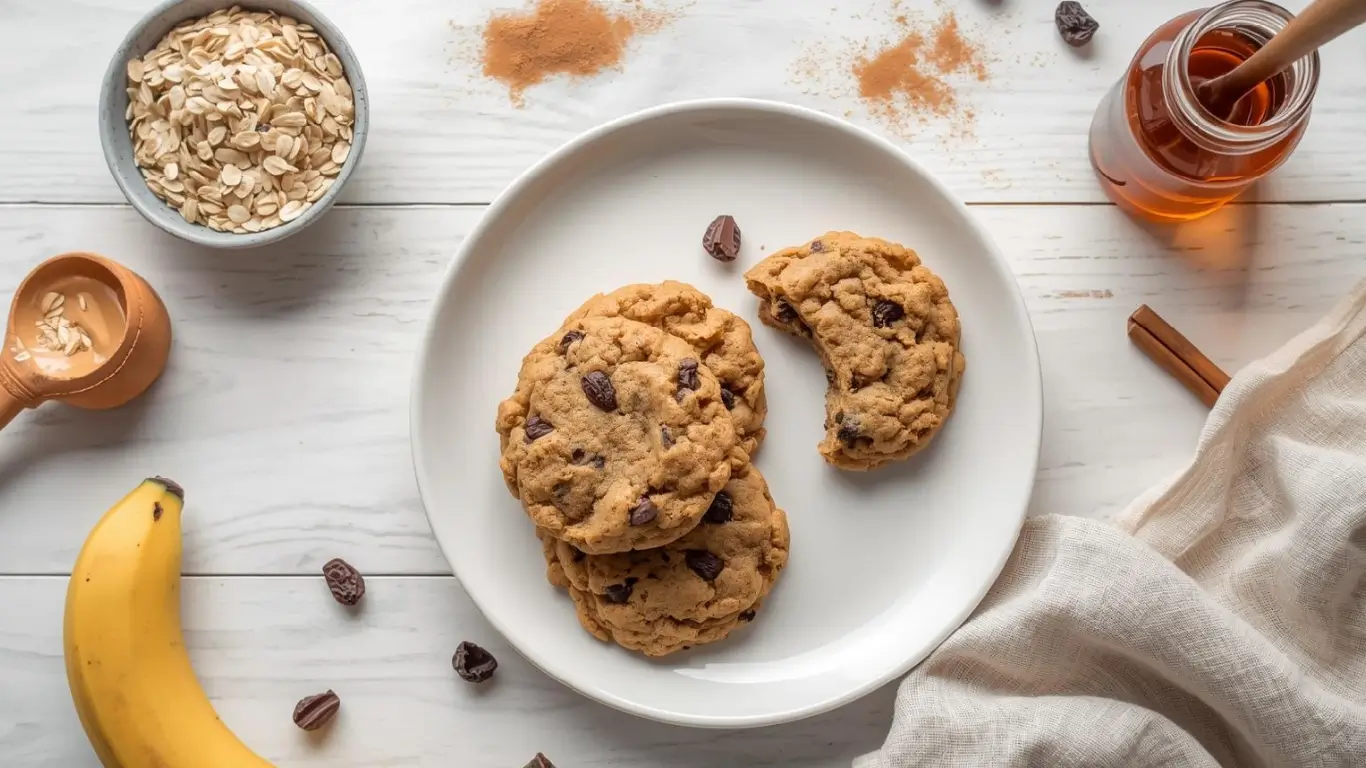
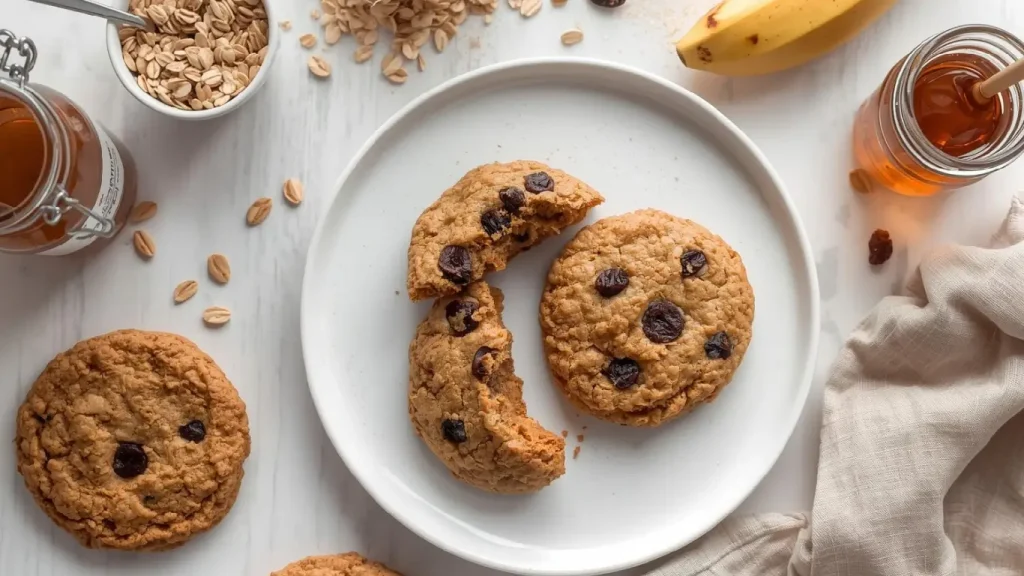
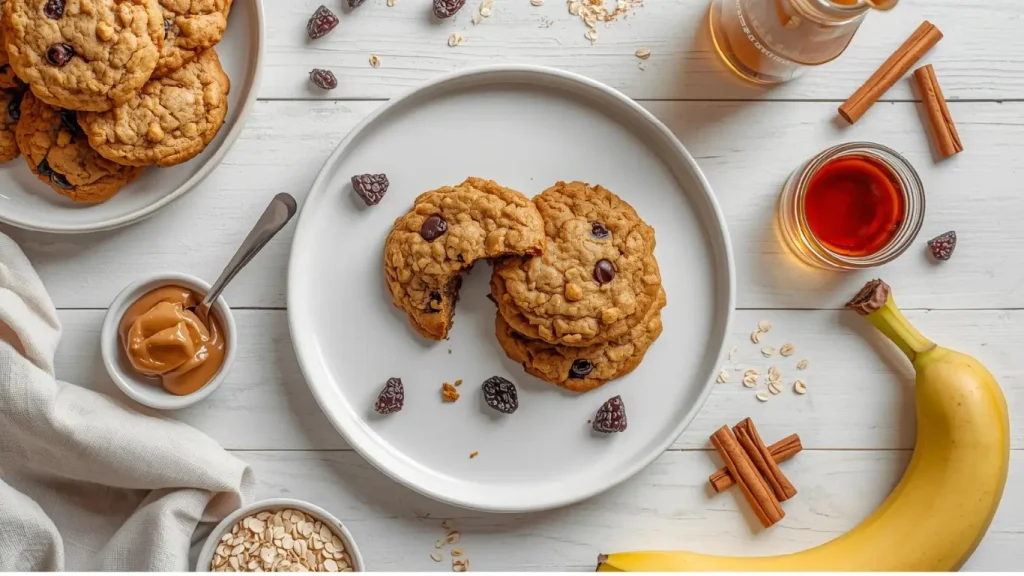
Can a cookie really contain 5 grams of fiber and still taste indulgent? Research shows that oats can reduce LDL cholesterol by up to 7% when consumed regularly, making them a powerhouse ingredient for guilt-free baking. If you’ve been searching for healthy oatmeal cookies that don’t sacrifice flavor for nutrition, you’ve found the perfect recipe. These wholesome treats combine the heartiness of rolled oats with natural sweeteners and nutrient-dense ingredients, creating cookies that satisfy your sweet tooth while supporting your wellness goals. In just 4 simple steps and under 25 minutes, you’ll master the art of baking cookies that are as nourishing as they are delicious—perfect for breakfast on-the-go, post-workout snacks, or anytime you crave something naturally sweet.

Ingredients List
Here’s everything you need to create approximately 18-20 delicious healthy oatmeal cookies:
Dry Ingredients:
- 2 cups old-fashioned rolled oats (not instant; steel-cut oats can be pulsed in a food processor for a chunkier texture)
- 1 cup whole wheat flour or oat flour (oat flour for gluten-free version; all-purpose flour works but reduces fiber content)
- 1 teaspoon baking soda (ensures cookies rise properly and achieve ideal texture)
- 1 teaspoon ground cinnamon (adds warmth; can substitute with pumpkin pie spice for seasonal variation)
- 1/2 teaspoon sea salt (enhances all flavors; don’t skip this crucial ingredient)
Wet Ingredients:
- 1/3 cup coconut oil or unsalted butter (melted; avocado oil works for neutral flavor, while butter adds richness)
- 1/2 cup pure maple syrup or raw honey (provides natural sweetness; date syrup offers deeper caramel notes)
- 2 large eggs (at room temperature for better incorporation; flax eggs work for vegan adaptation—see alternatives section)
- 2 teaspoons pure vanilla extract (enhances sweetness perception without added sugar)
Mix-Ins (Optional but Recommended):
- 1/2 cup dark chocolate chips (70% cacao or higher for antioxidants)
- 1/3 cup chopped walnuts or pecans (adds omega-3s and satisfying crunch)
- 1/4 cup unsweetened shredded coconut (provides tropical flavor and healthy fats)
- 1/3 cup dried cranberries or raisins (natural sweetness and chewy texture)
The beauty of these ingredients lies in their wholesome simplicity—every component serves a nutritional purpose while contributing to that classic oatmeal cookie taste you love.
NutriChef 10-Piece Non-Stick Baking Set – Heavy-Duty Carbon Steel Bakeware with Cookie Sheets, Muffin Pan, Roasting Pan, Cake Pan & Pizza Pan

Timing
Preparation Time: 10 minutes
Baking Time: 12-14 minutes
Cooling Time: 5 minutes
Total Time: 27-29 minutes
This streamlined recipe takes approximately 40% less time than traditional oatmeal cookie recipes that require butter softening, extensive creaming, and multiple mixing bowls. You’ll have freshly baked, aromatic cookies cooling on your counter faster than ordering delivery from a bakery—and with infinitely better ingredients.
Step-by-Step Instructions
Step 1: Prepare Your Workspace and Preheat
Begin by preheating your oven to 350°F (175°C) and positioning a rack in the center for optimal heat circulation. Line two large baking sheets with parchment paper or silicone baking mats—this prevents sticking and promotes even browning without added oils. Gather all your ingredients and measuring tools to create an efficient workflow. Pro tip: having everything at room temperature (especially eggs) ensures better emulsification and a more uniform dough texture. This mise en place approach, borrowed from professional kitchens, reduces mistakes and makes the process enjoyable rather than stressful.
Step 2: Mix Dry and Wet Ingredients Separately
In a large mixing bowl, combine your rolled oats, flour, baking soda, cinnamon, and salt. Whisk thoroughly for 30 seconds to distribute the leavening agent evenly—this prevents pockets of baking soda that can create metallic-tasting spots. In a separate medium bowl, whisk together the melted coconut oil, maple syrup, eggs, and vanilla extract until the mixture appears smooth and slightly frothy, about 1 minute. This aeration incorporates tiny air bubbles that contribute to lighter, more tender cookies. The separate mixing method, preferred by professional bakers, ensures even distribution of ingredients and prevents overmixing, which would create tough, dense cookies.
Step 3: Combine and Fold in Mix-Ins
Pour the wet ingredients into the bowl with dry ingredients. Using a wooden spoon or sturdy silicone spatula, fold the mixture together with gentle, deliberate strokes until just combined—you should still see a few flour streaks. Now add your chosen mix-ins (chocolate chips, nuts, dried fruit) and fold another 5-8 times until evenly distributed throughout the dough. The dough should be thick, slightly sticky, and hold its shape when scooped. If it seems too wet, add 1-2 tablespoons of oats; if too dry, add a teaspoon of milk or water. Resist the urge to overmix—this activates gluten development and results in tough cookies rather than the tender, chewy texture you want.
Step 4: Shape, Bake, and Perfect
Using a medium cookie scoop (about 2 tablespoons) or a spoon, portion the dough onto your prepared baking sheets, spacing cookies 2 inches apart to allow for spreading. Gently press each dough ball with your palm or the back of a spoon to flatten slightly—oatmeal cookies don’t spread as dramatically as other varieties, so this step ensures even thickness and consistent baking. Slide the baking sheets into your preheated oven and bake for 12-14 minutes, rotating the pans halfway through for uniform color. The cookies are done when edges turn golden brown while centers remain soft and appear slightly underbaked—they’ll continue firming up during the cooling process. Remove from the oven and let cookies rest on the baking sheet for 5 minutes (crucial for structural integrity), then transfer to a wire rack to cool completely. This final resting period allows the residual heat to finish the baking process while preventing the bottoms from becoming overly crispy.
Nutritional Information
Per Cookie (based on 20 cookies, with chocolate chips):
- Calories: 135
- Total Fat: 6g (Saturated: 3g)
- Cholesterol: 20mg
- Sodium: 95mg
- Total Carbohydrates: 18g (Dietary Fiber: 2.5g, Sugars: 7g, Added Sugars: 5g)
- Protein: 3g
- Iron: 6% Daily Value
- Magnesium: 8% Daily Value
- Phosphorus: 7% Daily Value
- Zinc: 5% Daily Value
Nutritional Advantages Over Traditional Cookies:
These healthy oatmeal cookies deliver substantially more nutritional value than conventional recipes. With 2.5 grams of fiber per cookie (compared to less than 1 gram in standard cookies), they support digestive health and promote satiety. The whole grain oats provide beta-glucan, a soluble fiber clinically proven to lower cholesterol levels. Each cookie contains 3 grams of protein from eggs and oats—nearly double what you’d find in typical cookies—helping stabilize blood sugar and keep you satisfied longer. By using natural sweeteners like maple syrup, you’re consuming minerals and antioxidants absent in refined white sugar. The inclusion of heart-healthy fats from nuts and coconut oil supports brain function and provides sustained energy without the crash associated with high-sugar treats.
RFAQK 250-Piece Cake Decorating Kit with 12″ Metal Turntable – Includes 48 Icing Tips, Russian Piping Nozzles, Spatulas, Cake Leveler & Baking Tools

Healthier Alternatives for the Recipe
Sugar-Free Version: Replace maple syrup with sugar-free alternatives like monk fruit maple-flavored syrup or use mashed ripe banana (1 cup) for natural sweetness and added moisture. This reduces added sugar by 100% while maintaining sweetness through fruit sugars.
Protein-Boosted Cookies: Add 1/4 cup vanilla protein powder and reduce flour by 1/4 cup, creating cookies with 5-6 grams of protein each—perfect for post-workout recovery. Alternatively, incorporate 2 tablespoons of hemp hearts or chia seeds for plant-based protein and omega-3 fatty acids.
Vegan Adaptation: Replace eggs with flax eggs (2 tablespoons ground flaxseed mixed with 6 tablespoons water, let sit 5 minutes) and use maple syrup instead of honey. Substitute dairy butter with coconut oil. These modifications maintain texture while making cookies completely plant-based.
Gluten-Free Guarantee: Use certified gluten-free oats and replace whole wheat flour with oat flour (blend rolled oats in a food processor until fine). Add 1/4 teaspoon xanthan gum to improve binding and prevent crumbling.
Lower Fat Option: Reduce oil to 1/4 cup and replace with 1/4 cup unsweetened applesauce. This cuts fat content by approximately 30% while maintaining moisture. The cookies will be slightly cakier but still delicious.
Diabetic-Friendly Version: Use sugar-free sweetener (erythritol or allulose) in place of maple syrup, reduce to 1/3 cup, and skip dried fruit. Opt for sugar-free chocolate chips. This modification creates cookies with only 8-9 net carbs per serving.
Nut-Free for Allergies: Omit all nuts and substitute with sunflower seeds or pumpkin seeds for crunch. Replace nut butters with sunflower seed butter if adding spreads. Many school-friendly versions successfully use these adaptations.
Serving Suggestions
Breakfast Power-Ups:
- Crumble 2-3 cookies over Greek yogurt with fresh berries for a protein-packed breakfast parfait
- Sandwich almond butter between two cookies and pair with a banana for sustained morning energy
- Serve warm with a drizzle of nut butter and a glass of cold milk for a satisfying breakfast treat
Snack-Time Perfection:
- Pack in lunchboxes as a wholesome midday treat that provides lasting energy
- Pair with herbal tea or golden milk for an afternoon pick-me-up
- Create cookie butter by blending several cookies with coconut oil for a spreadable treat
Dessert Transformations:
- Warm cookies slightly and top with vanilla Greek yogurt and a sprinkle of cinnamon for a healthier sundae
- Create ice cream sandwiches using frozen yogurt or dairy-free nice cream
- Serve alongside fresh apple slices and sharp cheddar for a sophisticated sweet-and-savory pairing
On-The-Go Options:
- Wrap individually for gym bag snacks that fuel workouts without weighing you down
- Freeze for quick grab-and-go breakfast options during busy mornings
- Pack for hiking or travel as shelf-stable, energy-dense provisions
Kid-Friendly Presentations:
- Let children customize with their choice of mix-ins before baking
- Create cookie “pizza” by pressing dough into a round pan, baking, and topping with yogurt “frosting” and fruit
- Make mini cookies using a smaller scoop for perfect portion control and fun bite-sized treats
Common Mistakes to Avoid
Using Instant Oats: Instant oats turn mushy during baking and create gummy-textured cookies. Always use old-fashioned rolled oats for proper structure and that signature chewy texture. Steel-cut oats are too hard and won’t soften adequately during the brief baking time.
Overmixing the Dough: Once you combine wet and dry ingredients, excessive stirring develops gluten strands that create tough, cake-like cookies instead of tender, chewy ones. Mix just until ingredients are incorporated—a few flour streaks are perfectly fine.
Skipping the Cooling Period: Moving cookies immediately from the baking sheet causes them to break apart. The 5-minute rest allows cookies to set properly. Patience during this step is the difference between perfect cookies and a pile of crumbs.
Incorrect Oven Temperature: Baking at too high a temperature browns exteriors before interiors cook through. Always verify your oven temperature with an oven thermometer—home ovens commonly run 25°F hotter or cooler than the setting indicates.
Not Flattening the Dough: Unlike traditional cookies, oatmeal cookies don’t spread dramatically during baking due to the oats’ absorbent nature. Failing to flatten dough balls results in thick, dome-shaped cookies with potentially undercooked centers.
Measuring Flour Incorrectly: Scooping flour directly from the container compacts it, resulting in 25% more flour than intended. This creates dry, crumbly cookies. Always use the spoon-and-level method: fluff flour, spoon into measuring cup, level with a knife.
Using Cold Ingredients: Cold eggs and coconut oil don’t emulsify properly, creating separated, greasy dough. Room temperature ingredients blend seamlessly for uniform texture and optimal rise.
Overbaking for “Crispness”: Cookies continue baking on the hot pan after removal from the oven. Taking them out when centers look slightly underdone yields perfect texture once cooled. Overbaking creates rock-hard cookies that lose their appealing chewiness.
Storing Tips for the Recipe
Room Temperature Storage: Store completely cooled cookies in an airtight container at room temperature for up to 5 days. Place a sheet of parchment paper between layers to prevent sticking. For maintaining softness, add a piece of fresh bread to the container—the cookies absorb moisture from the bread, staying tender without becoming soggy. Replace the bread slice every 2 days.
Refrigerator Storage: Extend freshness up to 2 weeks by refrigerating cookies in an airtight container. The cool temperature prevents natural oils in nuts and oats from becoming rancid. Let cookies sit at room temperature for 10 minutes before eating, or warm individual cookies in the microwave for 10-15 seconds to restore that fresh-baked texture.
Freezer Storage for Long-Term: These healthy oatmeal cookies freeze beautifully for up to 3 months. Arrange baked cookies in a single layer on a baking sheet and freeze until solid (about 2 hours), then transfer to freezer-safe bags or containers. This flash-freezing method prevents cookies from sticking together. Thaw at room temperature for 30 minutes, or heat frozen cookies in a 300°F oven for 5-7 minutes for that just-baked warmth.
Freezing Unbaked Dough: For ultimate convenience, portion cookie dough onto a parchment-lined baking sheet and freeze until solid. Transfer frozen dough balls to a freezer bag and store for up to 4 months. Bake directly from frozen at 350°F, adding 2-3 extra minutes to the baking time. This method means you can enjoy fresh cookies anytime without the full preparation process.
Make-Ahead Preparation: Prepare the dry ingredients mixture up to 1 week in advance and store in an airtight container. When ready to bake, simply prepare wet ingredients and proceed with the recipe. This time-saving hack is perfect for meal preppers and busy families.
Maintaining Optimal Texture: If cookies become too hard, microwave with a damp paper towel for 10 seconds to restore moisture. If they become too soft or humid, crisp them in a 300°F oven for 3-5 minutes. Proper storage is key—exposure to air is the primary enemy of cookie freshness.
Conclusion
These healthy oatmeal cookies prove that nutritious baking doesn’t require sacrifice. With whole grain oats, natural sweeteners, and customizable mix-ins, they deliver fiber, protein, and sustained energy in every bite. The 4-step method simplifies baking while producing consistently delicious results. Whether you need breakfast options, post-workout fuel, or wholesome snacks, these versatile cookies fit seamlessly into any lifestyle.
Ready to transform your snacking? Try this recipe today and share your creative mix-in combinations in the review section below. We’d love to hear how these cookies have become part of your healthy routine—leave a comment on our blog with your experience. Don’t forget to subscribe for weekly wholesome recipes, baking tips, and nutrition insights delivered straight to your inbox!
FAQs
Can I use quick oats instead of old-fashioned oats?
While possible, quick oats create a softer, less textured cookie because they’re more processed and absorb liquid faster. For best results with proper chew and structure, stick with old-fashioned rolled oats. If using quick oats, reduce baking time by 1-2 minutes.
How do I make these cookies chewier?
For maximum chewiness, slightly underbake by removing cookies when centers still look soft, use honey instead of maple syrup (it retains more moisture), and store cookies with a bread slice to maintain softness. Adding an extra egg yolk also increases chewiness significantly.
Are these cookies suitable for meal prep?
Absolutely! These cookies are ideal for weekly meal prep. Bake a double batch on Sunday, freeze half, and keep the rest in an airtight container. They maintain quality throughout the week and provide convenient, portion-controlled snacks.
Can I reduce the sugar even more?
Yes, you can reduce maple syrup to 1/3 cup, though cookies will be less sweet and slightly drier. Compensate by adding 2 tablespoons of applesauce or mashed banana. Alternatively, use ripe banana (1 cup) to replace all added sweeteners for naturally sweet cookies.
Why are my cookies too flat?
Flat cookies usually result from too much liquid, melted butter that’s too warm, or insufficient flour. Ensure you’re measuring correctly and that melted coconut oil has cooled slightly. Adding 2-3 tablespoons more oats can help if dough seems too loose.
Can I make these without eggs?
Yes, use flax eggs (1 tablespoon ground flaxseed + 3 tablespoons water per egg, let sit 5 minutes) or chia eggs using the same ratio. Commercial egg replacers also work. Vegan versions may be slightly less fluffy but still delicious.
How do I know when oatmeal cookies are done?
Look for golden brown edges while centers remain soft and slightly underdone. Press gently—if the cookie springs back slowly, it’s ready. Remember, cookies firm up considerably during cooling, so slight underbaking is better than overbaking.
Can I add protein powder to this recipe?
Yes! Replace 1/4 cup of flour with vanilla protein powder. Avoid exceeding this amount as too much protein powder creates dry, crumbly cookies. You may need to add 1-2 tablespoons of extra liquid to compensate for protein powder’s absorbency.
What’s the best way to soften hardened cookies?
Place cookies in an airtight container with a damp paper towel (not touching the cookies) overnight. Alternatively, microwave individual cookies for 10 seconds with a damp paper towel. Both methods reintroduce moisture without making cookies soggy.
Your feedback helps other cooks succeed. Rate this recipe!
Finally, a Healthy Cookie That Actually Tastes Good!
“I’ve tried so many ‘healthy’ cookie recipes that turned out dry or bland, but this one is a true winner. The 4-step process was incredibly clear, and the cookies came out perfectly chewy with just the right amount of sweetness. I used the suggested mashed banana as a binder and added dark chocolate chips. My kids had no idea they were eating something wholesome! This recipe has earned a permanent spot in our weekly snack rotation.”
Simple, Customizable, and Perfect Every Time
As someone who meal preps for a healthy lifestyle, this article was a goldmine. The base recipe is fantastic, and the ‘add-in’ suggestions allowed me to make several variations—one with nuts for protein and another with dried cranberries for a tart kick. They held together beautifully and stayed moist for days. The tip about not overmixing the oats was key to the perfect texture. A brilliantly practical and versatile guide!”
My Go-To Guilt-Free Treat
“These cookies are exactly what I’ve been looking for! They’re satisfying, nutritious, and come together in minutes. I appreciated the clear explanations for each step, especially how to tell when they’re perfectly baked (just golden at the edges). I used almond butter and a sprinkle of cinnamon, and the aroma was heavenly. It’s rare to find a recipe that is both genuinely healthy and truly delicious—this one nails it. I’ve already shared it with my entire book club!”