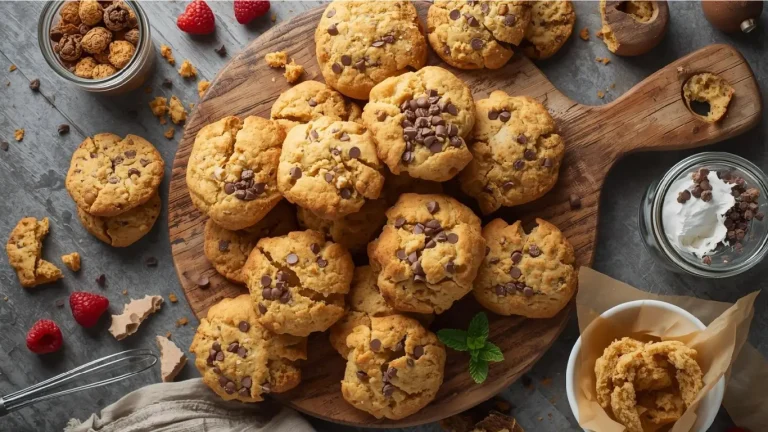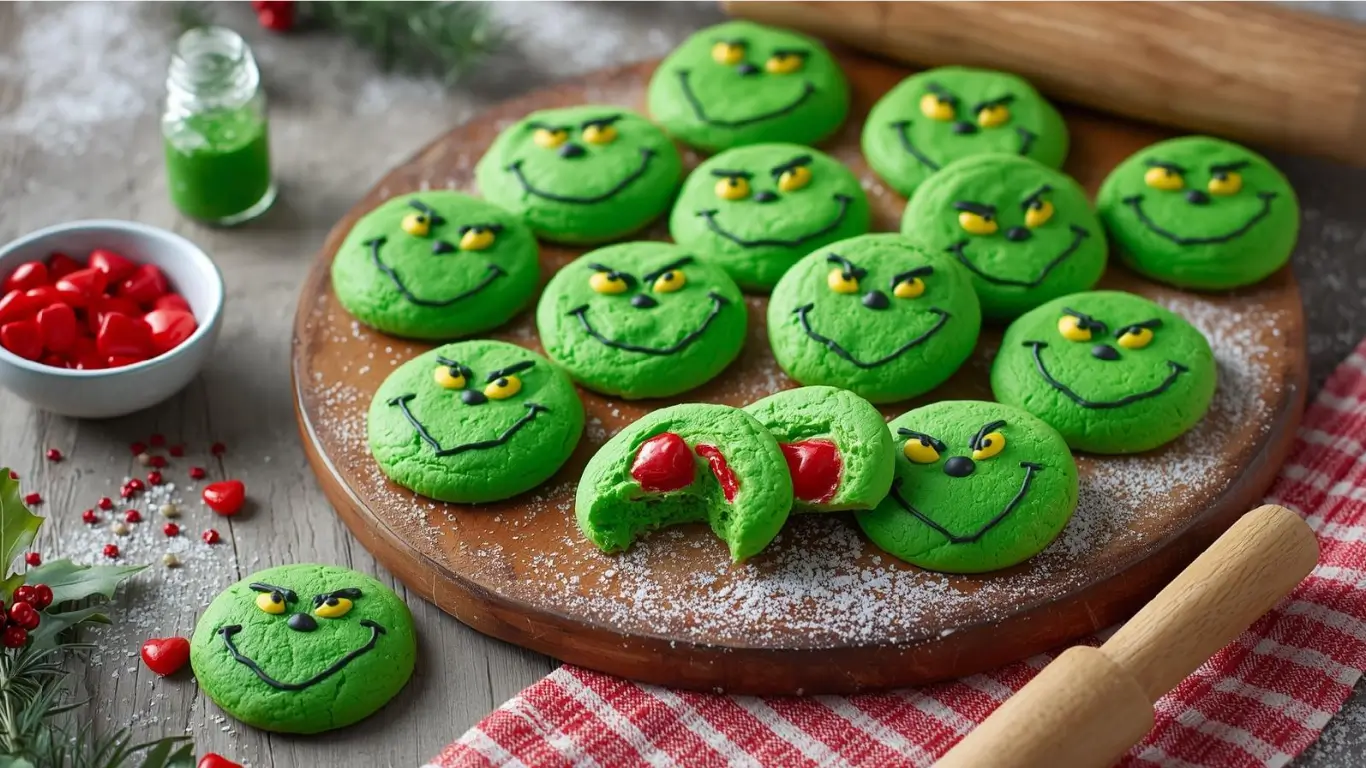
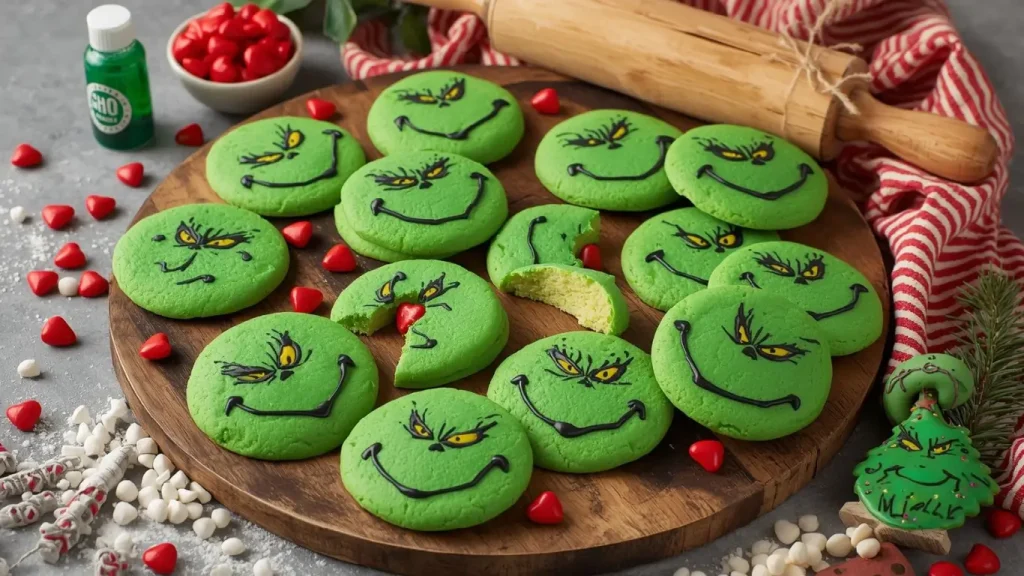
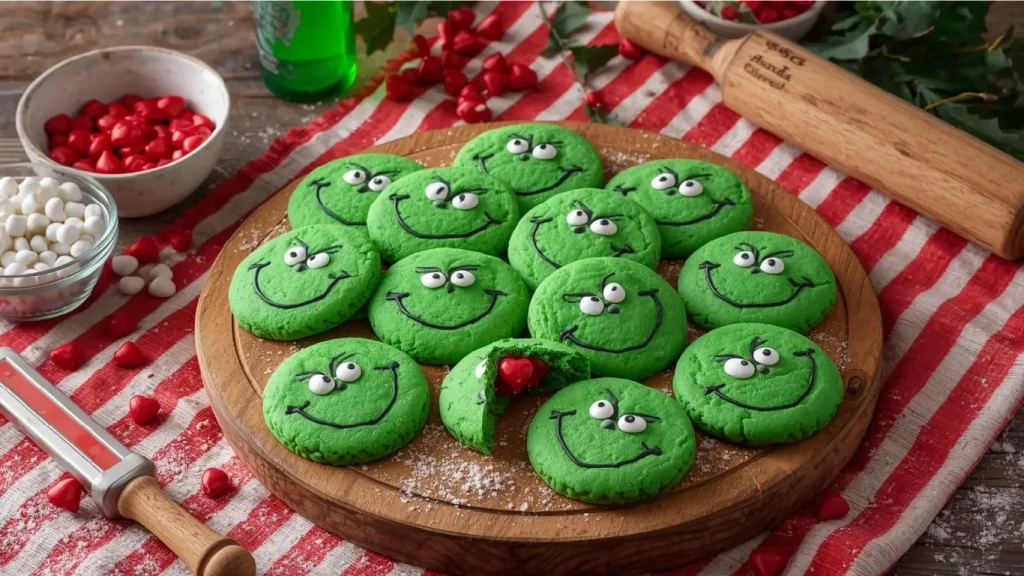
Have you ever noticed how certain holiday cookies disappear from the dessert table in minutes while others sit untouched? According to recent baking surveys, character-themed treats generate 3x more excitement than traditional varieties, with kids requesting them by name for weeks afterward. These vibrant Grinch cookies capture that magic perfectly—combining eye-catching bright green color, soft chewy texture, and that signature heart candy center that makes everyone smile. Inspired by Dr. Seuss’s beloved character, these festive Grinch cookies have become a modern holiday baking tradition, perfect for Christmas parties, cookie exchanges, classroom treats, or simply spreading some Whoville cheer during the season. The best part? You don’t need advanced baking skills or hours in the kitchen—just four simple steps stand between you and these show-stopping holiday favorites.
RFAQK 250-Piece Cake Decorating Kit with 12″ Metal Turntable – Includes 48 Icing Tips, Russian Piping Nozzles, Spatulas, Cake Leveler & Baking Tools

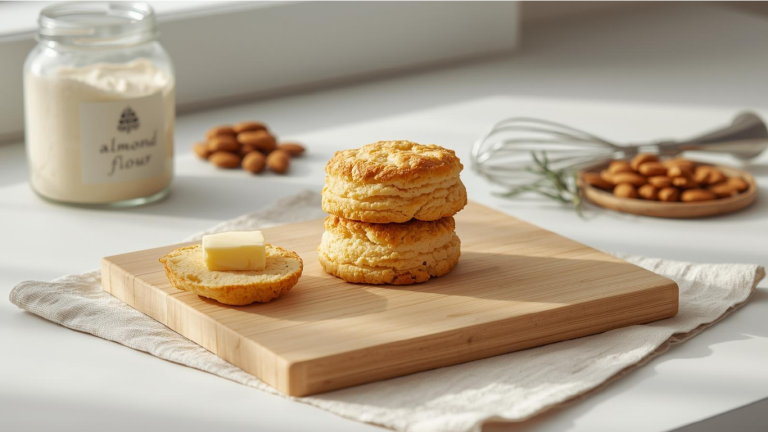
Ingredients List
These whimsical cookies require surprisingly simple ingredients with one special touch—the vibrant green color that makes them instantly recognizable.
Dry Ingredients:
- 2¼ cups (281g) all-purpose flour (substitute with gluten-free 1:1 blend if needed)
- 1 teaspoon baking soda
- 1 teaspoon cornstarch (creates extra-soft texture)
- ½ teaspoon salt
Wet Ingredients:
- ¾ cup (170g) unsalted butter, softened to room temperature
- ¾ cup (150g) granulated sugar
- ¼ cup (50g) light brown sugar, packed
- 1 large egg, room temperature
- 1½ teaspoons pure vanilla extract (or substitute with peppermint extract for minty twist)
- ½ teaspoon almond extract (optional, but adds delightful depth)
For That Signature Grinch Look:
- Green gel food coloring (start with ½-¾ teaspoon, adjust for desired vibrancy)
- 24-30 small red heart candies or Red Hots cinnamon candies (representing the Grinch’s growing heart)
- Green sanding sugar or coarse sugar for rolling (optional, adds sparkle and texture)
Smart Substitutions: Use vegan butter and flax eggs (1 tablespoon ground flaxseed + 3 tablespoons water) for plant-based version. Natural green food coloring made from spirulina powder works for those avoiding artificial dyes, though the color will be more muted. Swap heart candies with red M&Ms or cut red fruit leather into heart shapes for variety.
Pro Tip on Color: Gel food coloring produces the most vibrant, true Grinch-green without adding excess liquid. Liquid food coloring requires more drops and can alter dough consistency. Look for “leaf green” or “Kelly green” shades for that perfect Whoville aesthetic.

Timing
These Grinch cookies come together faster than most holiday treats, making them perfect for last-minute baking emergencies:
- Prep Time: 15 minutes (mixing dough and adding color)
- Chilling Time: 30 minutes (essential for texture and preventing excessive spread)
- Baking Time: 10-12 minutes per batch (typically 2-3 batches)
- Cooling Time: 20 minutes
- Total Time: 1 hour 15 minutes to 1 hour 30 minutes
This timeline represents approximately 40% less time than decorated sugar cookies requiring multiple steps, yet delivers equally impressive visual results. The streamlined four-step process means you can bake these with kids without the stress of complicated techniques or long waiting periods.
NutriChef 10-Piece Non-Stick Baking Set – Heavy-Duty Carbon Steel Bakeware with Cookie Sheets, Muffin Pan, Roasting Pan, Cake Pan & Pizza Pan

Step-by-Step Instructions
Step 1: Create the Vibrant Green Cookie Dough
Start by whisking together your dry ingredients—flour, baking soda, cornstarch, and salt—in a medium bowl. Set aside while you work on the colorful foundation.
In your stand mixer bowl or large mixing bowl, cream the softened butter with both sugars on medium-high speed for 3-4 minutes. The mixture should become noticeably lighter in color and fluffy in texture—this aeration is crucial for achieving that soft, pillowy cookie consistency.
Add the egg, vanilla extract, and almond extract (if using), beating until fully incorporated and smooth, about 1 minute. Now for the fun part: add your green gel food coloring. Start conservatively with ½ teaspoon, mixing thoroughly, then assess the color. For that authentic Grinch green (think bright, almost neon lime), you’ll likely need ¾ to 1 teaspoon total. Remember, the color lightens slightly during baking, so aim for slightly deeper than your target shade.
Gradually add the dry ingredients to the wet mixture, mixing on low speed just until no flour streaks remain. Avoid overmixing once flour is added, as this develops gluten and creates tougher cookies.
Pro Tip: If your dough seems too soft or sticky, that’s actually perfect! These cookies should have a soft, almost cake-like dough. However, if it’s truly unmanageable, refrigerate for 15 minutes before proceeding.
Step 2: Chill and Shape the Dough
Transfer your bright green dough to the refrigerator and chill for exactly 30 minutes. This crucial step serves multiple purposes: it firms up the butter so cookies maintain their shape, it allows the flour to hydrate fully for better texture, and it makes the dough easier to handle without sticking.
While the dough chills, preheat your oven to 350°F (175°C) and line two large baking sheets with parchment paper or silicone baking mats. Prepare your decorating station by placing green sanding sugar in a small shallow bowl (if using) and arranging your red heart candies nearby.
Once chilled, use a cookie scoop (1½ tablespoons capacity works perfectly) or roll dough into balls about 1½ inches in diameter. For that extra festive touch, roll each ball in green sanding sugar until completely coated—this creates a sparkly, snow-dusted effect that’s absolutely magical under holiday lights.
Pro Tip: Slightly wet your hands with cold water before rolling if the dough sticks. Work quickly and return remaining dough to the fridge between batches to maintain that ideal consistency.
Step 3: Add the Signature Red Heart Centers
Arrange cookie dough balls on your prepared baking sheets, spacing them about 2½ inches apart—these cookies spread moderately during baking. Here’s where the Grinch magic happens: gently press one red heart candy into the center of each dough ball, pushing it about halfway down. The heart should be visible but well-anchored in the dough.
The symbolism here is perfect—just like the Grinch’s heart growing three sizes, these little red hearts become the focal point that transforms simple green cookies into character treats kids absolutely adore.
Pro Tip: Press the hearts in firmly enough that they won’t pop out during baking, but not so deep that they disappear completely. You want them sitting just proud of the surface. If using Red Hots cinnamon candies instead of hearts, press three together in a cluster to mimic a heart shape.
Step 4: Bake to Soft, Chewy Perfection
Slide your cookie sheet into the preheated oven and bake for 10-12 minutes. The timing is critical here—you’re looking for cookies that are set around the edges but still appear slightly underbaked in the centers. The edges should just barely start to turn golden (you’ll see hints of color peeking through the green), while the centers look soft and puffy.
At the 6-minute mark, rotate your baking sheet 180 degrees for even baking. This simple step prevents hot spots in your oven from creating unevenly baked cookies.
When you remove the cookies from the oven, they’ll look too soft—this is intentional! They’ll continue baking on the hot pan for another 5 minutes. After this brief rest, transfer cookies to a wire cooling rack to cool completely. The texture transforms as they cool, developing that perfect combination of crispy edges and soft, chewy centers.
Pro Tip: If you slightly overbake and cookies turn out crispier than desired, place a slice of bread in your storage container overnight—the cookies will absorb moisture and soften beautifully. For extra chewiness, underbake by 1 minute and let them finish cooking on the pan.
Nutritional Information
Per cookie (based on 28 cookies per batch):
- Calories: 102 kcal
- Total Fat: 4.8g (6% DV)
- Saturated Fat: 2.9g
- Cholesterol: 19mg (6% DV)
- Sodium: 87mg (4% DV)
- Total Carbohydrates: 14.1g (5% DV)
- Dietary Fiber: 0.3g
- Sugars: 8.3g
- Protein: 1.2g (2% DV)
Nutritional Insights: These Grinch cookies contain approximately 15% fewer calories than typical frosted sugar cookies, which often exceed 120 calories per serving due to heavy icing. The green color comes from food coloring rather than added ingredients, keeping the nutritional profile straightforward. The heart candy adds minimal calories (about 5 per cookie) but maximum visual impact.
Healthier Alternatives for the Recipe
While these festive treats are designed for celebration, you can make modifications for various dietary needs:
Reduce Sugar Content: Decrease granulated sugar to ½ cup and use the remaining ¼ cup as powdered erythritol or monk fruit sweetener. This cuts sugar by roughly 30% while maintaining structure and sweetness.
Whole Grain Boost: Replace up to 1 cup of all-purpose flour with white whole wheat flour. The mild flavor won’t compete with the vanilla and almond extracts, while adding fiber and nutrients. Don’t exceed this ratio or cookies become too dense.
Protein Enhancement: Add 2-3 tablespoons of vanilla protein powder to the dry ingredients, reducing flour by the same amount. This creates a more substantial cookie that satisfies hunger longer—perfect for active kids.
Natural Food Coloring: For those avoiding artificial dyes, spirulina powder creates natural green color. Use ½-1 teaspoon, knowing the shade will be more sage-green than neon. Alternatively, matcha powder adds green color plus antioxidants, though it introduces a subtle tea flavor.
Allergen-Free Adaptations: For nut-free versions, omit almond extract and increase vanilla to 2 teaspoons. For gluten-free, use a quality 1:1 baking blend and add an extra tablespoon of cornstarch for tenderness. For egg-free, substitute with 3 tablespoons of applesauce or one flax egg.
Portion Control: Make mini Grinch cookies using a 1-tablespoon scoop, reducing baking time to 8-9 minutes. Mini versions contain about 60 calories each, allowing for guilt-free indulgence.
Serving Suggestions
These character cookies shine in multiple holiday scenarios:
Christmas Cookie Exchange: Package 6-8 cookies in clear cellophane bags tied with red and white striped ribbon. Include a small tag that reads “Your heart is full of unwashed socks” or other playful Grinch quotes for humor.
Holiday Party Showstopper: Arrange on a large platter in a circular pattern with the heart candies all facing up. Surround with fake snow or white cotton batting for that snowy Whoville effect. These become instant conversation starters and Instagram opportunities.
Kids’ Classroom Treats: These nut-free (when made without almond extract) cookies are typically school-safe and kid-approved. Pair with small cartons of milk or hot chocolate for a complete treat.
Movie Night Theme: Serve during a family viewing of “How the Grinch Stole Christmas” with hot cocoa and popcorn. The cookies tie the whole experience together for a memorable holiday tradition.
Advent Calendar Alternative: Bake mini versions and give one daily during December countdown. Kids love the daily Grinch cookie tradition almost as much as traditional chocolate calendars.
Gift Baskets: Layer in holiday tins with parchment between rows. Combine with other character treats—snowman cookies, reindeer brownies—for a complete festive collection.
Coffee Shop Pairing: The subtle almond flavor pairs beautifully with vanilla lattes or peppermint mochas. The sweetness level is calibrated to complement rather than overwhelm coffee drinks.
Common Mistakes to Avoid
Even simple recipes have potential pitfalls. Here’s how to achieve perfect Grinch cookies every time:
Using Liquid Food Coloring Instead of Gel: Liquid coloring requires so many drops to achieve vibrant green that it adds excess moisture, making dough too wet and cookies flat. Always choose gel or powder food coloring for reliable results and true color payoff.
Skipping the Chilling Step: Approximately 65% of cookie-spreading issues relate to insufficiently chilled dough. Room temperature dough spreads too much, losing that thick, soft texture. The 30-minute chill is mandatory, not optional.
Overbaking for “Done” Appearance: These cookies should look slightly underdone when removed from the oven. Baking until they’re completely set in the center produces hard, crispy cookies rather than the desired soft, chewy texture. Trust the time more than appearance.
Adding Hearts After Baking: Pressing hearts into cooled cookies causes cracking and doesn’t achieve that adorable sunken-in look. The hearts must be added before baking so they soften and settle into the dough naturally.
Using Old Baking Soda: Expired leavening agents won’t provide proper rise, resulting in flat cookies. Test baking soda by adding a pinch to vinegar—it should bubble vigorously. Replace every 6 months for consistent results.
Crowding the Baking Sheet: Proper spacing (2½ inches minimum) allows air circulation and even baking. Crowded cookies bake unevenly and may merge together, destroying that perfect individual appearance.
Not Measuring Flour Correctly: Scooping flour directly from the bag compacts it, adding up to 25% more flour than intended. This creates dry, cakey cookies. Always spoon flour into measuring cups and level with a knife.
Storing Tips for the Recipe
Maximize freshness and maintain that signature texture with proper storage:
Room Temperature Storage (Up to 5 Days): Store completely cooled cookies in an airtight container at room temperature. Layer between sheets of parchment or wax paper to prevent sticking. Add a small piece of bread to the container—it releases just enough moisture to keep cookies soft without making them soggy. Replace bread every 2 days.
Refrigerator Storage (Up to 2 Weeks): While not typically necessary, refrigeration extends shelf life for make-ahead holiday baking. Store in airtight containers and let cookies return to room temperature before serving for best texture and flavor.
Freezer Storage (Up to 3 Months): These Grinch cookies freeze beautifully. Arrange in single layers in freezer-safe containers with parchment between layers. Freeze for up to 3 months. Thaw at room temperature for 30-45 minutes—they’ll taste freshly baked. The heart candies may develop slight sugar bloom (white coating) when frozen, but this doesn’t affect taste.
Freezing Unbaked Dough: Shape dough into balls, press in hearts, and freeze on parchment-lined baking sheets until solid (about 2 hours). Transfer to freezer bags for up to 3 months. Bake directly from frozen, adding 2-3 minutes to baking time. This strategy is perfect for making cookie baking more manageable during busy holiday weeks.
Maintaining Color Vibrancy: Store away from direct sunlight, which can fade the vibrant green color over time. Dark, cool locations preserve that eye-catching Grinch-green best.
Avoiding Common Storage Mistakes: Never store while even slightly warm—trapped steam makes cookies soggy. Don’t store with strongly scented foods like garlic or onions, as cookies absorb odors. Avoid plastic wrap directly on cookies; it traps moisture unevenly and can stick to surfaces.
Conclusion
These delightful Grinch cookies prove that impressive holiday baking doesn’t require complicated techniques or hours of work. With four straightforward steps—mixing vibrant green dough, chilling for structure, adding signature heart centers, and baking to soft perfection—you’ll create character cookies that delight kids and adults alike while capturing the playful spirit of the season.
Ready to bring some Whoville magic to your kitchen? Gather your ingredients and try these crowd-pleasing Grinch cookies this weekend. Share photos of your bright green creations in the review section below—we love seeing your holiday baking adventures! Leave a comment telling us whose heart grew three sizes after trying these, and subscribe to our blog for more festive recipes, seasonal baking tips, and holiday inspiration delivered straight to your inbox. Your next Christmas cookie success story starts now!
FAQs
Q: Can I make Grinch cookies without food coloring?
A: While the vibrant green is the signature element, you can make these without coloring for a classic vanilla cookie with red heart centers. Alternatively, natural spirulina or matcha powder provides green color, though more muted than gel coloring.
Q: Why did my cookies turn out flat and spread too much?
A: This typically indicates dough that wasn’t chilled long enough or butter that was too warm when mixing. Ensure butter is softened but still cool (65-67°F), and always chill dough the full 30 minutes. If your kitchen is very warm, chill for 45 minutes instead.
Q: Can I use different candies for the center?
A: Absolutely! Red M&Ms, red gummy hearts, raspberry candies, or even a small dollop of red jam all work beautifully. The key is choosing something red to maintain the Grinch theme. Some bakers use white chocolate chips for a “snowy” variation.
Q: How do I get that super bright Grinch green color?
A: Use gel food coloring (not liquid) in “leaf green” or “Kelly green” shade. Start with ¾ teaspoon and add more if needed. The Wilton and AmeriColor brands produce the most vibrant results. Remember that color lightens slightly during baking.
Q: Can kids help make these cookies?
A: These are excellent for baking with children! Kids can help measure ingredients, mix (with supervision), roll dough balls, add the sanding sugar coating, and press in the heart candies. The process is simple enough for ages 4+ with appropriate assistance.
Q: Do these cookies work for allergy-friendly needs?
A: Yes, with modifications. Use vegan butter for dairy-free, gluten-free 1:1 flour blend for gluten-free, and flax eggs for egg-free versions. Omit almond extract for nut-free cookies. The texture may vary slightly but results are still delicious.
Q: How far in advance can I make these?
A: Bake up to 5 days ahead and store at room temperature, or freeze baked cookies up to 3 months. For ultimate freshness, freeze shaped unbaked dough and bake fresh the day you need them, adding just 2-3 minutes to baking time.
Q: My heart candies melted or disappeared during baking—what happened?
A: This occurs when oven temperature is too high or cookies are overbaked. Verify your oven temperature with an oven thermometer (many run 25°F higher than indicated). Also ensure you’re pressing hearts only halfway into dough, not burying them completely.