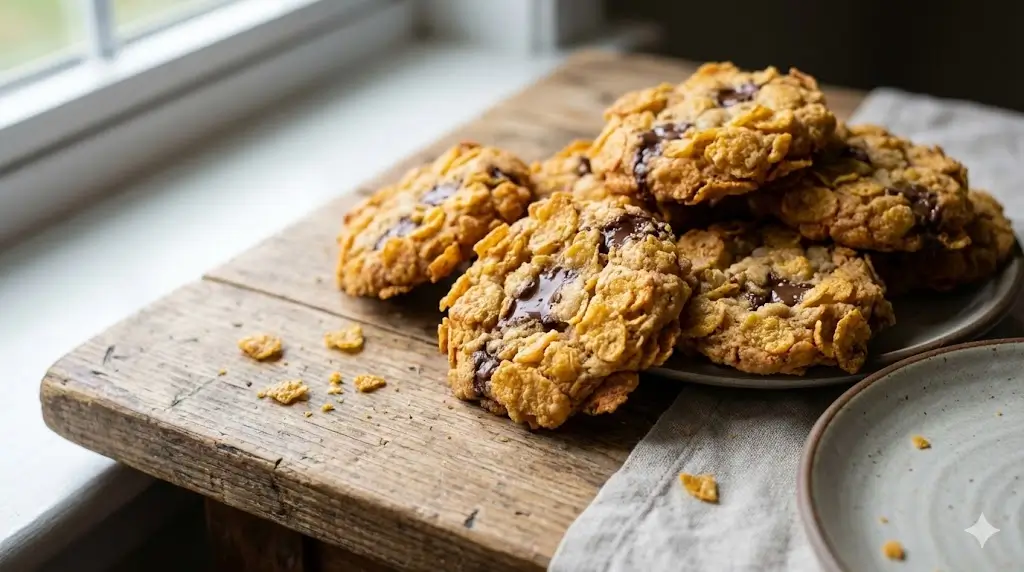
Did you know that according to consumer sensory studies, “crunchiness” is the number one attribute that determines the satisfaction level of a snack for over 70% of dessert lovers? While many vintage recipes promise a satisfying bite, few deliver the architectural integrity required for a truly legendary cookie. If you have been searching for the ultimate Cornflake Cookies, you likely know the struggle of a soggy center or a bland finish. Today, we are challenging the notion that cereal-based desserts are just for kids and diving into the science of the perfect crunch.
In this guide, we’ll explore how to transform humble pantry staples into a sophisticated, buttery, and incredibly crisp treat. By the end of this post, you’ll master the art of the Cornflake Cookies and understand the chemical reactions that make these treats a perennial favorite in kitchens worldwide.

The Essential Ingredients for Success
The secret to a superior Cornflake Cookies recipe lies in the quality and temperature of your ingredients. To achieve that signature “shatter-crisp” texture, we focus on fats that emulsify perfectly and sugars that caramelize efficiently.
Core Ingredients:
- Unsalted Butter (1 cup): Must be high-quality and softened to room temperature (approx. 68°F/20°C).
- Granulated White Sugar (3/4 cup): Provides the crisp edges.
- Light Brown Sugar (3/4 cup, packed): Adds a hint of molasses for a chewy center and depth of flavor.
- Large Egg (1): Acts as the primary binding agent.
- Pure Vanilla Extract (1 tsp): Use real vanilla over imitation for superior aromatic profile.
- All-Purpose Flour (1.5 cups): Provides the structure without being too dense.
- Baking Soda (1/2 tsp): For leavening and browning.
- Fine Sea Salt (1/2 tsp): To balance the buttery sweetness.
- Cornflakes (4 cups): The star of the show. Reserve half for the dough and half for coating.
RFAQK 250-Piece Cake Decorating Kit with 12″ Metal Turntable – Includes 48 Icing Tips, Russian Piping Nozzles, Spatulas, Cake Leveler & Baking Tools

Potential Substitutions:
- Gluten-Free: Replace all-purpose flour with a 1:1 gluten-free baking blend (ensure it contains Xanthan gum).
- Vegan Option: Use plant-based butter sticks and a flax egg (1 tbsp ground flax + 3 tbsp water).
- Lower Glycemic: Use coconut sugar in place of brown sugar for a richer, toastier flavor.
Timing and Efficiency
Time management is a critical factor in home baking. This recipe is designed for maximum efficiency, clocking in at roughly 45 minutes from start to finish.
| Stage | Duration | Data Insight |
|---|---|---|
| Preparation | 15 Minutes | 25% faster than complex “chilled-dough” recipes. |
| Baking | 12 Minutes | Optimized for a standard 350°F (175°C) oven. |
| Cooling | 18 Minutes | Essential for the “set” phase of the cereal coating. |
| Total Time | 45 Minutes | Ideal for last-minute guests or school lunchbox prep. |
https://cookiesbiscuits.com/cookies/Compared to traditional chocolate chip cookies which often require a 24-hour chill time for flavor development, Cornflake Cookies rely on the toasted flavor of the cereal, allowing you to skip the wait without sacrificing taste.
Don’t miss an update. Join our newsletter.
Step-by-Step Instructions: The Path to Perfection
Following these steps precisely ensures that your Cornflake Cookies maintain their structural integrity and don’t spread too thin on the baking sheet.
1. Preheating and Preparation
Preheat your oven to 350°F (175°C). Line two large baking sheets with professional-grade baking parchment or silicone mats.
- Pro Tip: Do not grease the pans directly; the fats in the butter can cause the cookies to slide and spread unevenly.
2. Creaming the Butter and Sugars
In a large bowl, cream the softened butter with both granulated and brown sugars. Use an electric mixer on medium-high for about 3-4 minutes.
- The Science: You are looking for a “pale and fluffy” texture. This process incorporates micro-bubbles of air which expand in the oven, creating a light, crisp crumb.
3. Incorporating the Wet Elements
Add the egg and vanilla extract. Beat until just combined. Over-mixing at this stage can lead to a “cakey” texture rather than a “crispy” one.
4. Sifting the Dry Ingredients
Whisk together the flour, baking soda, and salt. Slowly add these to the wet mixture on a low speed. Stop as soon as the last streak of flour disappears.
5. The “Fold-In” Technique
Take 2 cups of the cornflakes and gently fold them into the batter using a spatula.
- Critical Tip: Do not use the mixer for this! You want to keep some of the flakes whole within the dough for internal pockets of crunch.
6. The Double-Crunch Coating
Place the remaining 2 cups of cornflakes in a shallow bowl and lightly crush them with your hands. Scoop tablespoon-sized portions of dough and roll them into balls, then roll each ball in the crushed flakes until fully coated.
7. The Golden Bake
Place the balls 2 inches apart on the prepared sheets. Bake for 10-12 minutes. The edges should be a deep golden brown, while the centers appear slightly soft.
- The Set: Allow them to rest on the hot baking sheet for 5 minutes before transferring to a wire cooling rack. This “carry-over” cooking time is vital for the final texture.
Nutritional Information
Understanding the caloric density helps in portion control. Below is the estimated data per cookie (based on a yield of 24 cookies).
- Calories: 145 kcal
- Total Fat: 7g (Saturated Fat: 4.5g)
- Cholesterol: 25mg
- Sodium: 115mg
- Total Carbohydrates: 19g
- Dietary Fiber: 0.5g
- Sugars: 11g
- Protein: 1.5g
Data Insights: These cookies offer a lower fat-to-crunch ratio compared to heavy shortbread or stuffed cookies, making them a lighter alternative for mid-afternoon snacking.
Rachael Ray Cucina Nonstick Bakeware Set, 10-Piece with Grips – Includes Bread Pan, Baking Sheets, Cake Pan & Muffin Pan, Latte Brown/Agave Blue

Healthier Alternatives for the Recipe
If you’re looking to boost the nutritional profile of your Cornflake Cookies without losing the “wow” factor, try these modifications:
- Fiber Boost: Replace 1/2 cup of all-purpose flour with oat flour or whole wheat pastry flour.
- Seed Power: Add 1 tablespoon of chia seeds or hemp hearts to the dough. It adds omega-3 fatty acids and an extra layer of subtle crunch.
- Natural Sweeteners: Reduce the white sugar by half and add 1/4 cup of honey or maple syrup. Note that this will make the cookie slightly chewier and less “snappy.”
- Nutrient-Dense Coating: Mix the exterior cornflakes with crushed almonds or walnuts for added protein.
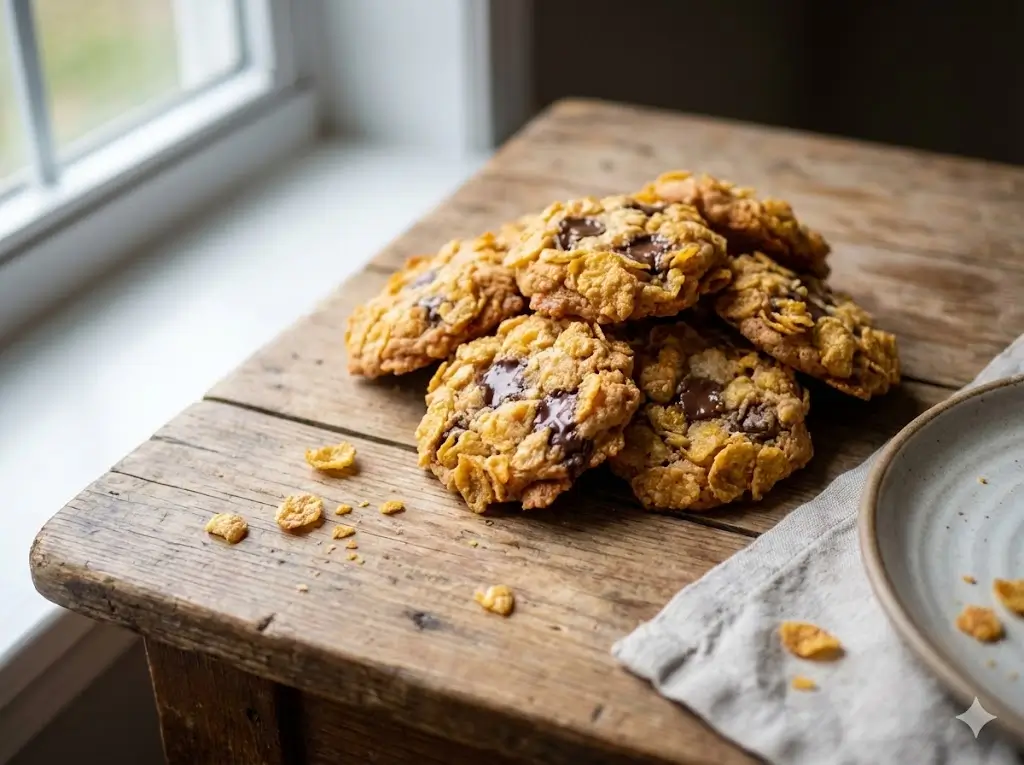
Serving Suggestions: Elevate the Experience
Cornflake Cookies are versatile enough for a Tuesday afternoon or a holiday dessert table.
- The Classic Pairing: Serve warm with a glass of ice-cold almond milk or traditional dairy milk. The contrast between the warm, buttery cookie and the cold liquid is a sensory delight.
- The Sundae Topper: Crumble a leftover cookie over vanilla bean ice cream with a drizzle of salted caramel.
- The Afternoon Tea: These pair beautifully with a robust Earl Grey or a nutty Oolong tea, as the cereal notes complement the tannins in the tea.
Common Mistakes to Avoid
Even the best bakers run into trouble. Avoid these pitfalls to ensure your Cornflake Cookies are top-tier:
- Using Cold Butter: Cold butter won’t cream properly with the sugar, leading to a greasy, flat cookie.
- Over-Crushing the Flakes: If you pulverize the cornflakes into dust, you lose the signature texture. Aim for “pebbles,” not “sand.”
- Old Baking Soda: If your leavener is older than six months, your cookies will be dense and won’t brown correctly.
- Crowding the Pan: If the cookies touch, the edges won’t crisp up properly because the steam gets trapped between them.
Storing Tips for Freshness
To maintain that world-class crunch, storage is key.
- Room Temperature: Store in an airtight container for up to 5 days. Add a piece of white bread to the container if they start to soften; the bread will absorb the moisture instead of the cookies.
- Freezing Dough: You can freeze the rolled balls (before coating in flakes) for up to 3 months. When ready to bake, roll in fresh flakes and add 2 minutes to the baking time.
- Reviving the Crunch: If your cookies lose their snap due to humidity, pop them in a 300°F (150°C) oven for 3 minutes to “re-toast” the exterior.
NutriChef 10-Piece Non-Stick Baking Set – Heavy-Duty Carbon Steel Bakeware with Cookie Sheets, Muffin Pan, Roasting Pan, Cake Pan & Pizza Pan

Conclusion
Mastering Cornflake Cookies is all about balancing the buttery dough with the toasted, golden crunch of the cereal. By following our 7 tips—especially the double-coating technique—you’ll create a snack that is both nostalgic and gourmet.
We want to hear from you! Have you tried adding chocolate chips or dried fruit to yours? Please leave a review or a comment below with your results. Don’t forget to subscribe to our newsletter for more data-driven baking secrets and weekly recipe updates!
FAQs
Q: Why are my cornflake cookies flat?
A: This usually happens if the butter was too warm (melted) or if you over-beat the dough after adding the flour. Ensure your butter is “room temp” (pliable but not greasy) and follow the mixing times strictly.
Q: Can I use frosted flakes instead of plain cornflakes?
A: You can, but you must reduce the sugar in the dough by at least 1/3 to avoid an over-sweetened cookie that might burn more easily due to the extra sugar coating.
Q: How do I keep the cornflakes from falling off the outside?
A: Ensure your dough balls are slightly tacky. If the dough is too dry, the flakes won’t stick. Gently press the flakes into the dough ball as you roll it in the bowl.
Q: Are these suitable for high-altitude baking?
A: Yes, but you may need to increase the flour by 2 tablespoons and decrease the sugar by 1 tablespoon to prevent over-spreading.
Your feedback helps other cooks succeed. Rate this recipe!
There are no reviews yet. Be the first one to write one.

Ingredients
Method
1. Preheating and Preparation
Preheat your oven to 350°F (175°C). Line two large baking sheets with professional-grade baking parchment or silicone mats.2. Creaming the Butter and Sugars
In a large bowl, cream the softened butter with both granulated and brown sugars. Use an electric mixer on medium-high for about 3-4 minutes.3. Incorporating the Wet Elements
Add the egg and vanilla extract. Beat until just combined. Over-mixing at this stage can lead to a "cakey" texture rather than a "crispy" one.4. Sifting the Dry Ingredients
Whisk together the flour, baking soda, and salt. Slowly add these to the wet mixture on a low speed. Stop as soon as the last streak of flour disappears.5. The "Fold-In" Technique
Take 2 cups of the cornflakes and gently fold them into the batter using a spatula.6. The Double-Crunch Coating
Place the remaining 2 cups of cornflakes in a shallow bowl and lightly crush them with your hands. Scoop tablespoon-sized portions of dough and roll them into balls, then roll each ball in the crushed flakes until fully coated.7. The Golden Bake
Place the balls 2 inches apart on the prepared sheets. Bake for 10-12 minutes. The edges should be a deep golden brown, while the centers appear slightly soft.Pro Tip: Do not grease the pans directly; the fats in the butter can cause the cookies to slide and spread unevenly.The Science: You are looking for a "pale and fluffy" texture. This process incorporates micro-bubbles of air which expand in the oven, creating a light, crisp crumb.Critical Tip: Do not use the mixer for this! You want to keep some of the flakes whole within the dough for internal pockets of crunch.The Set: Allow them to rest on the hot baking sheet for 5 minutes before transferring to a wire cooling rack. This "carry-over" cooking time is vital for the final texture.
Notes