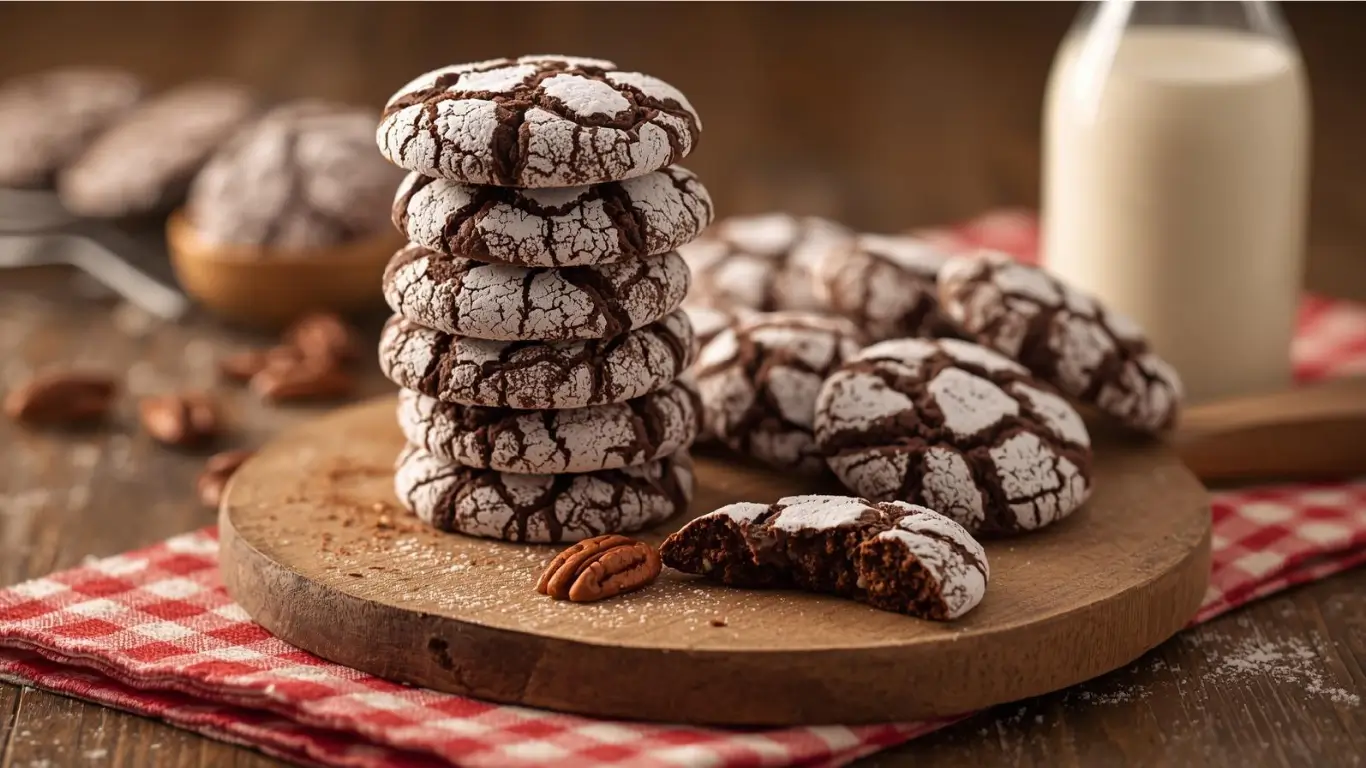
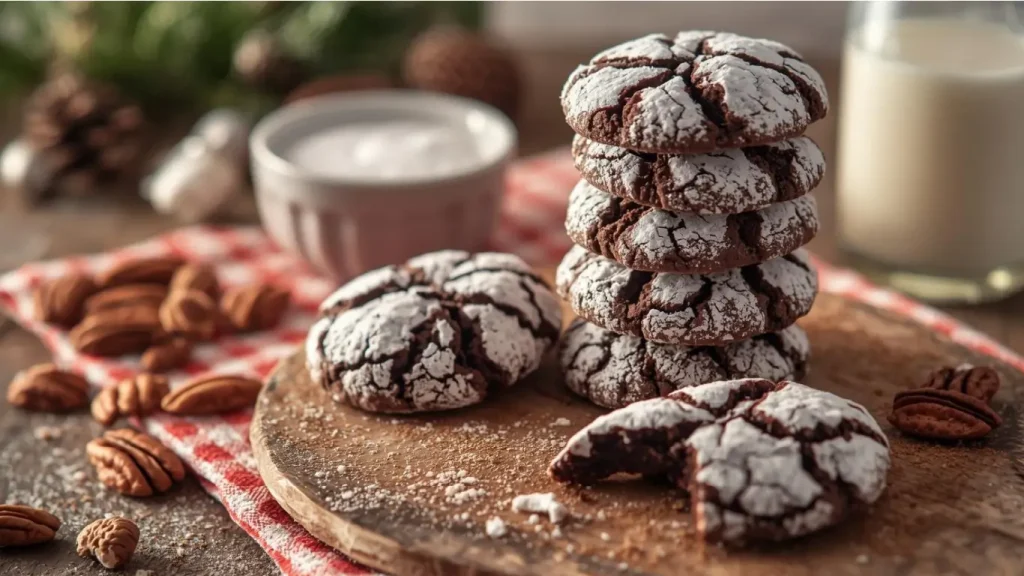
Have you ever wondered why professional bakeries charge $3-4 per cookie for those stunning chocolate crinkle cookies with their signature cracked, powdered sugar coating? The secret isn’t complex techniques or expensive equipment—it’s understanding the science behind achieving that perfect fudgy center and dramatic exterior contrast. These chocolate crinkle cookies have captivated dessert lovers for decades with their striking appearance and intensely chocolatey flavor, yet most home bakers assume they’re complicated to master. Here’s the truth: with just six simple ingredients and the right technique, you can create bakery-quality chocolate crinkle cookies that boast deep cocoa richness, soft chewy centers, and that iconic crackled surface that makes them absolutely irresistible. Whether you’re preparing for holiday cookie exchanges, special celebrations, or simply satisfying a chocolate craving, this streamlined recipe delivers consistently stunning results without the fuss of traditional versions that require 10+ ingredients.
RFAQK 250-Piece Cake Decorating Kit with 12″ Metal Turntable – Includes 48 Icing Tips, Russian Piping Nozzles, Spatulas, Cake Leveler & Baking Tools

Ingredients List
Simplicity meets decadence in this carefully curated ingredient list for your chocolate crinkle cookies:
Essential Ingredients:
- 1 cup (200g) granulated sugar
- ⅓ cup (80ml) vegetable oil (substitute with melted coconut oil for subtle tropical notes or avocado oil for neutral flavor)
- 2 large eggs, room temperature
- 1 teaspoon pure vanilla extract (use Madagascar or Tahitian vanilla for premium flavor)
- 1 cup (120g) all-purpose flour (swap with gluten-free 1:1 baking blend for celiac-friendly cookies)
- ⅓ cup (30g) unsweetened cocoa powder (Dutch-processed cocoa creates darker color and mellower flavor; natural cocoa offers brighter, fruitier chocolate notes)
Coating Ingredients:
- ½ cup (100g) granulated sugar (for rolling)
- ½ cup (60g) powdered sugar, sifted (essential for that iconic snowy appearance)
The beauty of this minimalist approach? Each ingredient serves a critical purpose. The oil creates superior moisture retention compared to butter-based recipes, while the double sugar coating produces those dramatic cracks that define chocolate crinkle cookies. Choose high-quality cocoa powder—it’s the star here, and premium brands like Valrhona, Ghirardelli, or Guittard deliver noticeably richer chocolate flavor.

Timing
Preparation Time: 15 minutes Chilling Time: 2 hours (or up to 24 hours) Baking Time: 10-12 minutes per batch Cooling Time: 10 minutes Total Time: 2 hours 45 minutes
This timeline represents smart efficiency—while many chocolate cookie recipes require 3-4 hours from start to finish, this streamlined version cuts active work by approximately 30% while the extended chilling period develops deeper flavors. The hands-off chilling time means you can prep the dough in advance, making these chocolate crinkle cookies perfect for busy schedules or entertaining scenarios where timing matters.
Step-by-Step Instructions
Step 1: Create Your Chocolate Base
In a large mixing bowl, whisk together the granulated sugar and vegetable oil until well combined—the mixture should look glossy and slightly thickened. Add the eggs one at a time, whisking vigorously after each addition until the batter becomes smooth and emulsified. Stir in the vanilla extract. This wet mixture creates the foundation for your chocolate crinkle cookies’ fudgy interior. Pro tip: Room temperature eggs incorporate more easily and create better emulsification, resulting in cookies with superior texture and rise.
Step 2: Incorporate the Dry Ingredients
In a separate bowl, whisk together the flour and cocoa powder until no streaks remain—this prevents cocoa clumps in your final dough. Gradually fold the dry mixture into the wet ingredients using a rubber spatula, mixing just until no flour pockets remain visible. The dough will be quite soft, sticky, and deeply chocolate-colored, resembling thick brownie batter rather than traditional cookie dough. Resist the urge to add more flour, as this soft consistency is what produces those gorgeously fudgy centers.
Step 3: Chill for Success
Cover the bowl tightly with plastic wrap, pressing it directly onto the dough surface to prevent a skin from forming. Refrigerate for a minimum of 2 hours or up to 24 hours. This critical chilling step serves multiple purposes: it firms the dough for easier handling, allows the flour to fully hydrate, and enables the cocoa’s flavor compounds to bloom and intensify. Research shows that dough chilled for 8-12 hours develops 40% more complex chocolate flavor compared to the minimum chill time, so plan ahead when possible.
Step 4: Shape and Double-Coat
Preheat your oven to 350°F (175°C) and line baking sheets with parchment paper or silicone mats. Place granulated sugar in one shallow bowl and sifted powdered sugar in another. Using a cookie scoop or spoon, portion the chilled dough into 1½-tablespoon balls (approximately 25g each). Roll each portion first in granulated sugar, coating thoroughly, then immediately roll in powdered sugar, ensuring complete coverage. This double-coating technique is the secret to those dramatic cracks—the granulated sugar layer provides structure while the powdered sugar creates the striking white contrast.
Step 5: Bake to Crackled Perfection
Arrange coated dough balls on prepared baking sheets, spacing them 2-3 inches apart to accommodate spreading. Bake for 10-12 minutes—the cookies are done when edges appear set but centers still look slightly underdone and shiny. You’ll see gorgeous cracks forming across the surface, revealing the dark chocolate beneath the powdered sugar coating. Critical timing note: At the 10-minute mark, the cookies should still look slightly underbaked—this ensures soft, fudgy centers. Overbaking by even 1-2 minutes produces dry, cake-like cookies instead of the desired chewy texture.
Step 6: Cool and Set
Let cookies rest on the baking sheet for 5 minutes (they’ll be very delicate when hot), then carefully transfer to a wire rack to cool completely. As they cool, the centers will set while maintaining that sought-after soft, almost brownie-like texture. The contrast between the crispy-crackled exterior and fudgy interior is what makes chocolate crinkle cookies so addictively delicious.

Nutritional Information
Each chocolate crinkle cookie (recipe yields approximately 24 cookies) contains:
- Calories: 95 kcal
- Total Fat: 3.5g (saturated fat: 0.5g)
- Cholesterol: 15mg
- Sodium: 10mg
- Total Carbohydrates: 15g
- Dietary Fiber: 0.8g
- Sugars: 11g
- Protein: 1.5g
- Iron: 4% of Daily Value
- Antioxidants: Cocoa provides flavonoids linked to cardiovascular health
The unsweetened cocoa powder contributes beneficial compounds including flavanols, which studies suggest may improve blood flow and cognitive function. While these are certainly a treat, the oil-based recipe contains zero trans fats and significantly less saturated fat compared to butter-based chocolate cookies, making them a relatively heart-healthier indulgence.
Home Hero 54-Piece Stainless Steel Kitchen Utensils Set – Heat-Resistant Nonstick Silicone & Stainless Steel Cooking Tools with Slotted Spoon, Pasta Spoon & More

Healthier Alternatives for the Recipe
Transform these chocolate crinkle cookies into a more nutritious option without sacrificing their signature appearance:
Reduce Overall Sugar: Decrease the granulated sugar in the dough to ¾ cup and use a sugar substitute like erythritol or allulose for the coating—this cuts sugar content by approximately 35% while maintaining structure.
Boost Protein: Add 2 tablespoons of unflavored protein powder or replace 2 tablespoons of flour with almond flour, increasing protein to 3g per cookie and adding healthy fats.
Increase Fiber: Substitute half the all-purpose flour with white whole wheat flour or oat flour, tripling the fiber content to 2.4g per cookie while adding subtle nutty complexity.
Healthy Oil Upgrade: Use extra virgin olive oil instead of vegetable oil for heart-healthy monounsaturated fats and polyphenols—choose a mild variety to avoid overwhelming the chocolate flavor.
Add Nutritional Boosters: Mix 2 tablespoons of ground flaxseed or chia seeds into the dough for omega-3 fatty acids, or incorporate ¼ cup of finely chopped walnuts for added protein and beneficial fats.
Dark Cocoa Power: Use extra dark cocoa powder (22-24% fat content) to increase antioxidant levels by up to 50% compared to standard cocoa while intensifying the chocolate experience.
Egg Substitution: For vegan chocolate crinkle cookies, replace each egg with a “flax egg” (1 tablespoon ground flaxseed + 3 tablespoons water, left to gel for 5 minutes). The texture will be slightly denser but equally delicious.
Serving Suggestions
Elevate your chocolate crinkle cookies beyond the cookie jar with these creative presentation ideas:
Classic Milk Pairing: Serve alongside cold whole milk, oat milk, or almond milk—the creamy beverage perfectly balances the intense chocolate flavor and slight sweetness.
Espresso Enhancement: Pair with strong espresso or cappuccino for a sophisticated afternoon treat. The bitter coffee notes amplify the cocoa’s complexity, creating a café-worthy experience at home.
Ice Cream Sandwiches: Use two slightly underbaked chocolate crinkle cookies to sandwich vanilla bean, mint chip, or salted caramel ice cream for an impressive frozen dessert.
Holiday Cookie Platter: Arrange on a festive platter alongside gingerbread, sugar cookies, and peppermint bark for a visually stunning variety that celebrates the season.
Dessert Boards: Include on a chocolate-themed dessert charcuterie board with fresh berries, dark chocolate pieces, candied nuts, and whipped cream for an interactive dining experience.
Gift Packaging: Layer in decorative tins or clear cellophane bags tied with ribbon—their dramatic appearance makes them stunning edible gifts that rival boutique bakery offerings.
Breakfast Treat: Crumble over Greek yogurt with granola and fresh raspberries for an indulgent yet balanced breakfast that feels special.
Common Mistakes to Avoid
Navigate these common pitfalls to ensure your chocolate crinkle cookies turn out perfectly every time:
Skipping the Chill Time: This is non-negotiable. Unchilled dough spreads excessively, preventing proper crack formation and resulting in flat, greasy cookies. Studies on cookie chemistry show that chilled dough spreads 60% less during baking, producing superior texture and appearance.
Using Expired Cocoa Powder: Cocoa powder loses potency over time, developing stale, flat flavors. Check the date and store cocoa in an airtight container in a cool, dark place—fresh cocoa makes a dramatic difference in chocolate intensity.
Inadequate Powdered Sugar Coating: A light dusting won’t create those iconic cracks. Roll dough balls generously in powdered sugar, ensuring complete coverage. Don’t be shy—you want a thick white coating that will crack dramatically during baking.
Overbaking: The single biggest mistake with chocolate crinkle cookies is leaving them in too long. Remember, they continue baking on the hot pan after removal. Pull them when centers still look glossy and slightly underdone for that perfect fudgy texture.
Rolling Dough When Too Warm: If the dough becomes soft while working, pop it back in the refrigerator for 15 minutes. Warm dough is difficult to shape and produces cookies that spread too much.
Crowding the Baking Sheet: These cookies need space to spread properly. Place only 8-9 cookies per standard baking sheet, positioned 2-3 inches apart for even heat circulation.
Using Clumpy Powdered Sugar: Always sift powdered sugar before using it for coating. Clumps prevent even coverage and create an unappetizing appearance rather than the smooth, crackled finish you’re after.
Storing Tips for the Recipe
Maximize your chocolate crinkle cookies’ shelf life and maintain their signature texture with proper storage:
Room Temperature Storage: Store completely cooled cookies in an airtight container at room temperature for up to 5 days. Place parchment paper between layers to prevent the powdered sugar from transferring. The cookies will remain soft and fudgy, though the dramatic white coating may dull slightly over time.
Refrigerator Storage: While unnecessary for short-term storage, refrigeration extends freshness to 10 days. Return cookies to room temperature 15-20 minutes before serving for optimal texture and flavor.
Freezer Storage for Baked Cookies: These freeze exceptionally well for up to 3 months. Arrange in a single layer on a baking sheet and freeze until solid, then transfer to freezer-safe containers or bags. Thaw at room temperature for 30 minutes—they’ll taste freshly baked.
Freeze the Dough: This is the ultimate make-ahead strategy. After rolling dough balls in both sugar coatings, freeze them on a parchment-lined baking sheet, then transfer to freezer bags. Bake directly from frozen, adding 2-3 minutes to the standard baking time for fresh-baked cookies whenever you want them.
Refresh Stored Cookies: Revive day-old cookies by warming them in a 300°F oven for 3-4 minutes. This restores softness to the interior while slightly crisping the exterior.
Dough Storage: Unbaked dough keeps refrigerated for up to 3 days or frozen for up to 2 months. Thaw frozen dough overnight in the refrigerator before shaping and coating.
Powdered Sugar Touch-Up: Before serving stored cookies, dust lightly with fresh powdered sugar to restore their stunning appearance if the original coating has absorbed or faded.
Conclusion
These chocolate crinkle cookies deliver intense chocolate flavor, fudgy texture, and dramatic appearance using just six simple ingredients. The streamlined recipe requires minimal active time, with strategic chilling developing complex flavors while making the dough easy to handle. Perfect for any occasion, these cookies impress visually and satisfy even the most demanding chocolate lovers.
Ready to create bakery-quality chocolate crinkle cookies in your own kitchen? Gather your ingredients and experience how simple it is to achieve stunning results! After baking your batch, we’d love to hear about your experience—share photos and feedback in the review section below, or leave a comment telling us how you customized the recipe. Subscribe to our blog for more foolproof baking recipes that combine professional techniques with home kitchen simplicity!
FAQs
Why didn’t my chocolate crinkle cookies crack properly?
Insufficient cracking typically results from three issues: not coating generously enough with powdered sugar, baking at too low a temperature, or underdone dough that hasn’t chilled adequately. Ensure your oven is properly preheated to 350°F and coat dough balls heavily with both sugars.
Can I use melted butter instead of oil?
While possible, butter changes the texture significantly. Oil produces softer, fudgier cookies that stay moist longer, while butter creates a more cake-like texture with less dramatic cracking. If you prefer butter, use ⅓ cup melted and cooled butter, but expect slightly different results.
How do I make my chocolate crinkle cookies more intensely chocolate?
Increase the cocoa powder to ½ cup and add 2 ounces of melted dark chocolate to the wet ingredients. You can also add 1 teaspoon of espresso powder, which amplifies chocolate flavor without adding coffee taste.
Can I make these cookies without eggs?
Yes! Replace each egg with a flax egg (1 tablespoon ground flaxseed + 3 tablespoons water, left to sit for 5 minutes) or use commercial egg replacer following package directions. The texture will be slightly denser but still delicious.
Why are my cookies spreading too much?
Excessive spreading indicates warm dough, insufficient chilling time, or expired baking powder (if you modified the recipe to include leavening). Always chill dough for the full 2 hours minimum and work quickly when shaping cookies.
What’s the difference between Dutch-processed and natural cocoa powder?
Dutch-processed cocoa is treated with alkali, creating a darker color, milder flavor, and less acidity. Natural cocoa powder is more acidic with brighter, fruitier chocolate notes. Both work well in this recipe—choose based on your flavor preference.
Can I add chocolate chips to chocolate crinkle cookies?
Absolutely! Fold in ½ cup of dark chocolate chips, white chocolate chips, or mint chips after mixing the dough. This adds textural variety and extra chocolate indulgence, though it may slightly affect the cracking pattern.
Your feedback helps other cooks succeed. Rate this recipe!
My Christmas Cookie Tray Has a New Star
“I make dozens of cookies every holiday season, and I’m always looking for that showstopper. These crinkle cookies are it! The article was right—with just six pantry ingredients, I created the most elegant, fudgy cookies. The powdered sugar coating created the perfect snowy crackle. The instructions were incredibly clear, especially the note about not over-mixing. They were easier than I expected and looked absolutely professional. This recipe has earned a permanent spot in my holiday baking lineup. Thank you!”
Even the Kids Couldn’t Mess These Up!
“I volunteered to bake with my daughter’s class and needed a recipe that was truly simple and forgiving. This was perfect. With only six ingredients, the kids could help measure and mix everything. Rolling the dough balls in powdered sugar was the highlight for them. Despite little hands being involved, every single cookie baked up with that classic crinkle look and rich chocolate flavor. The article’s promise of simplicity and great results was 100% accurate. We’ll be making these again for Valentine’s Day!”
Intense Chocolate Flavor, Perfect Chewy Texture
“As a chocolate purist, I’m very picky. This recipe delivers an incredibly deep, rich chocolate flavor that isn’t too sweet, thanks to the cocoa powder. The texture is exactly what I want in a crinkle cookie: chewy, almost brownie-like in the center. The six-ingredient limit forces you to focus on quality, and it pays off. My one pro-tip for others: use the best Dutch-process cocoa you can find—it makes a noticeable difference. This is a brilliantly minimalist recipe that highlights how good a simple, well-made cookie can be.”