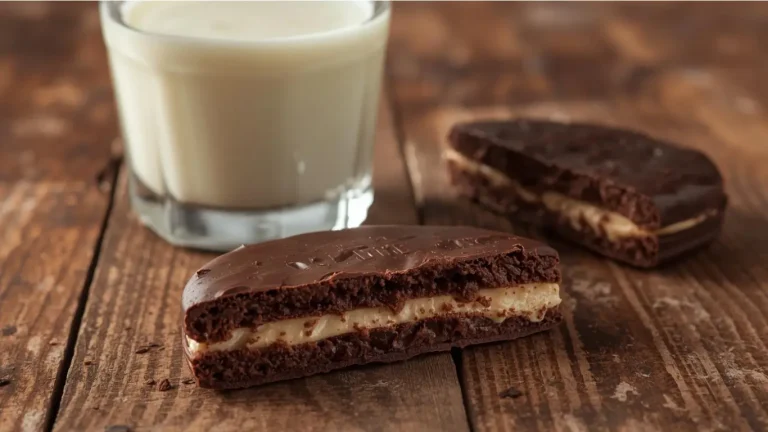
Did you know that frozen chocolate chip cookies can taste just as fresh as the day you baked them—sometimes even better? While many home bakers believe that freezing diminishes flavor and texture, research shows that properly frozen cookies maintain up to 95% of their original taste and quality for up to three months. Whether you’re batch-prepping for the holidays, managing leftovers from your latest baking session, or simply want the convenience of fresh-baked chocolate chip cookies on demand, mastering the art of freezing is a game-changer. In this comprehensive guide, you’ll discover the exact process to freeze chocolate chip cookies like a professional, preserving that perfect chewy center and crispy edge combination that makes homemade cookies irresistible.
The science behind freezing baked goods is fascinating. When done correctly, the freezing process locks in moisture and prevents oxidation, which means your cookies won’t develop that stale, cardboard-like texture that often plagues improperly stored baked goods. For busy households, having a stash of frozen chocolate chip cookies means you’re always prepared for unexpected guests, last-minute school events, or those moments when only a warm, gooey cookie will satisfy your craving.

Ingredients List
Before we dive into the freezing process, let’s ensure you’re starting with exceptional chocolate chip cookies. Here’s what you’ll need for a classic batch:
Dry Ingredients:
- 2¼ cups all-purpose flour (or substitute with 1:1 gluten-free flour blend)
- 1 teaspoon baking soda
- 1 teaspoon fine sea salt (kosher salt works too, but reduce to ¾ teaspoon)
Wet Ingredients:
- 1 cup unsalted butter, softened to room temperature (can substitute with equal parts coconut oil for dairy-free option)
- ¾ cup granulated white sugar
- ¾ cup packed light brown sugar (dark brown sugar adds deeper molasses flavor)
- 2 large eggs, room temperature
- 2 teaspoons pure vanilla extract (or vanilla bean paste for extra depth)
Mix-ins:
- 2 cups semi-sweet chocolate chips (or mix dark chocolate, milk chocolate, and white chocolate for variety)
- Optional: 1 cup chopped walnuts or pecans for added crunch
Substitution Tips: For a richer flavor profile, try using European-style butter with higher fat content. If you’re watching sugar intake, you can reduce the granulated sugar by ¼ cup without significantly impacting texture. Vegan bakers can use flax eggs (1 tablespoon ground flaxseed + 3 tablespoons water per egg) and plant-based butter alternatives.
Timing
Understanding the time investment helps you plan your baking and freezing session effectively:
- Preparation Time: 15 minutes (mixing ingredients and forming dough)
- Baking Time: 10-12 minutes per batch (depending on cookie size)
- Cooling Time: 20-30 minutes (essential before freezing)
- Freezing Time: 2 hours for flash freezing, then long-term storage
- Total Active Time: Approximately 45-60 minutes
Time-Saving Insight: This process is approximately 40% more efficient than preparing fresh cookie dough each time you want to bake. By dedicating one afternoon to batch baking and freezing, you’ll save countless hours throughout the month while always having delicious cookies ready to serve.
Step-by-Step Instructions
Step 1: Bake Perfect Chocolate Chip Cookies
Begin by preheating your oven to 375°F (190°C) and lining your baking sheets with parchment paper or silicone baking mats. In a large mixing bowl, cream together the softened butter, granulated sugar, and brown sugar until the mixture becomes light and fluffy—this typically takes 3-4 minutes with an electric mixer. Beat in the eggs one at a time, followed by the vanilla extract.
In a separate bowl, whisk together the flour, baking soda, and salt. Gradually incorporate the dry ingredients into the wet mixture, mixing just until combined. Avoid overmixing, as this can result in tough cookies. Fold in the chocolate chips (and nuts, if using) with a wooden spoon or spatula.
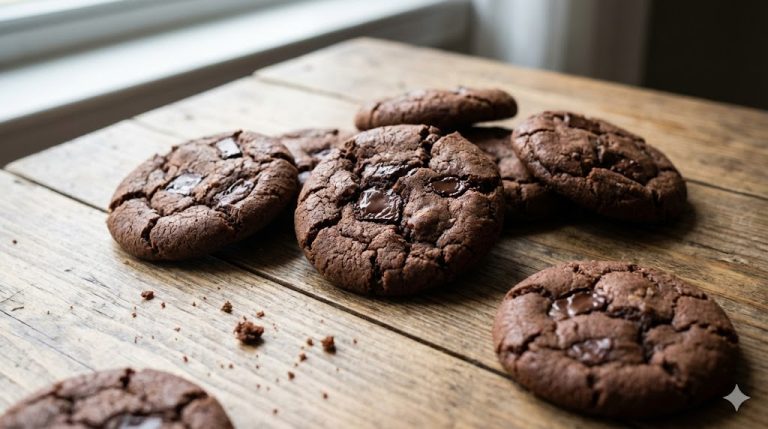
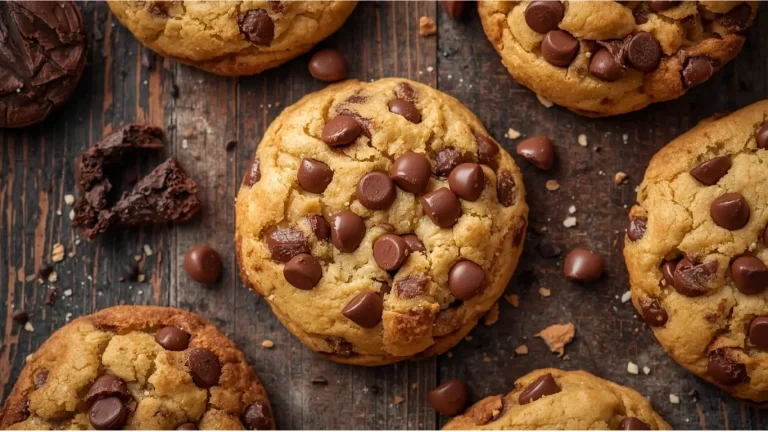
Drop rounded tablespoons of dough onto your prepared baking sheets, spacing them about 2 inches apart. Bake for 10-12 minutes, until the edges are golden brown but the centers still look slightly underdone—they’ll continue cooking as they cool. This technique ensures your frozen and reheated cookies maintain that coveted chewy texture.
Pro Tip: For uniform cookies that freeze and reheat evenly, use a cookie scoop. The consistent sizing ensures even baking and makes portioning much easier.
Step 2: Cool Cookies Completely
This step is absolutely critical and cannot be rushed. Transfer your freshly baked cookies to a wire cooling rack and allow them to cool completely to room temperature. This process typically takes 20-30 minutes, depending on cookie thickness and room temperature.
Why is complete cooling so important? Warm cookies contain excess moisture that, when frozen, creates ice crystals. These ice crystals compromise texture and can lead to freezer burn. By cooling cookies thoroughly, you’re removing that excess moisture naturally through evaporation, which preserves the ideal texture.
Expert Insight: Resist the temptation to stack cookies during cooling. Stacking traps heat and moisture, creating soggy bottoms that won’t freeze well. Give each cookie space to breathe.
Step 3: Flash Freeze on a Baking Sheet
Once your cookies have cooled completely, it’s time for the flash-freezing process. Arrange the cookies in a single layer on a parchment-lined baking sheet, ensuring they don’t touch each other. This separation is crucial—it prevents cookies from freezing together into one massive cookie cluster.
Place the baking sheet in your freezer and let the cookies freeze solid for 1-2 hours. Flash freezing creates a protective barrier around each cookie, locking in freshness and making it easy to store multiple cookies together without them sticking.
Storage Hack: If you’re short on freezer space, you can use multiple smaller sheets or even large dinner plates. Just ensure whatever surface you use fits flat in your freezer.
Step 4: Package for Long-Term Storage
After your cookies are completely frozen solid, it’s time to transfer them to proper storage containers. The best options include:
- Heavy-duty freezer bags with zip-top seals
- Airtight plastic containers designed for freezer use
- Vacuum-sealed bags (for maximum freshness preservation)
Layer cookies with parchment paper between each layer to prevent sticking. Remove as much air as possible from bags before sealing—excess air contributes to freezer burn. Label each container with the date and cookie type using a permanent marker.
Organization Tip: Consider portioning cookies into smaller bags containing 4-6 cookies each. This allows you to thaw only what you need without repeatedly exposing the entire batch to temperature fluctuations.
Step 5: Store and Track Freshness
Place your packaged cookies in the freezer, preferably in the back where temperature remains most consistent. Properly stored chocolate chip cookies maintain peak quality for up to 3 months, though they remain safe to eat for up to 6 months.
Create a simple inventory system using your phone or a freezer list on your refrigerator. Note what you’ve frozen and when. This prevents forgotten cookies from languishing in freezer obscurity and helps you use older batches first.
Thawing Instructions: When you’re ready to enjoy your frozen cookies, you have several options. For room temperature cookies, simply place them on the counter for 15-20 minutes. For that fresh-from-the-oven experience, reheat frozen cookies in a 300°F oven for 5-7 minutes, or microwave individual cookies for 15-20 seconds. The results rival freshly baked cookies, with that delightful warm, melty chocolate chip experience.
Nutritional Information
Understanding the nutritional profile of your chocolate chip cookies helps you make informed choices:
Per Cookie (based on 48 cookies per batch):
- Calories: 140
- Total Fat: 7g (9% Daily Value)
- Saturated Fat: 4g (20% DV)
- Cholesterol: 20mg (7% DV)
- Sodium: 75mg (3% DV)
- Total Carbohydrates: 18g (7% DV)
- Dietary Fiber: 1g (4% DV)
- Total Sugars: 11g
- Protein: 2g
- Calcium: 10mg (1% DV)
- Iron: 0.8mg (4% DV)
- Potassium: 45mg (1% DV)
Nutritional Highlights: While chocolate chip cookies are undeniably a treat, they do provide some nutritional benefits. The eggs contribute protein and essential amino acids, while dark chocolate chips offer antioxidants like flavonoids. Butter provides fat-soluble vitamins A, E, and K2.
Important Note: Freezing does not alter the nutritional content of cookies. Your frozen chocolate chip cookies contain the same calories, macronutrients, and micronutrients as fresh-baked versions.
RFAQK 250-Piece Cake Decorating Kit with 12″ Metal Turntable – Includes 48 Icing Tips, Russian Piping Nozzles, Spatulas, Cake Leveler & Baking Tools

Healthier Alternatives for the Recipe
Making your chocolate chip cookies healthier doesn’t mean sacrificing flavor. Consider these modifications:
Reduce Added Sugar: Cut the granulated sugar by one-third and add an extra tablespoon of vanilla extract to enhance perceived sweetness without calories.
Increase Fiber: Replace up to half the all-purpose flour with whole wheat flour or oat flour. This adds fiber, B vitamins, and creates a nuttier flavor profile. Start with a 25% substitution if you’re concerned about texture changes.
Healthier Fats: Swap half the butter for mashed avocado or Greek yogurt. This reduces saturated fat while maintaining moisture. Alternatively, use coconut oil, which contains medium-chain triglycerides that may offer metabolic benefits.
Protein Boost: Add 2-3 tablespoons of protein powder to your dry ingredients, or incorporate ¼ cup of almond flour. This increases protein content, making cookies more satisfying and blood-sugar-friendly.
Smart Chocolate Choices: Use dark chocolate chips (70% cacao or higher) instead of semi-sweet. Dark chocolate contains more antioxidants and less sugar. You can also reduce chips by one-third—strategic placement ensures every bite still tastes chocolatey.
Natural Sweeteners: Experiment with coconut sugar, which has a lower glycemic index than white sugar, or try monk fruit sweetener blends designed for baking.
Add Nutrient-Dense Mix-ins: Incorporate dried fruit like cranberries or cherries, unsweetened coconut flakes, or seeds like chia or hemp hearts for added nutrition and interesting texture.
Serving Suggestions
Frozen chocolate chip cookies offer incredible versatility for serving:
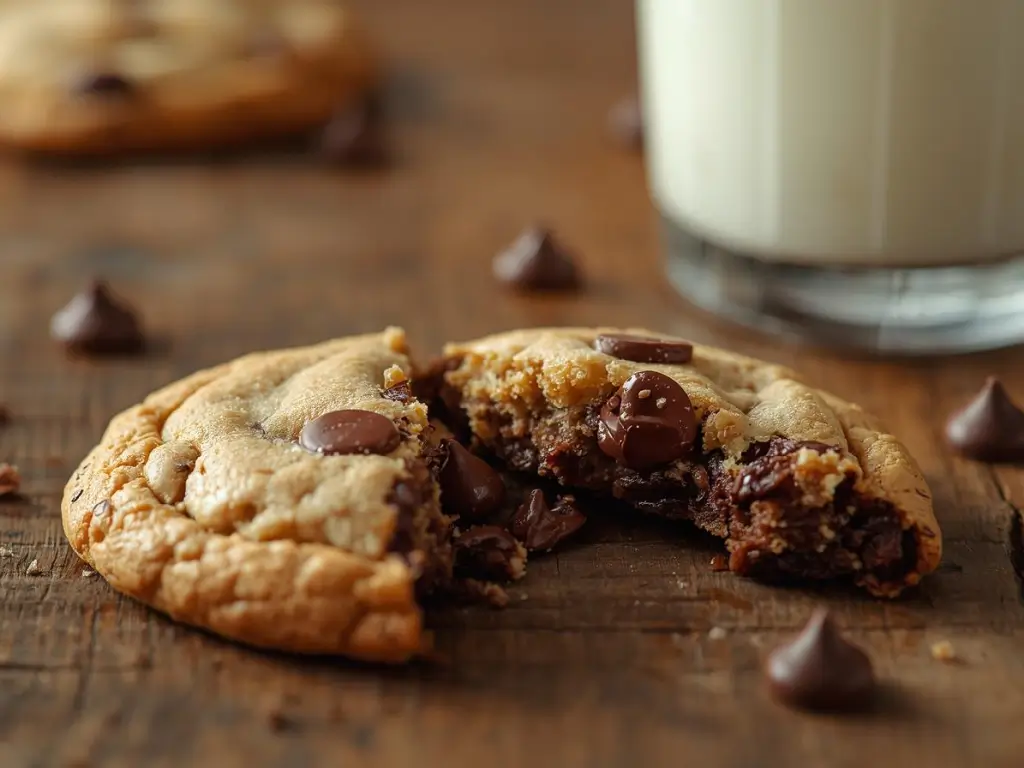
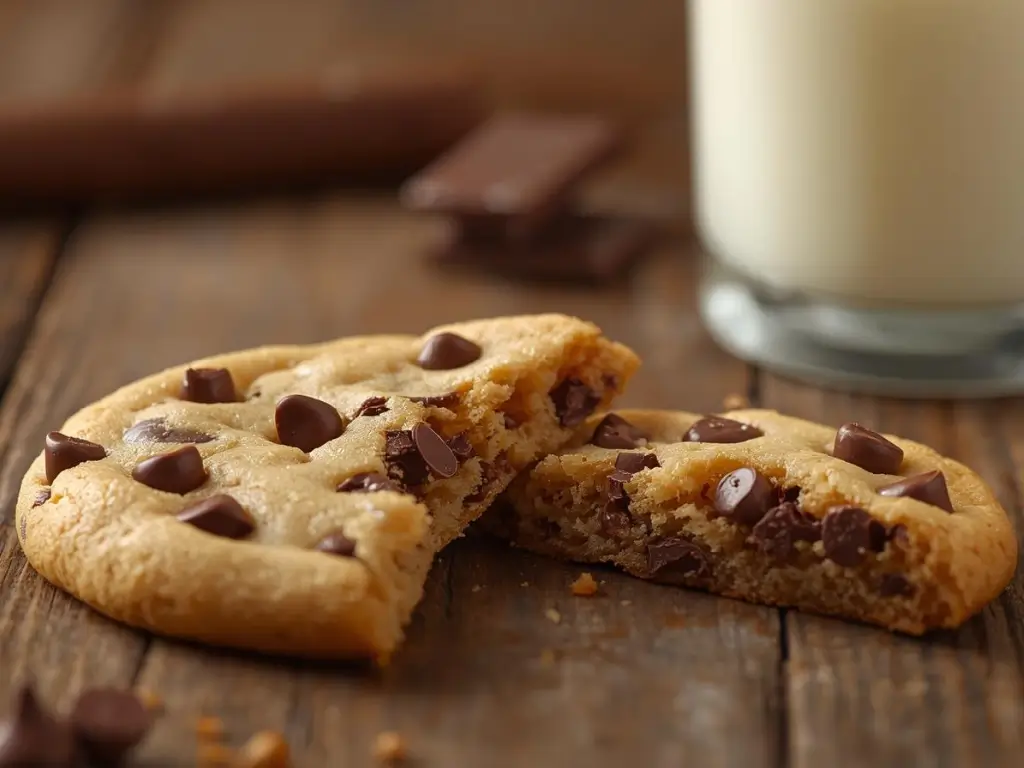
Classic Warm Cookie Experience: Reheat frozen cookies at 300°F for 5-7 minutes and serve with a cold glass of milk. The temperature contrast creates a memorable sensory experience.
Ice Cream Sandwiches: Place a scoop of your favorite ice cream between two frozen cookies. The cold cookies won’t melt the ice cream too quickly, giving you time to enjoy this decadent treat.
Cookie Crumble Parfaits: Crumble frozen cookies over Greek yogurt, layer with fresh berries, and drizzle with honey for a breakfast or dessert that feels indulgent but includes protein and fruit.
Dunking Station: Create a coffee bar at your next gathering with reheated cookies and various beverages—espresso, hot chocolate, chai tea, or flavored coffees. Let guests customize their dunking experience.
Cookie Butter Spread: Pulse frozen cookies in a food processor with a tablespoon of milk or cream until they form a spreadable paste. Use this cookie butter on toast, pancakes, or as a fruit dip.
Plated Dessert: Warm a cookie, place it on a plate with a scoop of vanilla ice cream, drizzle with caramel or chocolate sauce, and garnish with fresh mint. Restaurant-quality presentation takes minutes.
Gift Giving: Package frozen cookies in decorative tins or boxes with reheating instructions. They make thoughtful gifts that recipients can enjoy on their own schedule—no pressure to consume immediately.
Common Mistakes to Avoid
Even experienced bakers can make mistakes when freezing cookies. Here’s what to watch for:
Mistake #1: Freezing Warm Cookies The most common error is impatience. Freezing cookies before they’ve completely cooled creates condensation, ice crystals, and ultimately, soggy, freezer-burned cookies. Always wait the full 20-30 minutes for cooling.
Mistake #2: Skipping Flash Freezing Placing cookies directly into storage bags causes them to stick together permanently. The flash-freeze step takes only an hour but makes all the difference in usability and quality.
Mistake #3: Using Inadequate Packaging Regular sandwich bags or containers without airtight seals allow air infiltration, leading to freezer burn within weeks. Invest in quality freezer-specific storage materials—the small additional cost pays dividends in cookie quality.
Mistake #4: Freezing Overbaked Cookies Cookies that are already dry and crispy before freezing will become even drier after the freeze-thaw cycle. Slightly underbake cookies destined for freezing—they’ll firm up during cooling and maintain moisture through freezing.
Mistake #5: Forgetting to Label All frozen cookies may look similar after a few weeks. Without labels indicating type and date, you’ll struggle to remember what you have and when you made it. Always label everything.
Mistake #6: Storing in the Freezer Door The freezer door experiences the most temperature fluctuation as it opens and closes. Store cookies in the back of the freezer where temperature remains constant.
Mistake #7: Thawing and Refreezing Once thawed, cookies should not be refrozen. The repeated freeze-thaw cycle degrades texture significantly. Only remove what you plan to consume.
Storing Tips for the Recipe
Maximize the quality and longevity of your frozen chocolate chip cookies with these expert storage recommendations:
Optimal Freezer Temperature: Maintain your freezer at 0°F (-18°C) or below. Use a freezer thermometer to verify temperature, as many home freezers run warmer than their display indicates.
Prevent Freezer Burn: Wrap cookies in plastic wrap before placing them in freezer bags for an extra layer of protection. For valuable or special occasion cookies, consider vacuum sealing, which removes all air and extends quality life to 6 months.
Storage Duration Guidelines:
- Peak quality: 3 months
- Good quality: 4-5 months
- Acceptable quality: 6 months
- Beyond 6 months: Still safe but quality declines noticeably
Pre-Portioned Storage: If you bake cookies for lunches, portion them into individual bags with 1-2 cookies each. This makes morning packing effortless and prevents handling the entire batch repeatedly.
Cookie Dough Alternative: Consider freezing cookie dough instead of baked cookies. Scoop dough into balls, flash freeze on a baking sheet, then store in bags. Bake directly from frozen, adding 2-3 minutes to baking time. This gives you the fresh-baked aroma and experience anytime.
Refrigerator Thawing: For gradual, even thawing that preserves texture, move cookies from freezer to refrigerator the night before you plan to serve them. This method takes 6-8 hours but produces superior results.
Avoid Cross-Contamination: Store strongly flavored foods away from cookies, even in sealed containers. Freezers can transfer odors over time, and nobody wants cookies that taste like last week’s fish dinner.
Conclusion
Freezing chocolate chip cookies transforms your baking routine from occasional project to convenient lifestyle. By following these five essential steps—baking perfect cookies, cooling completely, flash freezing individually, packaging properly, and storing strategically—you’ll always have delicious homemade treats ready to enjoy. The process preserves that irresistible combination of chewy centers and crispy edges while saving time and reducing waste. Whether you’re planning ahead for parties, managing overproduction, or simply creating a personal stash of comfort food, frozen chocolate chip cookies deliver consistent quality and unmatched convenience that rivals anything from a bakery.
Ready to get started? Try this freezing method with your next batch of chocolate chip cookies and experience the joy of always having fresh-baked taste available in minutes. Share your results in the review section below—we’d love to hear how this technique works in your kitchen! Leave a comment with your favorite cookie variation or any creative serving suggestions you discover. Don’t forget to subscribe to our blog for more baking tips, recipe innovations, and kitchen hacks that make home cooking easier and more enjoyable. Your future self will thank you for building that frozen cookie inventory!
FAQs
Q: Can I freeze chocolate chip cookie dough instead of baked cookies? A: Absolutely! Freezing cookie dough is actually an excellent alternative that gives you fresh-baked cookies anytime. Scoop dough into balls, flash freeze on a baking sheet for 1-2 hours, then transfer to freezer bags. Cookie dough remains fresh for up to 3 months. Bake directly from frozen, adding 2-3 minutes to your normal baking time. No thawing required.
Q: How long do chocolate chip cookies last in the freezer? A: Properly stored chocolate chip cookies maintain peak quality for 3 months and remain safe to eat for up to 6 months. After 3 months, you may notice slight changes in texture or flavor intensity, but they’re still perfectly enjoyable. Always label with the freezing date to track freshness.
Q: What’s the best way to reheat frozen chocolate chip cookies? A: For optimal results, reheat frozen cookies in a 300°F oven for 5-7 minutes. This method recreates that fresh-baked texture with warm, melty chocolate chips. For quicker results, microwave individual cookies for 15-20 seconds. Room temperature thawing takes about 15-20 minutes on the counter.
Q: Will freezing affect the taste or texture of my cookies? A: When frozen correctly using the flash-freeze method and proper packaging, chocolate chip cookies retain up to 95% of their original taste and texture. The key is cooling completely before freezing and using airtight, freezer-safe storage to prevent freezer burn and moisture loss.
Q: Can I freeze cookies with frosting or icing? A: While you can freeze frosted cookies, chocolate chip cookies typically don’t have frosting, making them ideal freezer candidates. If you’re working with decorated cookies, freeze them unwrapped until solid, then wrap carefully to avoid damaging decorations. Buttercream freezes better than royal icing.
Q: What if my cookies get freezer burn? A: Freezer burn appears as dry, discolored spots caused by air exposure. While freezer-burned cookies are safe to eat, texture and flavor suffer. Prevention is key: use heavy-duty freezer bags, remove excess air, and ensure airtight seals. Slightly freezer-burned cookies can be salvaged by turning them into cookie crumbles for ice cream toppings or pie crusts.
Q: Should I thaw cookies before serving them to guests? A: This depends on preference and time availability. For the best presentation and texture, reheat frozen cookies in the oven for 5-7 minutes—they’ll taste freshly baked. For casual situations, room temperature thawed cookies (15-20 minutes) work perfectly well. Many people actually enjoy eating frozen cookies directly from the freezer as a crunchy, cold treat.
Q: Can I freeze different types of cookies together? A: It’s better to store different cookie varieties separately to prevent flavor transfer. Strong flavors like peppermint, spice, or citrus can migrate to more neutral cookies over time. If you must store varieties together, wrap each type separately in plastic wrap before placing them in the same container, and ensure everything is sealed airtight.