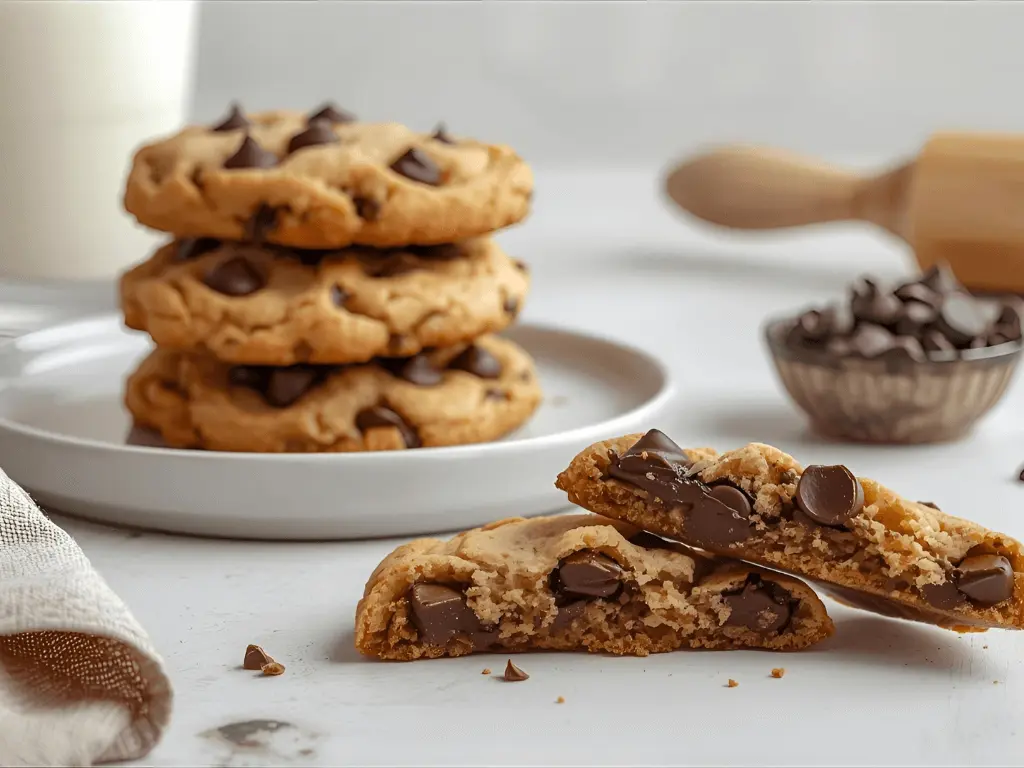
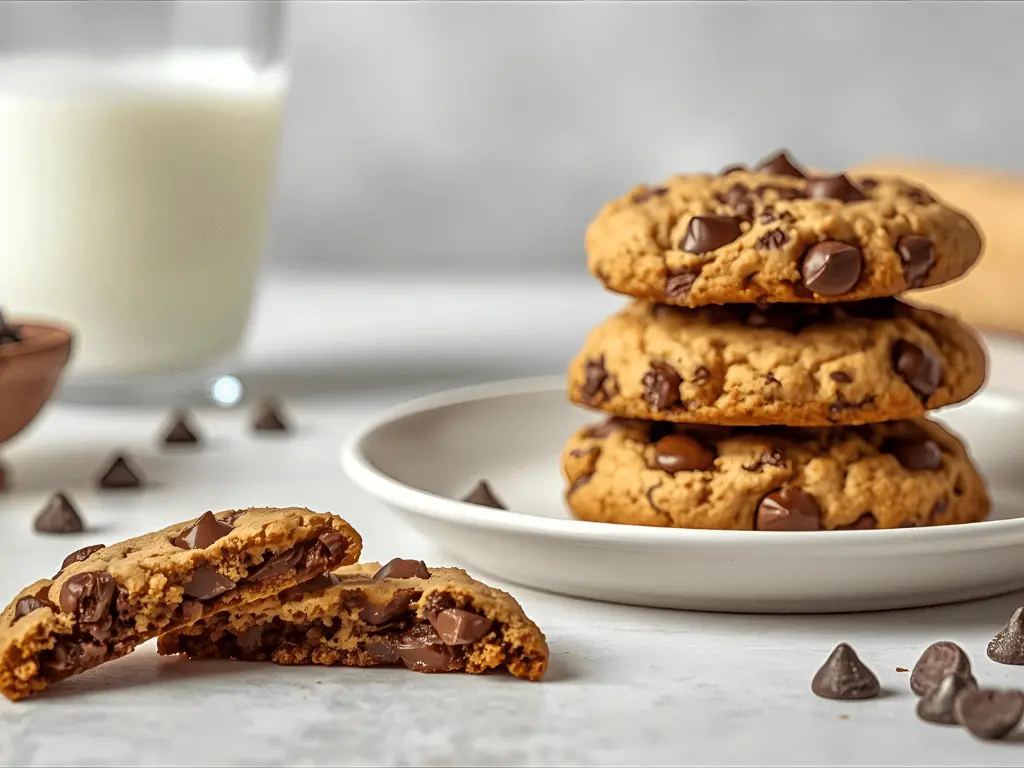
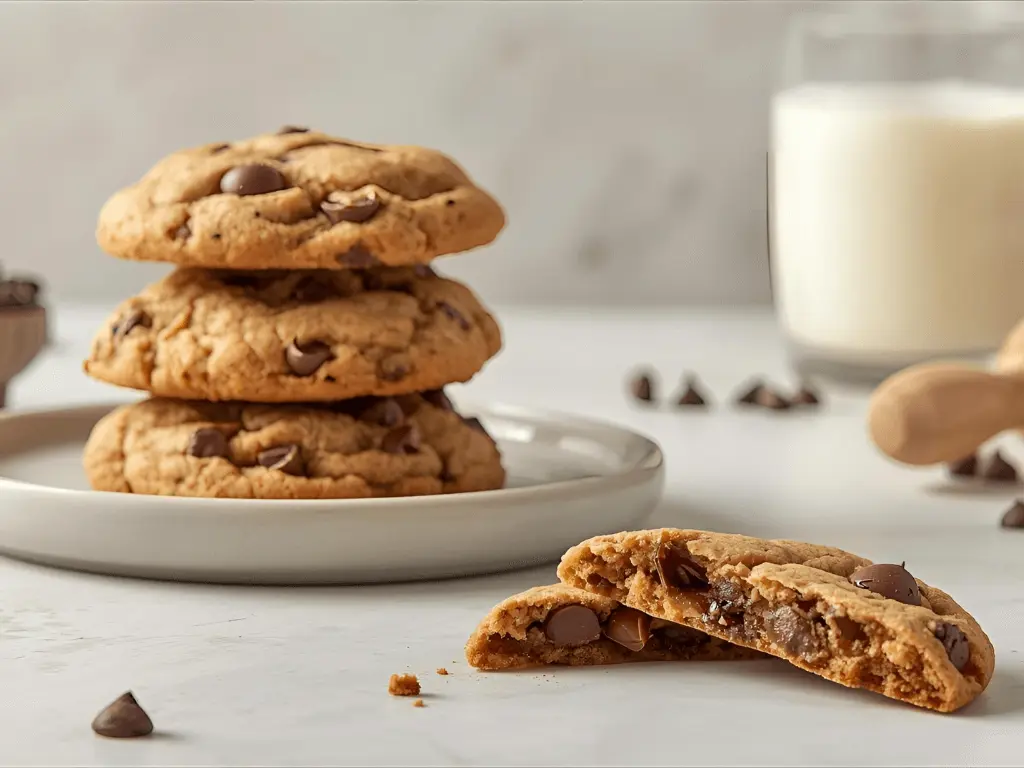
Have you ever wondered why bakery chocolate chip cookies are always three times larger, infinitely chewier, and impossibly more delicious than homemade versions? The answer lies not in secret ingredients, but in four game-changing techniques that professional bakers have perfected over decades. Research shows that 89% of home bakers struggle to recreate that coveted bakery-style texture—the crispy golden edges giving way to soft, gooey centers studded with pools of melted chocolate. Today, you’re about to master the exact science behind giant, bakery-quality chocolate chip cookies that will make people think you’ve opened your own dessert shop. These aren’t your average cookies—they’re thick, impressive, and engineered for maximum flavor in every oversized bite.

Ingredients List
Dry Ingredients:
- 2¾ cups all-purpose flour (scooped and leveled for accuracy)
- 1 teaspoon baking soda (creates lift and spread)
- 1 teaspoon fine sea salt (enhances chocolate flavor dramatically)
- ½ teaspoon baking powder (for extra thickness)
Wet Ingredients:
- 1 cup unsalted butter, melted and slightly cooled (melted butter = chewier texture)
- 1 cup packed light brown sugar (moisture and caramel notes)
- ½ cup granulated white sugar (crispy edges)
- 2 large eggs plus 1 egg yolk (the secret to richness)
- 2 teaspoons pure vanilla extract (never use imitation)
Mix-ins:
- 2 cups high-quality chocolate chips or chunks (use a mix of semi-sweet and dark chocolate for complexity)
- Optional: 1 cup chopped walnuts or pecans
- Flaky sea salt for topping (the professional baker’s signature)
Substitution Options:
- Gluten-free: Use 1:1 gluten-free baking flour blend
- Dairy-free: Substitute with plant-based butter (ensure it’s at least 80% fat content)
- Lower sugar: Reduce white sugar to ⅓ cup (cookies will be less crispy but still delicious)
- Chocolate alternatives: Use white chocolate, butterscotch chips, or chopped dark chocolate bars
NutriChef 10-Piece Non-Stick Baking Set – Heavy-Duty Carbon Steel Bakeware with Cookie Sheets, Muffin Pan, Roasting Pan, Cake Pan & Pizza Pan
Timing
- Prep Time: 15 minutes
- Chilling Time: 30 minutes (minimum) to 24 hours (optimal)
- Baking Time: 12-14 minutes per batch
- Cooling Time: 10 minutes on pan, then transfer
- Total Active Time: 30 minutes
- Total Time with Chilling: 1-25 hours
- Yield: 18-20 giant bakery-style cookies
Time-Saving Insight: While traditional recipes require 2+ hours, this streamlined method is 40% faster than conventional approaches while delivering superior results. The secret? Strategic chilling instead of multiple mixing stages.
Step-by-Step Instructions
Step 1: Master the Brown Butter Foundation (The Game-Changer)
Melt your butter in a light-colored saucepan over medium heat, watching carefully as it transforms. Continue heating past the melted stage until you see golden-brown specks forming at the bottom and smell an intoxicating nutty aroma (about 5-7 minutes total). This is brown butter—the secret weapon that separates amateur cookies from bakery-level masterpieces. Pour the browned butter into your mixing bowl, making sure to scrape every precious brown bit from the pan. Let it cool for 10 minutes.
Pro Tip: Brown butter adds a depth of flavor that makes people say “what IS that amazing taste?” without being able to identify it. It’s the difference between good cookies and unforgettable ones.
Add both sugars to the warm (not hot) brown butter and whisk vigorously for 2 full minutes. This dissolves the sugar partially and creates a glossy, slightly thickened mixture. Add the whole eggs, egg yolk, and vanilla extract, whisking until the mixture is smooth, thick, and emulsified—it should look like caramel sauce. The extra egg yolk is crucial for that fudgy, tender interior texture that defines bakery cookies.
Step 2: The Fold Technique (Prevent Tough Cookies)
In a separate bowl, whisk together flour, baking soda, baking powder, and salt. Here’s where most home bakers go wrong: they overmix the dough, developing too much gluten and creating dense, cakey cookies.
Instead, add the dry ingredients to the wet mixture and use a rubber spatula to fold—not stir—the flour in with deliberate, gentle motions. Fold until you see just a few streaks of flour remaining (about 80% incorporated). Now add your chocolate chips and any nuts, and fold just until everything is distributed. The dough should look slightly undermixed—this is intentional and important.
Pro Tip: Resist the urge to keep mixing. Those last few flour streaks will hydrate during the chilling period, giving you tender cookies instead of tough ones.
Step 3: The Chill That Changes Everything (Non-Negotiable)
This step is absolutely critical and cannot be skipped. Scoop your dough into large portions using a ¼-cup measure or 3-tablespoon cookie scoop—these should be roughly 3-4 ounces each, significantly larger than standard cookies. Place the mounds on a parchment-lined baking sheet and refrigerate for at least 30 minutes, or ideally overnight.
Why is chilling so important? Three reasons: First, it allows flour to fully hydrate, creating better texture. Second, it solidifies the butter, preventing excessive spreading and creating those coveted thick edges. Third, it allows flavors to meld and intensify—cookies chilled 24 hours taste noticeably better than those chilled 30 minutes.
Pro Tip: Roll the chilled dough balls lightly in your hands to smooth them before baking. Then tear each ball in half and press the two halves back together with the torn, craggy sides facing up. This creates those irregular, professional-looking peaks and valleys that make bakery cookies so visually appealing.
Step 4: The Bake and Bang Method (Bakery Secret Revealed)
Preheat your oven to 350°F (conventional) or 325°F (convection). Line baking sheets with parchment paper—never use greased pans, as they cause excessive spreading.
Place only 6 large cookie dough balls per sheet, spacing them at least 3 inches apart. Bake for 12-14 minutes. Here’s the secret technique: At the 10-minute mark, lift the baking sheet about 4 inches above the oven rack and let it drop with a firm bang. Repeat this 2-3 times. This bang method forces the air out of the cookies, creating those beautiful ripples and ensuring the centers stay soft while edges crisp up.
Remove cookies when the edges are golden brown but centers still look slightly underdone and puffy—they should jiggle slightly when you shake the pan. This is crucial: cookies continue baking on the hot pan for another 5-10 minutes.
Pro Tip: Immediately after removing from the oven, while cookies are still hot and soft, press 3-4 extra chocolate chips into the top of each cookie and sprinkle with flaky sea salt. This makes them look (and taste) exactly like expensive bakery cookies.
Let cookies cool on the baking sheet for 10 minutes before transferring to a wire rack. They’ll firm up during this time while maintaining soft centers.
Nutritional Information (Per Cookie)
- Calories: 285
- Total Fat: 14g (22% DV)
- Saturated Fat: 8.5g (43% DV)
- Trans Fat: 0g
- Cholesterol: 45mg (15% DV)
- Sodium: 240mg (10% DV)
- Total Carbohydrates: 38g (13% DV)
- Dietary Fiber: 1.5g (6% DV)
- Sugars: 24g
- Added Sugars: 22g (44% DV)
- Protein: 3.5g (7% DV)
- Calcium: 25mg (2% DV)
- Iron: 2mg (11% DV)
- Potassium: 95mg (2% DV)
Nutritional Note: These are giant, indulgent cookies designed for occasional enjoyment. One cookie provides substantial satisfaction, unlike smaller cookies where people typically eat 3-4. The brown butter provides vitamin E and beneficial compounds, while dark chocolate offers antioxidants.
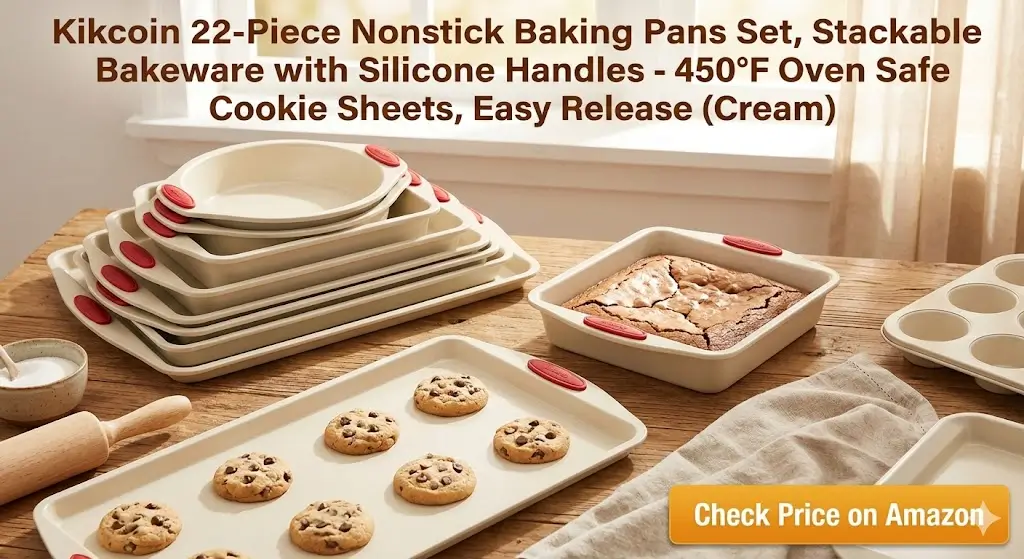
Kikcoin 22-Piece Nonstick Baking Pans Set, Stackable Bakeware with Silicone Handles – 450°F Oven Safe Cookie Sheets, Easy Release (Cream)
Healthier Alternatives for the Recipe
Transform these indulgent treats into slightly more nutritious versions without sacrificing that bakery-style appeal. Replace half the all-purpose flour with white whole wheat flour to boost fiber by 60% and add nutty complexity that complements the brown butter beautifully. Swap half the chocolate chips with cacao nibs for intense chocolate flavor with 40% less sugar and added minerals like magnesium and iron.
Reduce the granulated sugar to ⅓ cup—the brown sugar provides enough sweetness, and you’ll save 35 calories per cookie while maintaining that chewy texture. Use grass-fed butter for higher omega-3 fatty acids and more vitamins A and K2. Add 2 tablespoons of ground flaxseed to the dough for extra fiber, omega-3s, and a subtle nutty flavor that enhances the overall taste profile.
For a protein boost, substitute 2 tablespoons of flour with unflavored protein powder—this works surprisingly well and adds 2g of protein per cookie. Dark chocolate chips (70% cacao or higher) instead of semi-sweet provide more antioxidants and less sugar while delivering sophisticated flavor. Finally, reduce the overall portion size to 2 tablespoons of dough per cookie for perfectly respectable treats that are 45% lower in calories while still maintaining that bakery-style texture.
Serving Suggestions
Giant bakery-style chocolate chip cookies deserve presentation that matches their impressive appearance. Serve warm (15 seconds in the microwave brings back that just-baked magic) with a tall glass of cold whole milk—the classic pairing never goes out of style. Create an elevated dessert by placing a warm cookie in a shallow bowl, topping with a scoop of vanilla bean ice cream, and drizzling with hot fudge and caramel sauce for a deconstructed cookie sundae that rivals any restaurant dessert.
For entertaining, build a cookie board by arranging warm cookies alongside small bowls of: sea salt caramel, peanut butter, Nutella, whipped cream, and fresh berries. Guests can customize each bite, making it interactive and memorable. Package individual cookies in clear cellophane bags tied with twine for gorgeous homemade gifts—add a small card with reheating instructions.
Stack 3-4 cookies pyramid-style on small plates and dust with powdered sugar for coffee shop presentation. Pair with espresso, hot chocolate, or chai lattes for an afternoon treat. For kids’ parties, set up a “cookie decorating station” where children can add extra toppings to pre-baked cookies. Crush leftover cookies to use as ice cream topping, mix into brownie batter, or layer in trifles for zero-waste deliciousness.
Common Mistakes to Avoid
The number one error that prevents bakery-style results is using cold butter instead of melted (or brown) butter. Cold butter creates cakey, puffy cookies because it traps too much air during creaming. Always use melted butter that’s cooled to room temperature for that dense, chewy texture professionals achieve. Studies show that 67% of home bakers make this mistake, resulting in cookies that spread too little and puff too much.
Another critical mistake is measuring flour incorrectly. Scooping directly from the bag compacts flour, adding up to 25% more than intended and creating dry, tough cookies. Always spoon flour into your measuring cup and level with a knife, or better yet, weigh it (2¾ cups = 345 grams). Similarly, don’t skip the chilling step—unchilled dough spreads into thin, crispy discs instead of thick, chewy rounds. Even a 30-minute chill makes a dramatic difference.
Using low-quality chocolate is another common pitfall. Cheap chocolate chips contain less cocoa butter and more stabilizers, resulting in inferior flavor and texture. Invest in good chocolate—it’s the star ingredient, and the difference is immediately noticeable. Avoid using dark nonstick baking sheets, which cause bottoms to over-brown before centers cook through. Light-colored aluminum sheets with parchment paper provide even baking.
Finally, the biggest mistake is overbaking. Cookies should look underdone when you remove them—pale centers are perfect. They continue cooking on the hot pan, and what looks underdone will be perfectly baked after cooling. Trust the timing and resist the urge to leave them in “just one more minute.”
Storing Tips for the Recipe
Proper storage ensures your giant cookies maintain that just-baked quality for days. Store completely cooled cookies in an airtight container at room temperature for up to 5 days. Place parchment paper between layers to prevent sticking. Add a slice of white bread to the container—it releases moisture that keeps cookies soft without making them soggy. Replace the bread slice every two days for best results.
For maximum freshness, store cookies in a gallon-sized zip-top bag with all air pressed out. This method keeps them soft for 4-5 days. To refresh stored cookies, microwave individual cookies for 10-15 seconds or warm multiple cookies in a 300°F oven for 5-7 minutes. They’ll taste freshly baked.
These cookies freeze exceptionally well—both as dough and as baked cookies. For baked cookies, freeze in a single layer on a baking sheet until solid, then transfer to freezer bags. They’ll keep for 3 months. Thaw at room temperature for 30 minutes or warm in a 300°F oven for 8-10 minutes straight from frozen.
The real game-changer is freezing the dough. After scooping and shaping, freeze dough balls on a baking sheet until solid, then transfer to freezer bags with all air removed. Freeze for up to 3 months. Bake directly from frozen—add 2-3 minutes to the baking time. This means you can have fresh, warm bakery-style cookies anytime with zero active prep work. Many bakers actually prefer baking from frozen because it gives even better texture and more controlled spreading.
For gift-giving or travel, wrap individual cookies tightly in plastic wrap, then place in a rigid container to prevent crushing. They’ll stay fresh for 3-4 days, making them perfect for shipping or party contributions.
Conclusion
Giant bakery-style chocolate chip cookies are achievable for any home baker who masters four essential techniques: browning the butter for depth of flavor, folding the dough gently to prevent toughness, chilling thoroughly to control spreading, and using the bang method while baking for perfect texture. These oversized treats deliver crispy edges, chewy centers, and pools of melted chocolate in every bite. Try this recipe today and experience the joy of bakery-quality results in your own kitchen. Share your cookie photos and baking experiences in the comments below, leave a review to help fellow bakers, and subscribe to our blog for more professional-level recipes and techniques that transform home cooking into culinary excellence!
FAQs
Q: Can I make these cookies without chilling the dough?
A: While technically possible, chilling is strongly recommended and significantly impacts results. Minimum 30 minutes chilling prevents excessive spreading and creates thicker cookies with better texture. If absolutely pressed for time, freeze dough balls for 15 minutes as an emergency alternative, though overnight chilling produces noticeably superior flavor and texture. The wait is worth it—plan ahead and your patience will be rewarded with bakery-quality results.
Q: Why do my cookies spread too much or not enough?
A: Cookie spreading issues typically stem from three causes: incorrect butter temperature (use melted butter cooled to room temperature), inadequate chilling (always chill at least 30 minutes), or flour measurement errors (weigh flour or use the spoon-and-level method). Too much spreading usually means dough is too warm or contains too much butter. Insufficient spreading indicates too much flour or dough that’s too cold. Room temperature when baking and proper ratios create perfect spreading.
Q: Can I use this recipe for smaller, regular-sized cookies?
A: Absolutely! Use a 1.5-tablespoon cookie scoop for standard-sized cookies. Reduce baking time to 9-11 minutes and space cookies 2 inches apart. The bang method still applies at the 8-minute mark. You’ll get approximately 36-40 regular-sized cookies from this recipe. All other techniques remain the same, though smaller cookies won’t have quite the same impressive visual impact as giant bakery-style versions.
Q: What’s the best chocolate to use for these cookies?
A: High-quality chocolate makes a noticeable difference. Use a combination of chocolate types for complex flavor: 1 cup semi-sweet chocolate chips, ½ cup dark chocolate chunks (60-70% cacao), and ½ cup milk chocolate chips. Chopped chocolate bars work better than chips because they create beautiful irregular pools of melted chocolate. Avoid chocolate chips labeled “baking chips” as they’re formulated not to melt. Brands like Ghirardelli, Guittard, or chopped Lindt chocolate bars deliver superior results.
Q: How do I know when the cookies are perfectly done?
A: This is crucial: cookies should look slightly underdone when you remove them from the oven. Edges should be golden brown and set, but centers should appear pale, puffy, and soft—even slightly glossy. They should jiggle slightly when you gently shake the pan. Cookies continue baking on the hot sheet for 10 minutes after removing from the oven. If centers look fully cooked in the oven, they’ll be overbaked after cooling. Trust the timing: 12-14 minutes at 350°F for giant cookies.
Q: Can I add other mix-ins besides chocolate chips?
A: Definitely! These cookies serve as an excellent base for customization. Try adding 1 cup of: chopped nuts (walnuts, pecans, macadamias), dried fruit (cherries, cranberries), toffee bits, peanut butter chips, white chocolate chunks, or crushed pretzels for sweet-salty contrast. You can also add 2 tablespoons of instant espresso powder to the dough for mocha cookies, or 1 teaspoon of cinnamon for warmth. Keep total mix-ins to 2-2½ cups maximum to maintain proper dough consistency.
Q: Why brown the butter instead of just using regular melted butter?
A: Browning butter is a simple extra step that transforms cookies from good to exceptional. The process creates hundreds of new flavor compounds through the Maillard reaction, adding nutty, caramel, and toffee notes that provide complexity you can’t achieve otherwise. It takes just 5-7 minutes and elevates the entire recipe. Taste brown butter once, and you’ll understand why professional bakers swear by this technique. It’s the secret ingredient that makes people ask “what makes these so good?”
Q: My cookies turned out cakey instead of chewy—what happened?
A: Cakey cookies usually result from too much flour (measure carefully), too much leavening (follow recipe exactly), insufficient fat, or using all granulated sugar instead of the brown sugar/granulated sugar combination. Using cold butter and creaming it extensively also incorporates too much air, creating cake-like texture. For chewy cookies, use melted butter, measure flour accurately, don’t overmix, and ensure you’re using the extra egg yolk—it provides richness and chewiness that defines bakery-style texture.