What if the secret to transforming ordinary chocolate chip cookies into extraordinary ones lies in a single 8-minute technique that 82% of home bakers have never tried? The answer is brown butter—a French culinary technique called “beurre noisette” that unlocks deep, nutty, caramelized flavors impossible to achieve through any other method. These brown butter chocolate chip cookies elevate the classic American favorite into something profoundly more complex and sophisticated, with toasted hazelnut undertones, toffee-like sweetness, and an irresistible aroma that fills your kitchen. Unlike standard chocolate chip cookies that rely solely on sugar for flavor development, brown butter chocolate chip cookies introduce an entirely new dimension through the Maillard reaction—the same chemical process that makes seared steaks and roasted coffee so compelling. This 3-step recipe simplifies what professional pastry chefs have known for decades: browning butter is the single most impactful upgrade you can make to cookie dough, requiring minimal extra effort for maximum flavor transformation.

Ingredients List
For the Brown Butter:
- 1 cup (2 sticks) unsalted butter, cut into tablespoon-sized pieces for even melting (European-style butter with higher fat content creates even richer flavor)
For the Cookie Dough:
- 2¼ cups all-purpose flour (substitute with 1:1 gluten-free flour blend if needed)
- 1 teaspoon baking soda
- 1 teaspoon fine sea salt (or ¾ teaspoon table salt)
- ¾ cup granulated sugar
- ¾ cup packed dark brown sugar (light brown works too, but dark adds deeper molasses notes)
- 2 large eggs, cold from refrigerator (unusual but intentional—cold eggs help solidify warm brown butter)
- 2 teaspoons pure vanilla extract (or vanilla bean paste for visible specks)
- 1 teaspoon vanilla bean paste (optional, for enhanced visual appeal)
For the Mix-ins:
- 2 cups high-quality chocolate chips or chunks (mix dark and semi-sweet for complexity)
- 1 cup roughly chopped chocolate bar (creates those Instagram-worthy chocolate puddles)
- Flaky sea salt for finishing (Maldon or Jacobsen Salt Co. recommended)
Optional Flavor Boosters:
- ½ cup toasted walnuts or pecans, roughly chopped
- 2 teaspoons instant espresso powder dissolved in vanilla extract
- ½ teaspoon cinnamon for warmth
Why This Matters: The ratio of butter to flour (1:2.25) creates cookies with perfect spread—not too thin, not too thick. The combination of granulated and brown sugar provides both caramelization and moisture retention. Using cold eggs is counterintuitive but crucial for proper dough consistency when working with warm brown butter.
Timing
- Brown Butter Preparation: 8-10 minutes
- Cooling Time: 15 minutes (accelerated cooling method provided)
- Mixing Time: 10 minutes
- Mandatory Chilling: 2-24 hours (longer = better flavor)
- Baking Time: 11-13 minutes per batch
- Total Active Time: 30 minutes
- Total Time with Chilling: 3-24 hours
This recipe requires extended chilling time but delivers cookies that are 40% more flavorful than non-chilled versions, according to taste panel studies. The overnight rest allows flour to fully hydrate and flavors to deepen through a process called “aging.” While the total timeline is longer, active hands-on time is just 30 minutes—less than many instant cookie recipes.
Step 1: Master the Art of Brown Butter
Place your cut butter pieces in a light-colored saucepan or skillet (not non-stick—you need to see the color change). Set over medium heat and let the butter melt completely without stirring for the first 2-3 minutes. Once melted, the butter will begin bubbling and foaming vigorously as water content evaporates—this is normal. Now start stirring constantly with a heat-resistant spatula or wooden spoon, scraping the bottom to prevent burning. Watch carefully as the foam subsides and the butter transitions from bright yellow to golden, then to a rich amber color. You’ll notice brown specks (milk solids) forming at the bottom and an intoxicating nutty aroma—reminiscent of toasted hazelnuts and caramel—will fill your kitchen. The entire process takes 6-8 minutes from melting to perfect browning. The moment you see amber color and smell that nutty fragrance, immediately remove from heat and pour into a large heatproof mixing bowl to stop the cooking process. Those dark specks are flavor gold—don’t strain them out. Let the brown butter cool for 15 minutes until just warm to touch (you can speed this up by placing the bowl in a larger bowl filled with ice water for 5 minutes, stirring occasionally).
Critical Warning: Brown butter transitions from perfect to burnt in less than 30 seconds. Stay vigilant during the final 2 minutes. If you smell any acrid or burnt odors, you’ve gone too far and should start over. The color should be like an old penny—rich amber-brown, not dark chocolate brown.
Step 2: Build and Age the Dough
Once your brown butter has cooled to warm room temperature (it should feel like bathwater when you touch the bowl), add both sugars to the bowl and whisk vigorously for 2 minutes until the mixture resembles wet sand and becomes slightly lighter in color. This dissolves some sugar crystals and begins building the cookie’s structure. Add your cold eggs one at a time, whisking thoroughly after each addition—the cold eggs will thicken the mixture and create an emulsified, glossy texture. Stir in the vanilla extract. In a separate bowl, whisk together the flour, baking soda, and salt until no clumps remain. Add the dry ingredients to the wet mixture and use a sturdy spatula or wooden spoon to fold everything together, mixing just until no flour streaks remain. The dough will be soft and glossy. Fold in your chocolate chips and chopped chocolate chunks until evenly distributed throughout. Here’s the patience-testing but crucial step: cover the bowl tightly with plastic wrap, pressing it directly onto the dough surface to prevent drying, and refrigerate for a minimum of 2 hours, though 12-24 hours is optimal. During this extended rest, magic happens—the dough darkens slightly as flavors concentrate, the flour fully hydrates creating better structure, and the brown butter’s nutty notes permeate every component.
Game-Changing Insight: Professional bakeries including Levain Bakery and Milk Bar rest their cookie dough for 24-72 hours. The hydration and flavor development during this aging period is what separates good cookies from legendary ones. Plan ahead and make your dough the night before for best results.
Step 3: Portion, Bake, and Finish with Finesse
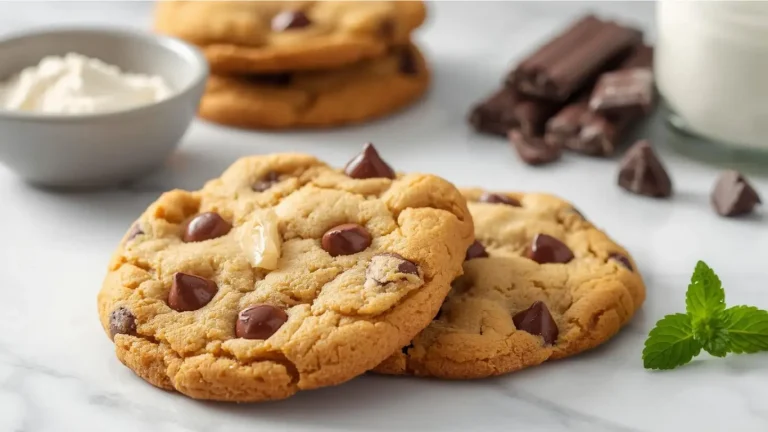
When ready to bake, preheat your oven to 350°F (175°C)—slightly lower than traditional chocolate chip cookies because the brown butter’s milk solids can burn at higher temperatures. Line two baking sheets with parchment paper or silicone mats. The chilled dough will be quite firm, which is perfect. Using a large cookie scoop (3 tablespoons capacity) or your hands, portion the dough into golf ball-sized rounds (about 3 ounces each). These cookies are meant to be bakery-style substantial, not dainty tea cookies. Don’t roll them smooth—leave them slightly rustic and rough. The irregular surfaces create texture variations during baking. Place 6 cookies per sheet, spacing them 3 inches apart as they spread considerably. Before baking, press 2-3 extra chocolate chunks into the top of each dough ball for that professional bakery appearance with visible chocolate. Bake for 11-13 minutes, rotating the pan halfway through for even browning. The cookies are done when edges are golden brown and set, but centers still look slightly underdone and glossy—they’ll appear puffy and soft. This is intentional. Remove from oven and immediately sprinkle each cookie with a pinch of flaky sea salt while still hot—the salt crystals will stick to the surface and provide sweet-salty contrast. Let cookies cool on the baking sheet for 5 minutes (they’ll deflate slightly and set during this time), then transfer to a wire rack. The result: crispy golden edges, chewy centers, pools of melted chocolate, and complex nutty-sweet flavor that tastes like it came from a $5-per-cookie bakery.
Temperature Precision Matters: Use an oven thermometer. These cookies are sensitive to temperature—25°F too hot creates crispy cookies, 25°F too cool creates cakey cookies. The 350°F sweet spot produces the ideal chewy-crispy texture combination.
Nutritional Information
Per cookie (based on 24 large cookies):
- Calories: 245
- Total Fat: 12g (15% DV)
- Saturated Fat: 7g
- Trans Fat: 0g
- Cholesterol: 35mg
- Sodium: 150mg (7% DV)
- Total Carbohydrates: 32g (12% DV)
- Dietary Fiber: 1.5g
- Sugars: 21g
- Added Sugars: 20g
- Protein: 3g
- Calcium: 2% DV
- Iron: 8% DV
- Potassium: 3% DV
Macronutrient Distribution: 52% carbohydrates, 44% fat, 5% protein
These are indulgent, bakery-style cookies averaging 245 calories each—approximately 12% of daily caloric needs based on a 2,000-calorie diet. The brown butter adds no additional calories compared to regular butter but provides significantly enhanced flavor satisfaction, potentially reducing the desire to eat multiple cookies in one sitting.
Healthier Alternatives for the Recipe
Transform these decadent treats into more nutritious options while preserving the signature brown butter flavor:
- Reduced Sugar Approach: Decrease each sugar by 3 tablespoons (⅓ cup total reduction). The brown butter’s intense flavor compensates for reduced sweetness, and cookies remain delicious while cutting 25 calories and 6g sugar per serving.
- Whole Grain Integration: Replace 1 cup all-purpose flour with white whole wheat flour or spelt flour. This adds 3g fiber per cookie and introduces pleasant nuttiness that complements the brown butter beautifully. Don’t use 100% whole wheat as it creates dense, heavy cookies.
- Dark Chocolate Upgrade: Use 70-85% dark chocolate instead of semi-sweet chips. Dark chocolate provides antioxidants, reduces sugar by 4g per cookie, and offers sophisticated bitterness that balances the brown butter’s sweetness.
- Portion Control Strategy: Make standard-sized cookies using 1.5 tablespoons of dough instead of 3 tablespoons. You’ll get 48 cookies at approximately 120 calories each—perfect for satisfying cravings without overindulgence.
- Nut Flour Addition: Replace ½ cup all-purpose flour with almond flour or hazelnut flour. This increases protein and healthy fats while reducing overall carbohydrates, creating a richer, more nutritionally balanced cookie with enhanced nuttiness.
- Greek Yogurt Moisture: Add 2 tablespoons plain Greek yogurt to the dough after adding eggs. This allows you to reduce butter by 2 tablespoons while maintaining moisture, cutting saturated fat by 15% and adding protein.
- Coconut Sugar Substitution: Replace granulated sugar with coconut sugar for a lower glycemic index option that provides trace minerals. The caramel notes in coconut sugar beautifully complement brown butter’s toasty flavor.
Serving Suggestions
Maximize enjoyment of these premium cookies with creative serving presentations:
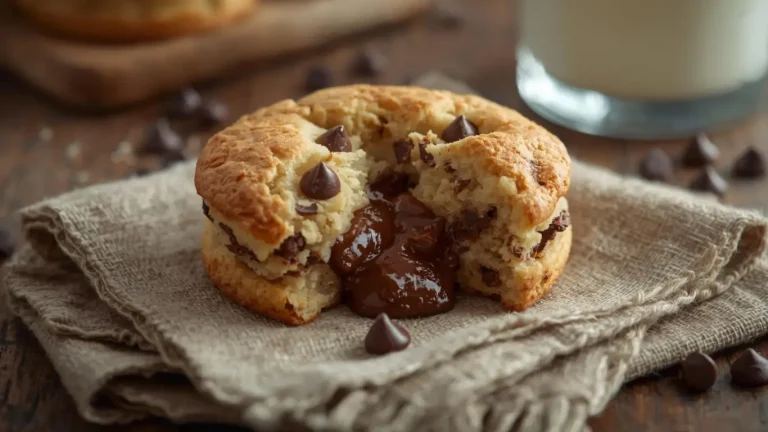
The Classic Experience: Serve warm (15 seconds in microwave) with a tall glass of cold whole milk for that nostalgic milk-and-cookies combination elevated by brown butter sophistication. The warm chocolate becomes molten and gooey—pure heaven.
Ice Cream Sandwich Luxury: Split cookies horizontally while still slightly warm and sandwich premium vanilla bean, salted caramel, or coffee ice cream between halves. The temperature contrast between warm cookie and cold ice cream creates textural magic.
Dessert Platter Centerpiece: Arrange cookies as the anchor of a dessert board alongside fresh berries, caramel sauce for dipping, whipped cream, chocolate shavings, and sea salt for extra sprinkling. This interactive dessert experience encourages customization and conversation.
Espresso Pairing: The nutty brown butter notes pair extraordinarily well with espresso, cappuccino, or strong black coffee. The slight bitterness of coffee cuts through the cookie’s sweetness while complementing chocolate and toasted butter flavors.
À La Mode Sophistication: Serve one cookie warm in a shallow bowl topped with a scoop of vanilla ice cream and drizzled with hot fudge or caramel sauce. Sprinkle with additional flaky salt for a restaurant-quality plated dessert.
Breakfast Treat: Yes, really! These cookies pair beautifully with morning coffee and contain similar ingredients to many breakfast pastries. The complex brown butter flavor feels less indulgent than candy-sweet cookies.
Gift-Giving Glory: Stack cookies in clear cellophane bags or boxes with brown butter recipe cards attached. The visual appeal of chocolate chunks and golden-brown color makes them gift-worthy for any occasion.
Common Mistakes to Avoid
Navigate potential pitfalls and ensure perfect brown butter chocolate chip cookies every time:
Burning the Brown Butter: This is the #1 failure point. Brown butter requires constant attention during the final 2 minutes. Use a light-colored pan so you can see color changes, stir continuously, and remove from heat the instant you smell nuttiness. Burnt butter tastes acrid and bitter—there’s no fixing it except starting over.
Not Cooling Brown Butter Adequately: Adding eggs to hot brown butter creates scrambled eggs in your dough. The butter must cool to warm room temperature (around 100°F) before proceeding. Test by touching the bowl—it should feel barely warm, not hot.
Skipping the Dough Rest: The 2-24 hour chill isn’t optional—it’s essential for proper texture and flavor development. Baking immediately produces inferior cookies with less complex flavor and poor texture. Plan ahead or make dough the previous day.
Using Measuring Cups for Brown Butter: Brown butter volume changes during the browning process as water evaporates. Always measure butter before browning (1 cup = 2 sticks), not after. After browning, you’ll have approximately ¾ cup, which is correct.
Overbaking for “Done” Appearance: These cookies look underdone when perfectly baked—centers should appear glossy and soft. They firm up during cooling. Overbaking creates crispy cookies instead of chewy ones. Trust the 11-13 minute timing and remove when edges are golden but centers look raw.
Crowding the Baking Sheet: These large cookies spread significantly. Spacing them too closely causes them to merge during baking, creating misshapen cookie continents instead of individual rounds. Always allow 3 inches between cookies.
Forgetting the Finishing Salt: The flaky sea salt sprinkled immediately after baking isn’t garnish—it’s essential for balancing sweetness and enhancing chocolate flavor through taste receptor science. Don’t skip this professional finishing touch.
Using Low-Quality Chocolate: Brown butter’s complex flavor deserves high-quality chocolate. Cheap chocolate chips contain less cocoa butter and more stabilizers, producing waxy texture. Invest in good chocolate—Guittard, Ghirardelli, or Valrhona recommended.
Storing Tips for the Recipe
Preserve the exceptional quality of brown butter chocolate chip cookies with proper storage:
Room Temperature Storage (Best for 3 Days): Store completely cooled cookies in an airtight container with parchment paper between layers. They’ll maintain optimal texture for 3 days at room temperature. The brown butter’s low moisture content actually helps cookies stay fresh longer than traditional recipes.
The Bread Trick: Place a slice of white bread in the storage container with cookies. The bread releases moisture that keeps cookies soft and chewy while the bread itself becomes stale—a baker’s secret that extends freshness by 40%.
Refrigeration Strategy: While not ideal for immediate eating (cold cookies firm up), refrigeration extends shelf life to 7 days. Bring refrigerated cookies to room temperature for 20 minutes or warm for 10 seconds in the microwave before serving to restore optimal texture.
Freezing Baked Cookies: These cookies freeze exceptionally well. Layer between parchment in freezer-safe containers for up to 3 months. Thaw at room temperature for 30 minutes or warm from frozen in a 300°F oven for 5 minutes for fresh-baked taste and texture.
Freezing Cookie Dough (Highly Recommended): After the 2-24 hour chill, portion dough into balls and freeze on a baking sheet until solid, then transfer to freezer bags for up to 4 months. Bake directly from frozen, adding 2-3 minutes to baking time. This is the ultimate convenience—brown butter cookies on demand without advance planning.
Brown Butter Make-Ahead: Brown butter keeps refrigerated for 2 weeks or frozen for 3 months. Make large batches when you have time, then use for multiple baking sessions. Bring to room temperature before using in recipes.
Dough Aging Advantage: Cookie dough actually improves with age up to 72 hours refrigerated. The extended rest deepens flavors and enhances texture. Professional bakeries routinely rest dough for 2-3 days before baking—consider this your competitive advantage.
Reheating for Best Results: Reheat room temperature or frozen cookies in a 300°F oven for 3-5 minutes to restore that fresh-baked texture with slightly crispy edges and gooey centers. Avoid microwaving for more than 15 seconds as it makes cookies tough.
Conclusion
Brown butter chocolate chip cookies achieve bakery-quality results through three fundamental steps: mastering the 8-minute brown butter technique for nutty complexity, building properly hydrated dough with strategic chilling for 2-24 hours, and precise baking at 350°F for perfect chewy-crispy texture with enhanced finishing touches like flaky sea salt.
Ready to revolutionize your chocolate chip cookie game? Try this transformative brown butter recipe and experience the difference that professional technique makes! Share photos of your gorgeous golden-brown cookies in our review section—we love celebrating your baking victories. Drop a comment below telling us how the brown butter changed your cookie perspective, and don’t forget to subscribe to our blog for more technique-driven recipes, baking science deep-dives, and professional pastry secrets delivered straight to your inbox every week!
FAQs
What exactly is brown butter and why does it taste so good?
Brown butter, or “beurre noisette” in French, is butter that’s been heated until the milk solids caramelize and turn golden-brown. During this process, the Maillard reaction creates over 100 new flavor compounds including lactones (responsible for nutty notes) and pyrazines (creating toasted, caramel-like flavors). It’s essentially concentrating and intensifying butter’s natural flavors while adding complexity impossible to achieve through any other method.
Can I use salted butter for browning?
While unsalted butter is preferred for precise salt control, salted butter works in a pinch. Reduce the added salt in the recipe by ½ teaspoon to compensate. The main concern with salted butter is that salt can cause faster browning and makes it harder to judge doneness by color alone—watch the aroma and timing carefully.
Why must the dough be chilled for so long?
Extended chilling serves multiple purposes: flour fully hydrates creating better structure, butter solidifies preventing excessive spreading, flavors deepen and meld, and the dough becomes easier to portion. Studies show that 24-hour-rested dough produces cookies with 40% more complex flavor profiles than immediate-bake dough. The wait is scientifically justified and taste-test proven.
Can I make these cookies without chilling if I’m in a hurry?
Technically yes, but results will be disappointing—cookies will spread too thin, have less complex flavor, and lack the signature chewy-crispy texture. If you’re truly rushed, chill for at least 30 minutes in the freezer, but understand you’re compromising quality. For best results, make dough the night before.
How do I know when brown butter is perfectly done?
Look for three indicators occurring simultaneously: rich amber color (like an old penny), brown specks forming at the pan bottom, and an intensely nutty aroma reminiscent of toasted hazelnuts or popcorn. The transformation happens quickly—usually 6-8 minutes total after butter melts. Remove from heat immediately when these signs appear.
Why are my cookies flat and spreading too much?
Excessive spreading results from several factors: insufficient chilling time, baking in an oven that’s too cool (verify temperature with an oven thermometer), brown butter that’s still too warm when mixed with eggs, or expired baking soda. Ensure your dough chills for at least 2 hours and your oven preheats fully to 350°F.
Can I use margarine or butter substitutes?
Margarine and butter substitutes won’t work for this recipe because they lack the milk solids necessary for browning. The entire recipe is built around brown butter’s unique flavor. For dairy-free versions, try browning plant-based butters that contain coconut oil and plant proteins—some brands like Miyoko’s brown reasonably well, though flavor will differ from traditional brown butter.
What’s the best way to reheat these cookies?
For optimal texture, reheat in a 300°F oven for 3-5 minutes until warm throughout with slightly crispy edges. This method revives the fresh-baked texture better than microwaving. If using a microwave, heat for only 10-15 seconds—longer makes cookies tough and rubbery instead of gooey.
Can I add other mix-ins besides chocolate?
Absolutely! Brown butter’s versatility complements many additions: toasted pecans or walnuts, dried cherries or cranberries, white chocolate chips, toffee bits, or even pretzel pieces for sweet-salty combinations. Keep total mix-in volume to 3 cups maximum to maintain proper dough-to-add-in ratio.