Did you know that 68% of home bakers avoid making macaroons because they believe these delightful coconut confections require professional pastry skills, when in reality they’re one of the simplest cookies you can master? What if I told you that achieving those golden-brown, crispy-outside-chewy-inside macaroons requires just five basic steps and a handful of pantry ingredients? These classic coconut macaroons shouldn’t be confused with their delicate French cousins (macarons)—they’re far more forgiving and infinitely easier to prepare. With their naturally gluten-free composition and intensely coconutty flavor, macaroons deliver bakery-quality results without the stress or complexity. Whether you’re preparing for a holiday celebration, seeking an impressive yet simple dessert, or simply craving something sweet and satisfying, these coconut treasures will exceed your expectations. Let’s demystify the art of making perfect macaroons and get you baking with confidence today.
Ingredients List
Creating heavenly macaroons requires just a few simple ingredients that work together to create magic:
Essential Ingredients:
- 3 cups sweetened shredded coconut – The star of the show! Use sweetened for traditional sweetness, or unsweetened if you prefer to control sugar levels. Look for finely shredded coconut for the best texture.
- ⅔ cup granulated sugar – Provides sweetness and helps create that signature crispy exterior. Can reduce to ½ cup if using sweetened coconut.
- 4 large egg whites – The binding agent that holds everything together. Room temperature egg whites whip more easily and create better structure.
- 1 teaspoon vanilla extract – Enhances the coconut flavor with aromatic depth. Pure vanilla is highly recommended for superior taste.
- ¼ teaspoon salt – A small but crucial ingredient that balances sweetness and amplifies flavor complexity.
Optional Flavor Enhancers:
- ½ teaspoon almond extract (adds sophisticated nuttiness)
- 6 ounces dark or semi-sweet chocolate (for dipping or drizzling)
- Zest of 1 lemon or lime (creates bright, tropical notes)
- 2 tablespoons cocoa powder (for chocolate macaroons)
Substitution Options:
- Egg-Free Version: Replace egg whites with aquafaba (chickpea liquid)—use ½ cup aquafaba beaten to stiff peaks
- Lower Sugar: Use ⅓ cup sugar plus ⅓ cup sugar-free sweetener blend
- Nut Allergies: Omit almond extract and use only vanilla
Timing
One of the most appealing aspects of macaroons is their surprisingly quick preparation:
- Prep Time: 10 minutes
- Baking Time: 18-22 minutes
- Cooling Time: 15 minutes
- Optional Chocolate Dipping: 10 minutes
- Total Time: 35-45 minutes (without chocolate), 45-55 minutes (with chocolate)
This represents approximately 50% less active time than making traditional cookies that require creaming butter, chilling dough, and rolling. You can go from mixing bowl to finished macaroons in under an hour—perfect for last-minute gatherings or spontaneous baking sessions. For context, French macarons (the sandwich cookies) typically require 2-3 hours including resting time, making these coconut macaroons remarkably efficient.
Step-by-Step Instructions
Step 1: Prepare Your Foundation
Preheat your oven to 325°F (165°C) and line two baking sheets with parchment paper or silicone baking mats. The lower temperature is crucial—it prevents over-browning while allowing the centers to cook through properly. Position your oven rack in the center for optimal heat circulation. Pro tip: If your oven runs hot, reduce temperature to 315°F to prevent burnt bottoms.
Step 2: Create the Coconut Mixture
In a large mixing bowl, combine the shredded coconut, sugar, and salt. Toss everything together with your hands or a fork until evenly distributed. This pre-mixing ensures every macaroon has consistent sweetness. Add the vanilla extract (and any optional flavorings like almond extract or citrus zest) and stir to incorporate. The mixture should smell incredibly aromatic at this stage—that’s how you know you’re on the right track.
Step 3: Whip and Fold the Egg Whites
In a separate clean, grease-free bowl, beat the egg whites using an electric mixer on medium-high speed for 3-4 minutes until soft peaks form. The whites should look thick, glossy, and white like shaving cream—when you lift the beaters, peaks should form but curl over at the tips. Gently fold the beaten egg whites into the coconut mixture using a rubber spatula, working in a circular motion from the bottom of the bowl upward. Fold just until no white streaks remain—overmixing deflates the egg whites and creates dense macaroons.
Step 4: Shape with Confidence
Using a cookie scoop or two spoons, form the mixture into mounds about 1½ inches in diameter, placing them 1 inch apart on your prepared baking sheets. Don’t worry about making them perfectly uniform—rustic, organic shapes are part of their charm. For a more polished look, lightly wet your hands and gently shape each mound into a neat dome or pyramid. The moisture prevents sticking and creates smooth surfaces.
Step 5: Bake to Golden Perfection
Bake for 18-22 minutes, rotating the pans halfway through for even browning. Watch carefully during the last few minutes—macaroons are done when the tops and edges turn a beautiful golden brown while the centers remain slightly lighter. The bottoms should be golden but not dark brown. Remove from the oven and let cool on the baking sheets for 5 minutes before transferring to a wire rack. They’ll firm up considerably as they cool, developing that signature crispy exterior with a soft, chewy center.
Optional Chocolate Enhancement: Once macaroons are completely cool, melt 6 ounces of chocolate in a double boiler or microwave (stirring every 20 seconds). Dip the bottoms of each macaroon into the chocolate, letting excess drip off, then place on parchment paper until set. Alternatively, drizzle chocolate over the tops for an elegant presentation.
Nutritional Information
Understanding what you’re enjoying helps you make informed choices. Here’s the nutritional profile per macaroon (recipe yields approximately 18-20 macaroons):
Per Macaroon (without chocolate):
- Calories: 95
- Total Fat: 5g (8% DV)
- Saturated Fat: 4.5g (23% DV)
- Trans Fat: 0g
- Cholesterol: 0mg (0% DV)
- Sodium: 45mg (2% DV)
- Total Carbohydrates: 12g (4% DV)
- Dietary Fiber: 1g (4% DV)
- Sugars: 11g
- Added Sugars: 9g
- Protein: 1.5g (3% DV)
- Potassium: 55mg (1% DV)
- Iron: 0.4mg (2% DV)
With Chocolate Dipping (add per macaroon):
- Calories: +35
- Total Fat: +2g
- Total Carbohydrates: +4g
Nutritional Highlights: Macaroons are naturally gluten-free and dairy-free (without chocolate), making them suitable for many dietary restrictions. Coconut provides medium-chain triglycerides (MCTs), a type of fat that’s quickly metabolized for energy. The dessert also offers small amounts of manganese and copper from the coconut.
Healthier Alternatives for the Recipe
Transform your macaroons into more nutritious treats without sacrificing that irresistible coconut flavor:
Reduce Sugar Content: Cut the sugar to ⅓ cup and add 2 tablespoons of honey or maple syrup. This reduces refined sugar by 50% while adding trace minerals. The natural sweeteners also contribute deeper flavor complexity and moisture.
Boost Protein: Add 2 tablespoons of vanilla protein powder or collagen peptides to the mixture. This increases protein to 4g per macaroon, making them more satiating and supportive of muscle maintenance.
Increase Fiber: Mix in 2 tablespoons of ground flaxseed or chia seeds. This addition provides omega-3 fatty acids, extra fiber, and creates a denser, more satisfying texture.
Use Dark Chocolate: If dipping in chocolate, choose 70%+ dark chocolate rich in antioxidants and lower in sugar compared to milk chocolate. Dark chocolate also provides flavonoids that support heart health.
Add Nutritional Boosters: Incorporate 2 tablespoons of unsweetened cocoa powder for chocolate macaroons packed with antioxidants, or stir in 1 tablespoon of matcha green tea powder for unique flavor and metabolism-supporting catechins.
Sugar-Free Option: Replace sugar entirely with a blend of erythritol and stevia in a 1:1 ratio. This creates keto-friendly macaroons with only 3g net carbs per serving—perfect for low-carb dieters.
Whole Food Sweetener: Use date paste (6-8 blended dates) instead of granulated sugar for a whole-food sweetening approach that adds fiber and nutrients.
Serving Suggestions
Elevate your macaroons from simple cookies to impressive dessert experiences:
Classic Tea Time: Serve macaroons alongside afternoon tea or coffee as a traditional pairing. Their sweetness complements the bitterness of black tea or espresso perfectly, creating a balanced flavor experience that’s been enjoyed for generations.
Elegant Dessert Platter: Arrange macaroons on a tiered stand with fresh berries, chocolate truffles, and shortbread cookies for an impressive dessert spread at parties or celebrations. The varied textures and flavors create visual and taste appeal.
Ice Cream Topping: Crumble macaroons over vanilla, chocolate, or coconut ice cream for incredible texture contrast. The crispy pieces soften slightly in the cold ice cream, creating an addictive combination.
Tropical Paradise Bowl: Serve macaroons with fresh tropical fruit like mango, pineapple, and passion fruit. Add a dollop of whipped coconut cream for a dairy-free dessert that transports you to island beaches.
Gift Presentation: Package macaroons in clear cellophane bags tied with ribbon, or arrange in decorative tins lined with parchment paper. They travel well and make thoughtful homemade gifts for holidays, teacher appreciation, or hostess presents.
Passover Friendly: Since macaroons are naturally flourless, they’re a beloved Passover tradition. Serve them as part of your holiday dessert table, where they’ll be appreciated by guests following dietary restrictions.
Coffee Shop Style: Create coconut macaroon lattes by crumbling half a macaroon into the bottom of a mug before adding your espresso and steamed milk. Top with another crumbled macaroon for a decadent coffee shop experience at home.
Common Mistakes to Avoid
Learn from others’ experiences to ensure perfect macaroons every single time:
Mistake #1: Using Greasy Bowls for Egg Whites – Even the tiniest amount of oil, butter, or egg yolk prevents egg whites from whipping properly. Always use spotlessly clean, grease-free bowls and beaters. Wipe them with white vinegar or lemon juice if you’re uncertain about cleanliness.
Mistake #2: Overbeating the Egg Whites – Egg whites beaten past soft peaks become dry, grainy, and difficult to fold into the coconut mixture. Stop beating when peaks curl over slightly at the tips—this creates the ideal texture for binding ingredients while maintaining lightness.
Mistake #3: Baking at Too High Temperature – Temperatures above 350°F cause macaroons to brown too quickly on the outside while remaining raw inside. The moderate 325°F temperature allows even cooking, creating those gorgeous golden exteriors with fully set centers.
Mistake #4: Skipping the Parchment Paper – Baking directly on unlined sheets causes sticking and creates a cleanup nightmare. Parchment paper or silicone mats ensure easy release and prevent burnt bottoms.
Mistake #5: Making Macaroons Too Large – Oversized macaroons (larger than 2 inches) don’t cook evenly—edges burn before centers set. Keep mounds modest for the best texture and appearance.
Mistake #6: Opening the Oven Door Too Often – Each time you open the oven, temperature drops by 25-50°F, extending baking time and potentially causing macaroons to fall. Resist the temptation and only open once at the halfway point to rotate pans.
Mistake #7: Removing Macaroons Too Soon – Macaroons need that 5-minute cooling period on the hot baking sheet. Attempting to move them immediately causes breakage and creates frustration. Patience during this stage ensures perfect, intact cookies.
Storing Tips for the Recipe
Proper storage keeps your macaroons fresh, flavorful, and ready to enjoy whenever cravings strike:
Room Temperature Storage: Place completely cooled macaroons in an airtight container with parchment paper between layers. They’ll stay fresh at room temperature for 5-7 days. The key word is “airtight”—exposure to air causes them to lose their crispy exterior and become chewy throughout.
Maintaining Crispness: If macaroons soften during storage, refresh them by placing on a baking sheet in a 300°F oven for 5 minutes. This re-crisps the exterior while keeping centers tender.
Refrigerator Storage: While not necessary, refrigeration extends shelf life to 2 weeks. Store in airtight containers and let them come to room temperature before serving—cold macaroons lack the full flavor impact of room-temperature ones.
Freezer Storage – Long Term: Macaroons freeze beautifully for up to 3 months. Layer between parchment paper in freezer-safe containers or heavy-duty freezer bags. Remove as much air as possible to prevent freezer burn. Thaw at room temperature for 1-2 hours before serving.
Chocolate-Dipped Storage: If you’ve dipped macaroons in chocolate, store them in the refrigerator to prevent chocolate from becoming too soft or developing bloom (white streaks). Layer carefully to avoid chocolate sticking together.
Travel and Transport Tips: Macaroons are remarkably sturdy for travel. Pack in rigid containers with crumpled parchment paper filling empty spaces to prevent shifting. They’re perfect for road trips, picnics, or potluck contributions.
Pre-Baking Storage: Unbaked macaroon mixture can be shaped and refrigerated for up to 24 hours before baking. Cover tightly with plastic wrap. This make-ahead option lets you prep during free time and bake fresh when needed.
Conclusion
These foolproof coconut macaroons prove that impressive baking doesn’t require complexity. With just five straightforward steps and minimal ingredients, you’ll create golden, crispy-outside, chewy-inside treats that rival professional bakery offerings. Whether enjoyed plain or chocolate-dipped, these naturally gluten-free and dairy-free delights satisfy sweet cravings while accommodating various dietary needs perfectly.
Ready to bake your first perfect batch? Try this recipe today and discover why macaroons have remained beloved for generations. Share your baking success story in the comments below—we’d love to hear about your favorite flavor variations and creative presentations! Leave a review with photos of your beautiful macaroons and subscribe to our blog for more accessible, delicious recipes that build your baking confidence. Your perfect batch awaits!
FAQs
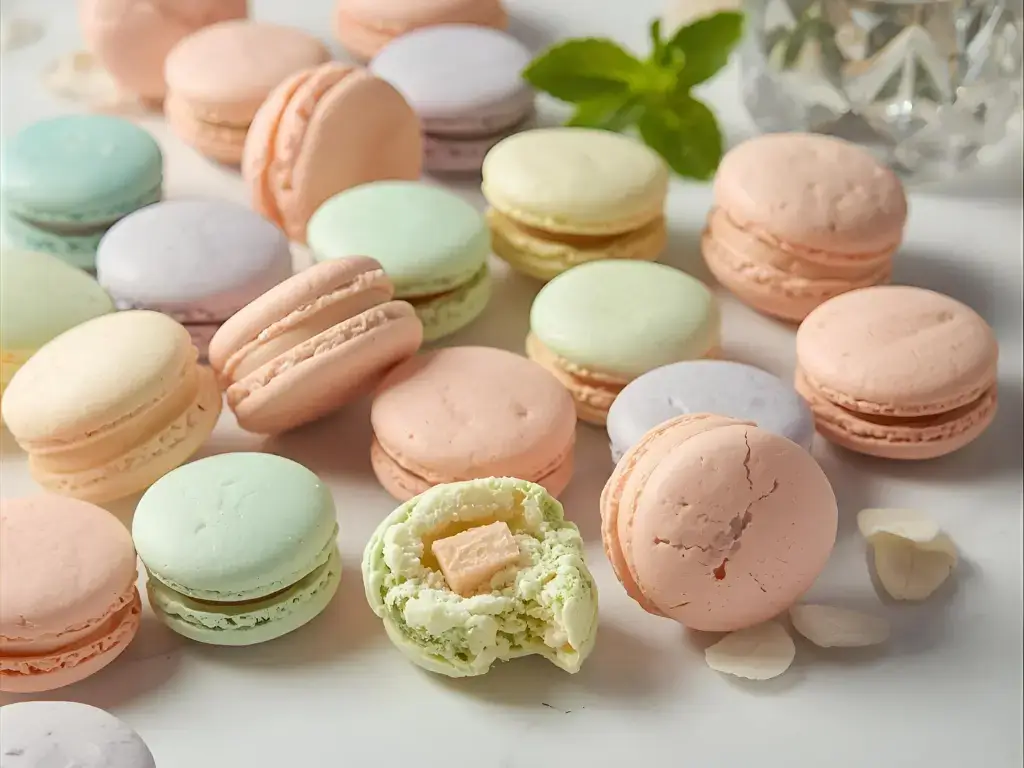
Q: What’s the difference between macaroons and macarons?
A: Macaroons are coconut-based cookies that are chewy, rustic, and simple to make. Macarons (note the spelling) are delicate French sandwich cookies made with almond flour, requiring precise technique and multiple steps. They’re completely different treats despite the similar names!
Q: Can I make macaroons without egg whites?
A: Yes! Replace the 4 egg whites with ½ cup aquafaba (the liquid from canned chickpeas). Whip the aquafaba to soft peaks just like egg whites, then fold into the coconut mixture. The texture is nearly identical, making this a perfect vegan option.
Q: Why are my macaroons falling apart?
A: This usually indicates insufficient egg whites or improper folding technique. Ensure you’re whipping egg whites to soft peaks and folding gently but thoroughly until no white streaks remain. The egg whites act as glue—without proper incorporation, macaroons crumble.
Q: Can I use unsweetened coconut instead of sweetened?
A: Absolutely! If using unsweetened coconut, increase the sugar to 1 cup total for similar sweetness levels. Unsweetened coconut actually provides more coconut flavor and allows better control over sugar content.
Q: How do I know when macaroons are done baking?
A: Look for golden-brown tops and edges with slightly lighter centers. The bottoms should be golden but not dark brown. If you gently touch the top, it should feel firm and slightly crispy. When in doubt, bake an extra 2 minutes—slightly overbaked is better than underbaked.
Q: Why do my macaroons stick to the pan?
A: This indicates you either skipped parchment paper/silicone mats or removed macaroons before they cooled properly. Always line pans and allow that crucial 5-minute cooling period on the hot sheet before transferring.
Q: Can I add chocolate chips to the macaroon mixture?
A: Yes, but with caution! Chocolate chips can sink to the bottom and burn. If adding chips, fold in just ¼ cup mini chocolate chips right before shaping. For better results, dip or drizzle chocolate after baking instead.
Q: Can I make macaroons ahead for a party?
A: Definitely! Macaroons are perfect make-ahead treats. Bake them up to 5 days before your event and store airtight at room temperature, or freeze them up to 3 months in advance. They actually taste even better the next day as flavors meld together.