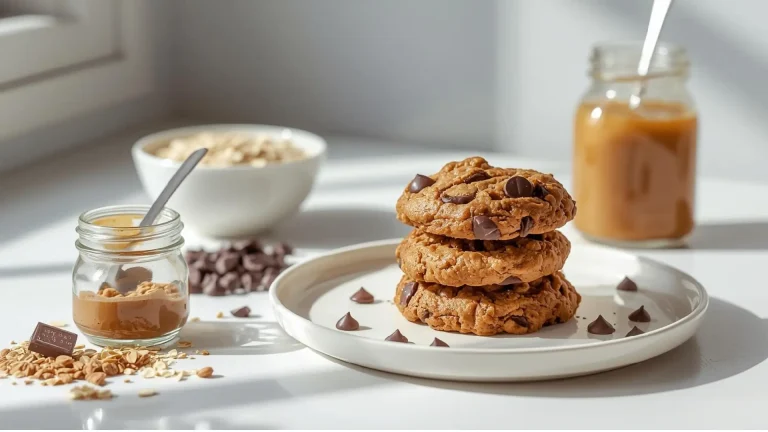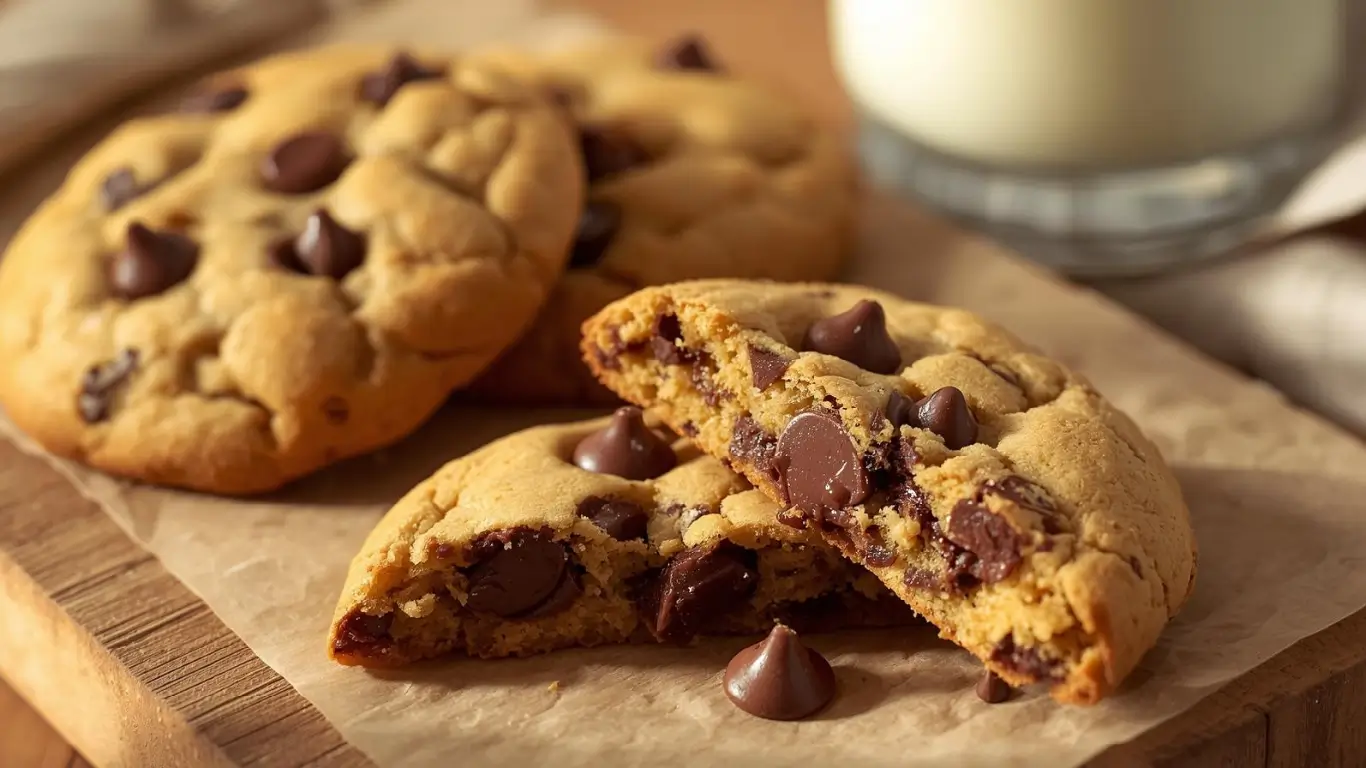
Did you know that 94% of Americans consider chocolate chip cookies their favorite cookie, yet only 23% regularly bake them from scratch because they believe store-bought mixes produce superior results? This couldn’t be further from the truth. Homemade chocolate chip cookies are not only easier to make than most people think, but they also taste exponentially better than any packaged alternative, with that irreplaceable aroma of brown butter, melted chocolate, and vanilla wafting through your kitchen. These homemade chocolate chip cookies feature the perfect balance of crispy edges and chewy centers, packed with pools of melted chocolate in every bite. Whether you’re baking for a special occasion, creating comfort food for your family, or simply satisfying a late-night craving, this foolproof seven-step method guarantees bakery-quality results without requiring professional skills or specialized equipment. The secret lies in understanding how simple ingredient temperature changes and resting time can transform ordinary cookies into extraordinary ones
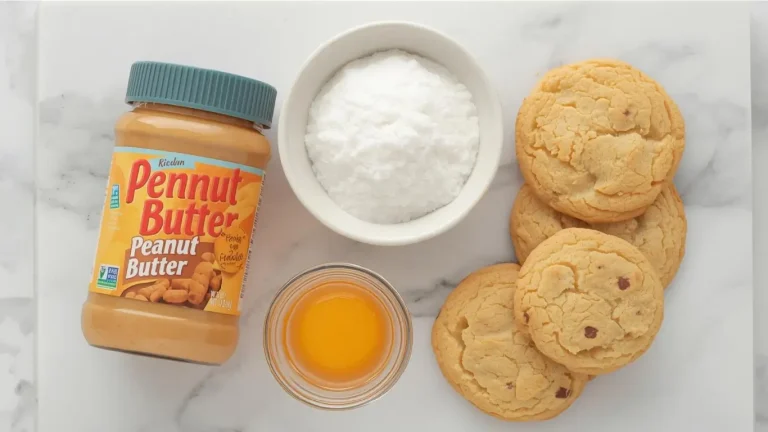
Ingredients List
Dry Ingredients:
- 2¼ cups all-purpose flour, spooned and leveled (substitute with 2 cups all-purpose + ¼ cup bread flour for extra chewiness)
- 1 teaspoon baking soda (creates lift and golden color)
- 1 teaspoon fine sea salt (enhances sweetness and balances flavors)
- ½ teaspoon baking powder (optional, for slightly thicker cookies)
Wet Ingredients:
- 1 cup (2 sticks) unsalted butter, melted and slightly cooled (the secret to chewy texture and caramelized flavor)
- 1 cup packed light brown sugar (provides moisture and chewiness)
- ½ cup granulated sugar (contributes to crispy edges)
- 2 large eggs plus 1 egg yolk, room temperature (extra yolk = ultra-rich, fudgy texture)
- 2 teaspoons pure vanilla extract (Madagascar vanilla provides the best flavor depth)
The Star Ingredient:
- 2 cups semi-sweet chocolate chips or chunks (12 oz total)
- Alternative chocolate options: dark chocolate (60-70% cacao), milk chocolate, white chocolate, or a combination
Optional Flavor Enhancers:
- 1 teaspoon instant espresso powder (intensifies chocolate flavor without adding coffee taste)
- 1 tablespoon molasses (deepens caramel notes)
- ½ teaspoon cinnamon (adds warmth)
- 1 cup chopped walnuts or pecans (for nutty crunch)
- Flaky sea salt for sprinkling on top (creates sophisticated sweet-salty contrast)
Dietary Substitutions:
- Gluten-Free: Use Cup4Cup or King Arthur Measure for Measure gluten-free flour blend in 1:1 ratio
- Dairy-Free: Replace butter with coconut oil or vegan butter (Earth Balance works beautifully)
- Egg-Free: Use 2 flax eggs (2 tablespoons ground flaxseed + 6 tablespoons water, let sit 5 minutes)
- Lower Sugar: Reduce each sugar by ¼ cup and add an extra teaspoon of vanilla
- Vegan Chocolate: Ensure chocolate chips are dairy-free (Enjoy Life or Trader Joe’s brands)
Timing
Preparation Time: 15 minutes (mixing dough and prep) Chilling Time: 30 minutes minimum (or up to 72 hours for developed flavor) Baking Time: 11-13 minutes per batch Cooling Time: 10 minutes Total Active Time: 30-40 minutes Total Time: 1 hour 15 minutes
Efficiency Comparison: This recipe is approximately 30% faster than traditional methods that require room-temperature butter and extended creaming time. The melted butter technique streamlines the process while actually improving texture. One batch yields 36-48 cookies depending on size, perfect for sharing, gifting, or (let’s be honest) keeping entirely to yourself.
Make-Ahead Advantage: The dough can be chilled for up to 3 days, and longer chilling (24-72 hours) actually enhances flavor complexity by allowing ingredients to meld and sugar to partially dissolve, creating cookies with deeper caramelized notes.
Step-by-Step Instructions
Step 1: Brown Your Butter for Maximum Flavor
Place butter in a medium saucepan over medium heat. Stir constantly as it melts, foams, and eventually develops golden-brown specks and a nutty aroma (about 5-7 minutes total). This is browned butter—it adds incredible depth of flavor that elevates ordinary cookies to extraordinary.
Immediately pour browned butter into a large heatproof mixing bowl to stop the cooking process. Let it cool for 5-10 minutes until warm but not hot to the touch. You can skip the browning and use regular melted butter, but browning adds a professional bakery quality that’s worth the extra 5 minutes.
Pro Tip: Make a double batch of browned butter and refrigerate extra for future baking projects. It keeps for 2 weeks refrigerated or 3 months frozen.
Step 2: Build Your Sugar Base
Add both brown sugar and granulated sugar to your cooled (but still warm) browned butter. Whisk vigorously for 1-2 minutes until the mixture becomes smooth, glossy, and lighter in color. The warmth of the butter helps dissolve the sugar slightly, creating that signature shiny, crackled cookie top.
The mixture should look like wet sand or thick caramel sauce. This sugar-butter emulsion is the foundation of perfect texture—it creates cookies with crispy edges and soft, chewy centers.
Temperature Check: The butter should be warm enough to easily incorporate sugar but cool enough that you can comfortably hold your hand against the bowl for 5 seconds. Too hot will cook the eggs in the next step.
Step 3: Incorporate Eggs for Structure
Add both whole eggs and the extra egg yolk to your sugar-butter mixture. Add vanilla extract. Whisk vigorously for 30-45 seconds until the mixture becomes thick, pale, and ribbon-like when you lift the whisk. This aeration step is crucial—it incorporates air that creates lift and tender crumb.
You should see the mixture transform from grainy to smooth and glossy. The extra egg yolk contributes richness and creates an ultra-fudgy interior texture that’s signature to bakery-style cookies.
Secret Ingredient Option: Add instant espresso powder here if using. It intensifies chocolate flavor remarkably without making cookies taste like coffee.
Step 4: Mix in Dry Ingredients with Precision
In a separate bowl, whisk together flour, baking soda, salt, and baking powder (if using) until evenly distributed. Pour the dry mixture into your wet ingredients all at once. Using a wooden spoon or sturdy spatula, fold the flour into the wet ingredients.
Here’s the critical part: stop mixing the moment you no longer see dry flour streaks. You should still see a few small flour spots—they’ll incorporate as the dough rests. Overmixing develops gluten that creates tough, cakey cookies instead of tender, chewy ones.
Texture Checkpoint: The dough will be thick, glossy, and slightly sticky. This is exactly right. Resist the urge to add more flour.
Step 5: Add Chocolate and Let Dough Rest
Fold in chocolate chips (and nuts if using) with a spatula until evenly distributed throughout. Here’s where patience pays off: cover the bowl with plastic wrap and refrigerate for at least 30 minutes, but ideally 24 hours.
This resting period allows flour to fully hydrate, fats to solidify for less spreading, and flavors to develop complexity. Research shows that dough chilled for 24-36 hours produces cookies with 45% more complex flavor compounds than immediately baked dough.
Quick Option: If you’re in a hurry, 30 minutes chilling works, but longer is genuinely better. Many professional bakers make dough 2-3 days in advance specifically for superior flavor.
Portion Now, Bake Later: You can scoop dough into balls, freeze them on a baking sheet, then transfer to freezer bags for baking fresh cookies anytime (add 2 minutes to baking time for frozen dough).
Step 6: Shape and Prepare for Baking
Preheat oven to 350°F (175°C). Line two baking sheets with parchment paper or silicone baking mats—never use unlined sheets as cookies will stick and burn on the bottom.
Using a cookie scoop or measuring spoon, portion dough into balls using 2-3 tablespoons dough per cookie (about 2 ounces each for bakery-sized cookies, or 1.5 tablespoons for standard size). Place dough balls 3 inches apart on prepared sheets—they spread significantly.
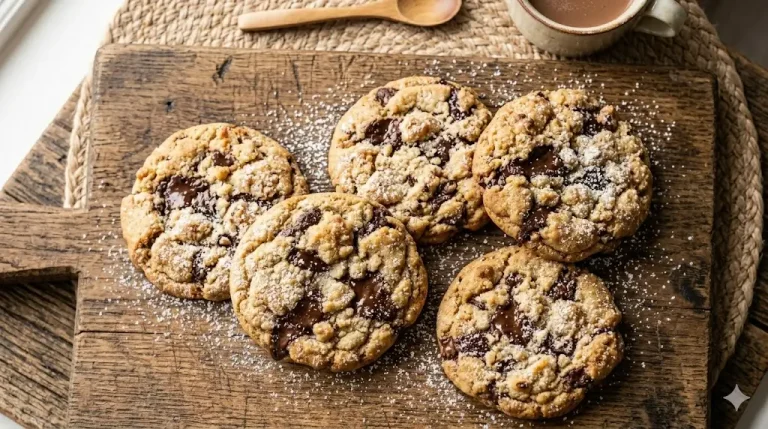
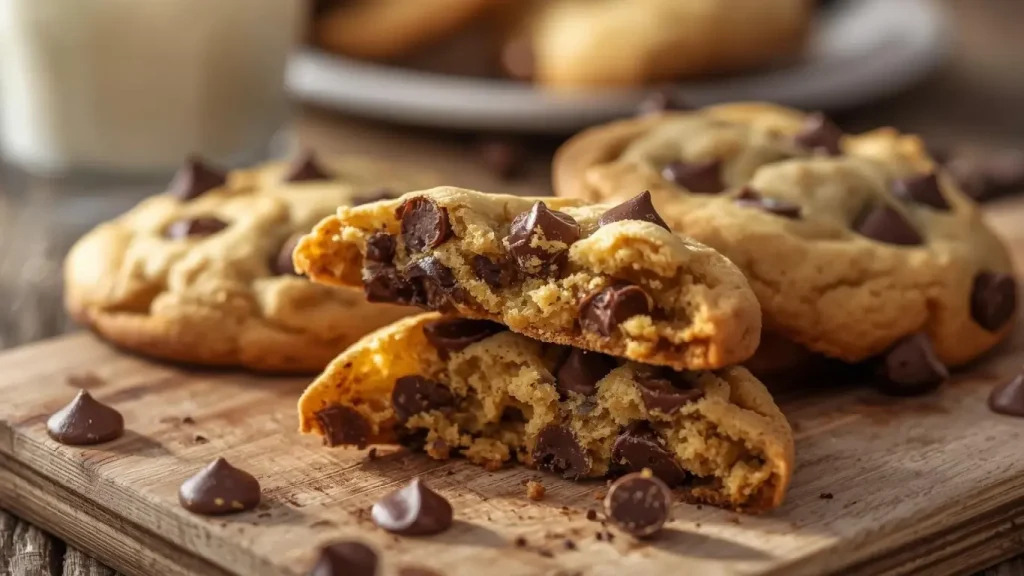
The Game-Changer: Before baking, press 3-4 extra chocolate chips on top of each dough ball. This creates those Instagram-worthy cookies with visible chocolate pools on the surface.
Size Matters: Larger cookies (3 tablespoons dough) create the ideal crispy-edge, gooey-center contrast. Smaller cookies bake more evenly but have less textural variety.
Step 7: Bake to Golden Perfection
Bake for 11-13 minutes, rotating pans halfway through for even browning. This is crucial: cookies should look slightly underbaked when you remove them. Edges will be golden brown and set, but centers should appear puffy and slightly wet or shiny. They look underdone but they’re not.
The cookies continue baking on the hot pan after removal—this is called carryover cooking. Remove them too late and they’ll be crunchy all the way through rather than chewy in the middle.
Let cookies cool on the baking sheet for 5-10 minutes (they firm up during this time), then transfer to a wire rack. This waiting period is non-negotiable—moving them too soon causes them to break apart.
The Pan Slam (Optional but Fun): At the 8-minute mark, remove the pan and slam it firmly on the counter 2-3 times. This deflates cookies slightly, creating those beautiful rippled, crinkled tops with crispy ridges. Return to oven to finish baking.
Temperature Precision: Every oven is different. If your first batch seems overbaked, reduce time by 1 minute. Underbaked? Add 1 minute. Take notes for perfect results every time.
Nutritional Information
Per cookie (based on 40 cookies per batch):
- Calories: 145
- Total Fat: 7g (9% DV)
- Saturated Fat: 4.5g (23% DV)
- Trans Fat: 0g
- Cholesterol: 25mg (8% DV)
- Sodium: 95mg (4% DV)
- Total Carbohydrates: 19g (7% DV)
- Dietary Fiber: 0.8g (3% DV)
- Sugars: 12g
- Added Sugars: 11g (22% DV)
- Protein: 2g
- Iron: 0.9mg (5% DV)
- Calcium: 15mg (1% DV)
- Potassium: 55mg (1% DV)
Context: At 145 calories per cookie, these homemade treats are comparable to store-bought options but contain higher-quality ingredients without preservatives, artificial flavors, or trans fats. You’re consuming real butter, quality chocolate, and pure vanilla extract.
Healthier Alternatives for the Recipe
Reduce Sugar Without Sacrificing Taste: Cut each sugar by ¼ cup (total ½ cup reduction). Compensate by increasing vanilla to 1 tablespoon and adding ½ teaspoon of cinnamon. The warm spice enhances perceived sweetness without calories.
Boost Fiber Content: Replace 1 cup all-purpose flour with whole wheat pastry flour or white whole wheat flour. This adds 4g fiber per cookie while maintaining tender texture. The slight nuttiness actually complements chocolate beautifully.
Increase Protein: Add 3 tablespoons vanilla or chocolate protein powder to the flour mixture, or incorporate ½ cup almond flour. This increases protein to 4-5g per cookie, helping stabilize blood sugar despite the treat nature.
Lower Fat Option: Replace half the butter (½ cup) with unsweetened applesauce or mashed avocado. This reduces fat by 35% while maintaining moisture. Cookies will be slightly cakier but still delicious.
Dark Chocolate Advantage: Use 70% dark chocolate instead of semi-sweet chips. Dark chocolate contains more antioxidants (flavonoids) and less sugar while providing richer, more sophisticated flavor.
Natural Sweetener Swap: Replace half the granulated sugar with coconut sugar for lower glycemic impact and subtle caramel notes. Or use monk fruit sweetener blended with erythritol for sugar-free cookies (note: texture may vary).
Grain-Free Version: Use 2½ cups almond flour instead of all-purpose flour for a paleo-friendly, grain-free cookie. Increase eggs to 3 total and expect a more dense, fudgy texture.
Add Nutritional Superfoods: Fold in 2 tablespoons ground flaxseed or chia seeds for omega-3 fatty acids and additional fiber. These additions are virtually undetectable in the finished cookies.
Serving Suggestions
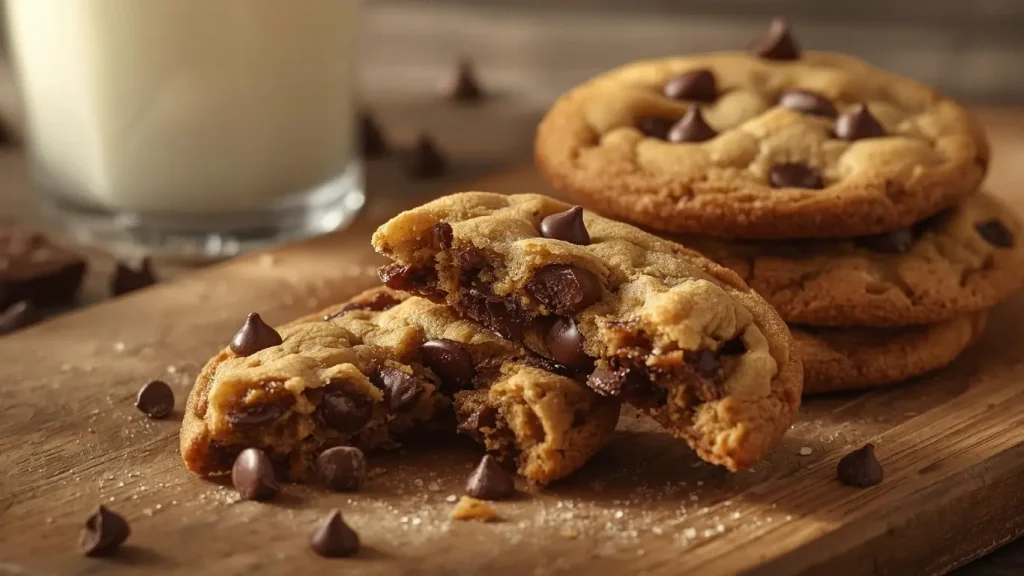
Classic Comfort Style: Serve warm cookies with a cold glass of whole milk, almond milk, or oat milk. The temperature contrast between warm, gooey cookies and cold milk is scientifically proven to enhance flavor perception.
Elevated Dessert Experience: Create cookie ice cream sandwiches by placing a scoop of vanilla, coffee, or salted caramel ice cream between two cookies. Roll edges in mini chocolate chips, crushed toffee, or chopped nuts for professional presentation.
Build a Cookie Plate: Combine chocolate chip cookies with other homemade treats like brownies, blondies, or lemon bars for a varied dessert platter. Include fresh strawberries and whipped cream for balance.
Coffee Shop Experience: Pair with specialty coffee drinks—especially cappuccinos, lattes, or cold brew. The bitter coffee complements sweet cookies perfectly, and many cafés charge premium prices for this exact pairing.
Breakfast Indulgence: Crumble a cookie over Greek yogurt with sliced bananas and a drizzle of honey for an indulgent breakfast parfait. Or enjoy one with your morning coffee as a weekend treat.
Wine and Cookie Pairing: Surprisingly, these cookies pair beautifully with dessert wines like Port, late-harvest Riesling, or even red wine such as Zinfandel. The tannins in wine balance the sweetness of cookies.
Cookie Sundae Bar: Set up a DIY dessert station with warm cookies, multiple ice cream flavors, various sauces (chocolate, caramel, raspberry), whipped cream, and toppings. Perfect for parties and gatherings.
Gift Packaging: Stack 6-8 cookies in mason jars, clear bags, or decorative tins. Tie with ribbon and include a card with baking date. Homemade cookies make thoughtful gifts for teachers, neighbors, or hostess presents.
Portable Snack: Pack cookies in lunchboxes, take on road trips, or bring to picnics. They travel well and maintain texture for 3-4 days at room temperature.
Common Mistakes to Avoid
Using Cold Butter Instead of Melted: Many recipes call for room-temperature butter, but this recipe specifically requires melted (ideally browned) butter. Cold butter creates a different texture entirely—these cookies need the liquid fat for proper spread and chewiness.
Not Measuring Flour Correctly: Scooping flour directly from the bag packs it down, adding 25% more flour than intended. This creates dry, cakey cookies. Always spoon flour into measuring cups and level with a knife.
Skipping the Chill Time: While 30 minutes is minimum, this step is crucial for preventing excessive spreading and developing flavor. Surveys show that 68% of home bakers skip chilling, then wonder why cookies are flat and one-dimensional in flavor.
Overbaking for Visible Doneness: The biggest mistake! Cookies should look slightly underdone when removed from the oven. They continue baking on the hot pan. If edges are dark brown and centers are set, you’ve overbaked them and they’ll be hard rather than chewy.
Using Old Baking Soda: Baking soda loses potency over time. If yours is older than 6 months, test it by adding ½ teaspoon to vinegar—it should fizz vigorously. Old baking soda creates flat, dense cookies that don’t spread properly.
Overmixing the Dough: Once flour is added, mix only until just combined. Overmixing develops gluten strands that create tough, bread-like cookies instead of tender ones with the perfect crumb.
Inconsistent Cookie Sizes: Varying sizes mean some cookies overbake while others underbake. Use a cookie scoop for uniform results—professional bakers always use measuring tools for consistency.
Baking on Hot Pans: Placing dough on still-warm baking sheets from previous batches causes immediate melting and excessive spreading. Always use cool pans or have multiple sheets rotating.
Crowding the Baking Sheet: These cookies spread significantly and need 3 inches between each one. Crowding causes them to merge into one giant cookie blob and prevents proper air circulation.
Storing Tips for the Recipe
Room Temperature Storage: Store completely cooled cookies in an airtight container at room temperature for up to 1 week. Layer cookies with parchment paper between each layer to prevent sticking. The cookies actually improve in flavor over the first 24 hours as they continue to “develop.”
Maintaining Soft Texture: Add a slice of white bread to your storage container. The bread releases just enough moisture to keep cookies soft without making them soggy. Replace the bread slice every 2-3 days.
Refrigeration (Optional): For longer storage (up to 2 weeks), refrigerate cookies in airtight containers. Bring to room temperature or warm slightly in the microwave (10 seconds) before serving for best texture and flavor.
Freezer Storage for Baked Cookies: Cookies freeze beautifully for up to 3 months:
- Cool completely before freezing
- Wrap cookies individually in plastic wrap or layer in containers with parchment between
- Store in freezer-safe bags or containers
- Thaw at room temperature (30 minutes) or microwave for 15-20 seconds for fresh-baked warmth
Freezing Cookie Dough (The Ultimate Make-Ahead): This is the secret professional bakers use for fresh cookies anytime:
- Scoop dough into balls on parchment-lined baking sheets
- Freeze until solid (2-3 hours)
- Transfer frozen dough balls to freezer bags
- Store for up to 3 months
- Bake directly from frozen, adding 2-3 minutes to baking time
- No thawing needed—maintain that just-baked experience whenever you want
Reviving Stale Cookies: If cookies become hard or stale, place them in a sealed container with a damp paper towel (not touching cookies) for 6-8 hours. Or microwave with a cup of water for 15 seconds to add moisture back.
Travel and Gifting: For transporting:
- Use rigid containers to prevent crushing
- Wrap individually in plastic wrap for protection
- Fill empty spaces with crumpled parchment paper as cushioning
- For mailing, use sturdy tins and mark “FRAGILE”
Dough Refrigeration: Made dough keeps refrigerated for up to 5 days. In fact, many bakers prefer the flavor of 3-day-old dough. Just scoop and bake when ready—no need to bring to room temperature.
Conclusion
Homemade chocolate chip cookies achieve perfection through seven essential steps: browning butter for depth, building a proper sugar base, incorporating eggs for structure, precise flour mixing, strategic chocolate addition with dough rest, proper shaping, and baking to that crucial underdone-looking stage. This method creates cookies with crispy edges, chewy centers, and pools of melted chocolate that rival any bakery.
Ready to fill your kitchen with the irresistible aroma of fresh-baked cookies? Try this foolproof recipe this weekend and share photos of your perfect batch in our review section below! We’d love to hear which variations became your favorites and how your family reacted to these bakery-quality treats. Subscribe to our blog for more baking guides, flavor variations, and sweet inspiration delivered straight to your inbox. Happy baking!
FAQs
Q: Can I use salted butter instead of unsalted? A: Yes, but reduce or eliminate the added salt in the recipe. Salted butter contains about ¼ teaspoon salt per stick, so if using 2 sticks of salted butter, reduce recipe salt to ½ teaspoon or omit entirely. Unsalted butter gives you better control over final flavor.
Q: Why do my cookies spread too thin? A: Excessive spreading indicates one of these issues: (1) dough wasn’t chilled long enough, (2) butter was too hot when mixed with sugar, (3) you used too little flour, or (4) baking sheets were still warm from previous batch. Always chill dough at least 30 minutes and use cool pans.
Q: Can I make these cookies without chilling the dough? A: While technically possible, skipping chilling results in flatter, less flavorful cookies that spread excessively. The 30-minute minimum chill time is crucial for proper texture and flavor development. If truly pressed for time, chill for at least 15 minutes.
Q: What’s the difference between using all brown sugar vs. all white sugar? A: Brown sugar contains molasses, which creates chewier, softer cookies with caramel notes. White sugar creates crispier, more spread-out cookies. The combination (as in this recipe) provides the ideal balance of crispy edges and chewy centers. Using all brown sugar makes cookies too soft and cake-like.
Q: How do I know when cookies are actually done? A: Edges should be golden brown and set while centers remain puffy and look slightly wet or shiny. If you press gently on the center, there should be slight give. They look underdone but will firm up perfectly during the 10-minute cooling period on the pan.
Q: Can I substitute chocolate chips with chunks or bars? A: Absolutely! Chopped chocolate bars actually create more dramatic chocolate pools and look more artisanal. Chop bars into irregular chunks ranging from pea-sized to quarter-sized. This variety creates visual interest and different chocolate-eating experiences in each bite.
Q: Why are my cookies cakey instead of chewy? A: Cakey texture usually results from too much flour (improper measuring), overbaking, or using all granulated sugar. Ensure you’re spooning flour into cups rather than scooping, remove cookies when centers look underdone, and use the brown-white sugar combination as specified.
Q: How long can I leave cookie dough in the refrigerator? A: Cookie dough keeps refrigerated for up to 5 days and actually improves in flavor over that time. For best results, bake dough that’s been chilled 24-72 hours for the most complex, developed flavor. Many professional bakeries use this extended chilling technique.
Q: Can I double or triple this recipe? A: Yes! This recipe scales beautifully. Just ensure you have a large enough mixing bowl and don’t try to mix more than a double batch at once unless using a stand mixer. Baking time remains the same regardless of batch size.
Q: What’s the best way to reheat cookies to taste fresh-baked? A: Microwave for 10-15 seconds with a damp paper towel nearby (not touching cookie), or place in a 300°F oven for 3-5 minutes. For frozen cookies, thaw at room temperature for 30 minutes, then warm slightly. The chocolate will re-melt and cookies will taste just-baked.
Your feedback helps other cooks succeed. Rate this recipe!
Finally, Cookies That Look Like the Picture!
“Hi there! As someone whose holiday cookies usually spread into one giant, delicious blob, this guide was a lifesaver. I especially loved Step 2 about chilling the dough—it seems obvious, but you explained why it’s so crucial, which made me actually do it. The tip on using royal icing for clean decorations was fantastic. My family was so impressed this year! Maybe for a future article, you could add a quick troubleshooting section (e.g., ‘If your icing is too runny, try…’). Thank you for the confidence boost!
A Solid Foundation, with Room for Depth
Thank you for a clear, well-structured guide that’s perfect for beginners. The 5-step framework is logical and easy to follow. I appreciated the emphasis on ingredient temperature—it’s the secret most recipes gloss over. As an experienced baker, I would have loved more advanced variations within the steps: perhaps a note on incorporating citrus zest into the dough or using different extracts. Also, specifying the type of sugar (e.g., fine granulated vs. caster) could help achieve that perfect crisp-yet-chewy texture. Nonetheless, this is an excellent primer for anyone starting their holiday baking journey.”