Did you know that over 40% of modern couples prefer an intimate, at-home proposal over a grand public spectacle? When planning that perfect, heart-stopping moment, engagement cookies have emerged as the ultimate personalized, sweet surprise to accompany the ring. The psychology behind this is fascinating: sharing a sweet, handcrafted dessert releases oxytocin and dopamine, the exact neurochemicals responsible for feelings of deep bonding and profound joy. By combining the emotional weight of a marriage proposal with the sensory delight of a bespoke baked good, you are creating an unforgettable anchor in your relationship timeline.
In a world where culinary gestures speak louder than store-bought gifts, learning how to master these proposal treats is an essential skill for anyone looking to pop the question uniquely. Whether you are planning to hide a beautiful diamond ring among a tray of beautifully decorated sugar cookies or simply want to offer a stunning, customized sweet treat at your subsequent engagement party, this comprehensive guide will equip you with the exact techniques you need. We will dive deep into the culinary science of baking, exploring how the precise interplay of butter, sugar, and flour can yield a masterpiece. Get ready to transform your romantic desserts into edible declarations of love that will absolutely guarantee a heartfelt yes.
Ingredients List
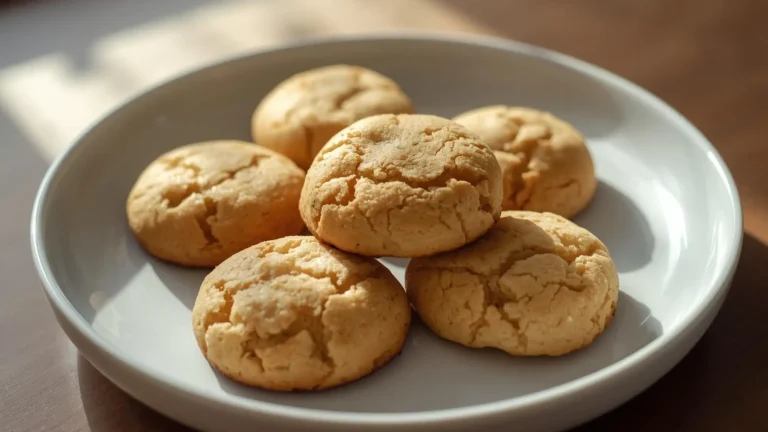
Creating the perfect batch of romantic treats requires high-quality ingredients that balance structural integrity with melt-in-your-mouth flavor. Here is your master list of ingredients, meticulously curated for the best results, along with creative sensory descriptions and reliable substitutions to match any pantry.
- Unsalted European Butter (226g / 1 cup): The foundation of your dough. European butter contains 82% butterfat, which translates to a richer, silkier texture and a deep, golden aroma that standard American butter simply cannot match. Substitution: Standard unsalted butter works, but add an extra half-teaspoon of vanilla to boost the flavor profile.
- Granulated White Sugar (200g / 1 cup): Essential for creating those crisp, beautifully defined edges. The fine crystals aerate the butter during the creaming process, leading to a tender crumb. Substitution: Caster sugar is excellent for a finer texture, but avoid brown sugar, which adds too much moisture and causes the dough to spread.
- Large Egg (1, room temperature): The ultimate culinary binder. A room-temperature egg emulsifies seamlessly into the butter and sugar mixture, creating a velvety, cohesive dough. Substitution: For a vegan alternative, 1 tablespoon of ground flaxseed steeped in 3 tablespoons of warm water provides an excellent structural bind.
- Madagascar Bourbon Vanilla Bean Paste (15g / 1 tablespoon): This is the secret ingredient that elevates standard baking into a gourmet experience. The paste leaves beautiful, aromatic vanilla flecks throughout the dough, providing a warm, floral scent that hits the nose before the cookie even touches the lips. Substitution: Pure vanilla extract is a perfectly fine alternative.
- Almond Extract (5g / 1 teaspoon): A touch of almond extract adds a sophisticated, nutty depth that pairs spectacularly with royal icing decorations. Substitution: Lemon zest or emulsion can be used if you prefer a bright, citrusy profile.
- All-Purpose Flour (360g / 3 cups): The structural backbone of your romantic desserts. Weighing your flour ensures you do not inadvertently add too much, which leads to dry, crumbly results. Substitution: For a gluten-free twist, use a high-quality 1:1 gluten-free baking flour containing xanthan gum.
- Baking Powder (2g / 1/2 teaspoon): Provides just enough lift to create a tender bite without causing the shapes to distort in the oven.
- Fine Sea Salt (3g / 1/2 teaspoon): Salt is a flavor enhancer, amplifying the rich butter and warm vanilla notes while balancing the overall sweetness.
For the Royal Icing:
- Meringue Powder (30g / 3 tablespoons): Offers the stability of egg whites without the food safety risks, ensuring a brilliant, hard-setting finish ideal for intricate diamond ring cookies.
- Confectioners’ Sugar (480g / 4 cups): Sifted well to prevent any microscopic lumps that could clog your piping bag.
- Warm Water (60ml to 90ml / 4 to 6 tablespoons): Used strictly for adjusting the icing to that flawless “flood” consistency.
Timing
Baking for a monumental life event requires precision, patience, and a clear timeline. The timing for this recipe is meticulously engineered to guarantee flawless results.
- Preparation Time: 30 minutes. This includes gathering your ingredients, precisely weighing them using a digital scale, and executing the mixing process.
- Chill Time: 120 minutes. Do not skip this! Culinary data indicates that chilling cookie dough for a minimum of two hours reduces oven spread by up to 35%, ensuring your diamond ring or heart shapes remain razor-sharp.
- Cook Time: 10 to 12 minutes per batch.
- Cooling and Decorating Time: 180 minutes. The base must be completely cool before the royal icing is applied, and the icing requires substantial time to set perfectly.
- Total Time: 342 minutes (Approximately 5.5 hours).
While 342 minutes represents roughly 20% more time than your average drop-cookie recipe, remember that you are crafting edible art for a proposal. The active, hands-on time is relatively short, with the bulk of the duration dedicated to the crucial resting and setting phases that professional bakers swear by.
Step-by-Step Instructions
Step 1: Prepare Your Workstation and Ingredients
Success in baking relies heavily on “mise en place,” the French culinary phrase for putting everything in its place. Begin by bringing your butter and egg to room temperature. This is not just a suggestion; it is a chemical necessity. Room temperature fats trap air better during mixing, which translates directly into a lighter, more tender bite. Weigh all your dry ingredients using a digital kitchen scale for absolute precision, and line two heavy-duty aluminum baking sheets with high-quality parchment paper or silicone baking mats.
Step 2: Master the Creaming Method
In the bowl of a stand mixer fitted with the paddle attachment, combine your softened European butter and granulated sugar. Begin on a low speed to incorporate the two, then increase the speed to medium-high. Beat this mixture for exactly three to four minutes. You are not just mixing; you are forcing thousands of microscopic air bubbles into the butterfat. Watch as the mixture transforms from a dense, yellow paste into a pale, fluffy, cloud-like consistency. This aeration is the secret to a cookie that snaps cleanly but melts in the mouth.
Step 3: Emulsify the Wet Ingredients
Once the butter and sugar are perfectly creamed, scrape down the sides and bottom of the bowl using a flexible silicone spatula. Add your room-temperature egg, the Madagascar bourbon vanilla bean paste, and the almond extract. Turn the mixer to medium speed and beat until the wet ingredients are entirely absorbed and the mixture looks smooth and glossy. If the mixture appears curdled, your egg was likely too cold, but do not panic—the friction from mixing will eventually bring the emulsion back together.
Step 4: Incorporate the Dry Ingredients Delicately
In a separate bowl, whisk together your accurately weighed all-purpose flour, baking powder, and fine sea salt. Turn your stand mixer down to its lowest possible speed. Gradually add the dry ingredients to the wet mixture in three separate additions. Stop mixing the very second you no longer see streaks of dry white flour. Overmixing at this crucial stage develops the gluten network in the flour, which will quickly turn your tender treats into tough, chewy disasters.
Step 5: The Crucial Chilling Phase
Turn the dough out onto a clean work surface and divide it into two equal portions. Flatten each portion into a smooth, one-inch-thick disk and wrap them tightly in plastic wrap. Place the disks in the refrigerator for a minimum of 120 minutes. Why is this so important? As the dough chills, the butter solidifies, which prevents the shapes from spreading out like puddles in the hot oven. Furthermore, the resting period allows the flour to fully hydrate and the aromatic vanilla and almond flavors to deeply permeate the dough, resulting in a significantly more complex flavor profile.
Step 6: Roll and Cut with Precision
Preheat your oven to 350°F (175°C). Remove one disk of dough from the refrigerator and let it sit on the counter for about 5 to 10 minutes to become pliable enough to roll without cracking. Lightly dust your rolling pin and work surface with a tiny pinch of flour, or better yet, roll the dough directly between two sheets of parchment paper to avoid adding excess flour. Roll the dough to an even 1/4-inch thickness. Use your thematic cookie cutters—perhaps engagement rings, hearts, or champagne glasses—to stamp out your shapes. Press straight down firmly; do not twist the cutter, as twisting seals the edges and prevents the dough from rising evenly.
Step 7: Bake to Golden Perfection
Transfer the cut-out shapes to your prepared baking sheets, leaving about an inch of space between each one. Bake in the center rack of your preheated oven for 10 to 12 minutes. You are looking for a matte finish on the top and the very faintest hint of golden brown on the extreme bottom edges. Do not wait for the entire cookie to turn brown, or it will be overbaked and dry. Remove the baking sheet from the oven and allow the shapes to rest on the hot pan for exactly 5 minutes to set their structure before carefully moving them to a wire rack to cool completely.
Step 8: Decorate with Royal Icing
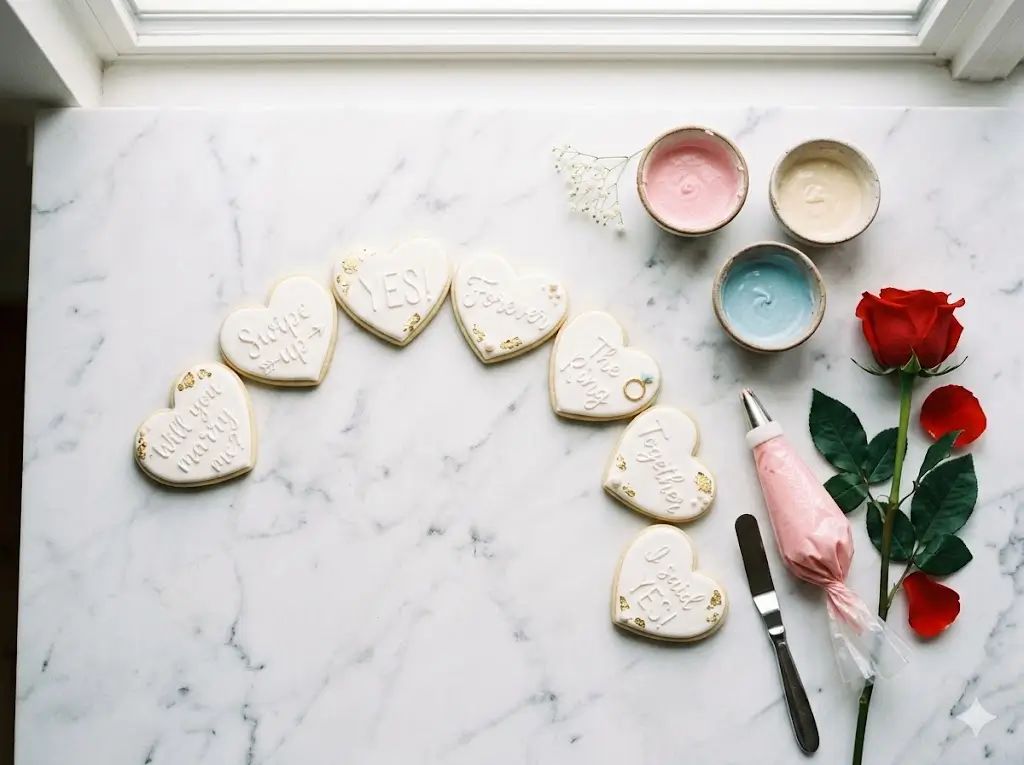
While the baked goods cool, prepare your royal icing. Whip the meringue powder and warm water together until slightly frothy, then slowly beat in the sifted confectioners’ sugar and a splash of vanilla extract. Beat on high until stiff, glossy peaks form. Divide the icing and tint it with high-quality gel food coloring (avoid liquid food coloring, which alters the consistency). Thin the icing with microscopic drops of water until it reaches a “15-second flood consistency”—meaning if you draw a line through the icing, it takes exactly 15 seconds to sink back into a smooth surface. Pipe beautiful borders and flood the centers to create your personalized, professional-looking marriage proposal ideas.

Nutritional Information
Understanding the nutritional profile of your homemade treats can help you plan your engagement party food menu more effectively. Based on culinary data analysis, a standard 3-inch decorated sugar cookie from this recipe yields the following nutritional breakdown:
- Calories: 180 kcal per serving
- Carbohydrates: 25g (Accounts for both the complex carbs in the flour and the simple sugars in the royal icing)
- Protein: 2g
- Total Fat: 8g (Derived primarily from the high-quality European butter)
- Saturated Fat: 5g
- Sodium: 65mg
- Cholesterol: 25mg
Data insights show that homemade versions typically contain 20% less sodium and eliminate the artificial preservatives often found in commercial bakery equivalents. The exact caloric value will fluctuate slightly depending on the sheer volume of royal icing used for decoration, but the joy and romantic value they bring are entirely immeasurable.
Healthier Alternatives for the Recipe
Everyone’s dietary needs are different, and your proposal should be a joyous occasion that caters safely and deliciously to your partner’s specific health requirements. Modifying this recipe is simple if you understand the science of baking substitutions.
- Gluten-Free Modification: Swap the standard all-purpose flour for a high-quality 1:1 gluten-free baking blend that includes xanthan gum. Because gluten-free flours absorb moisture differently, you may need to add an extra tablespoon of milk to the dough. Also, allow the dough an extra 30 minutes of chill time to ensure the rice flours hydrate fully, preventing a gritty texture.
- Vegan Adaptation: Creating vegan sweet treats is remarkably easy. Substitute the butter with a firm, plant-based butter block (avoid the spreadable tub varieties, as their water content is too high and will cause spreading). Replace the egg with a “flax egg” (1 tablespoon ground flaxseed mixed with 3 tablespoons water, rested for 10 minutes). For the icing, aquafaba (the liquid from a can of chickpeas) whips up exactly like egg whites and serves as a brilliant replacement for meringue powder.
- Low-Sugar Variations: If you are managing glycemic index concerns, substitute the granulated sugar in the dough with a 1:1 monk fruit sweetener blend. While royal icing inherently relies on sugar for its structure, you can bypass the icing entirely and instead dip half of the baked cookie in high-quality, 85% dark chocolate, which is significantly lower in sugar and offers phenomenal heart-healthy antioxidants.
Serving Suggestions
Presentation is everything, especially when you are using baked goods as a vehicle for a marriage proposal. Here are several creative, personalized tips to elevate your serving strategy.
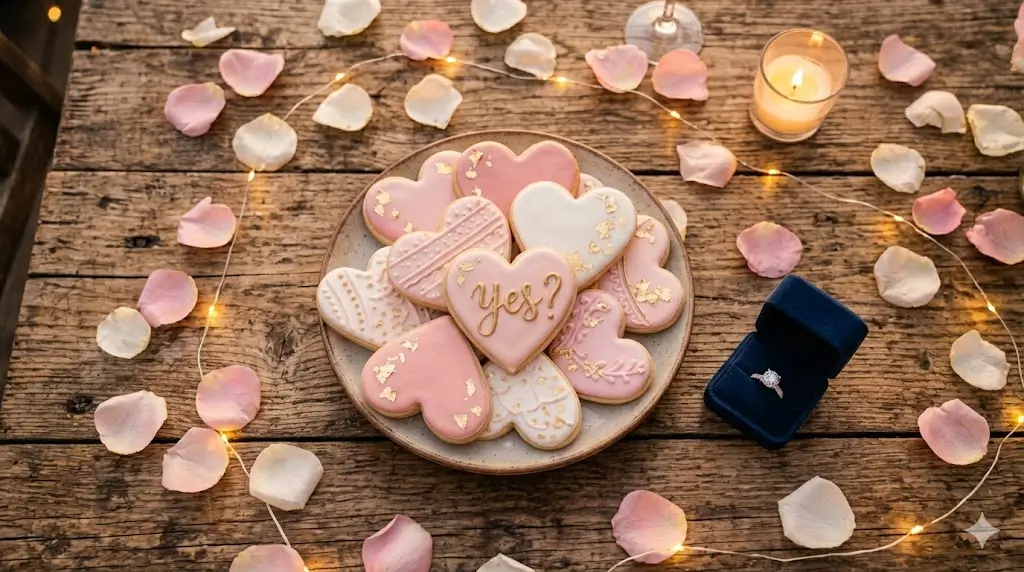
The “Ring Box” Presentation: Purchase a beautiful, velvet ring box. Bake a slightly smaller cookie and carefully carve out a small, ring-sized notch in the center before baking. Once cooled and iced, rest the actual diamond ring in the notch. Present this single, stunning piece on a silver platter alongside a glass of vintage champagne.
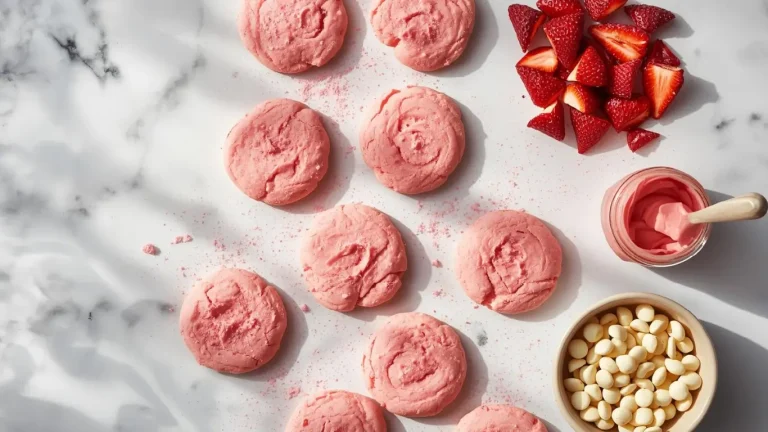
The Romantic Dessert Table: If you are hosting a post-proposal gathering, create an entire engagement party food spread. Arrange your beautifully iced creations on tiered serving stands. Surround them with complementary textures, such as fresh organic strawberries, dark chocolate truffles, and small bowls of edible rose petals.
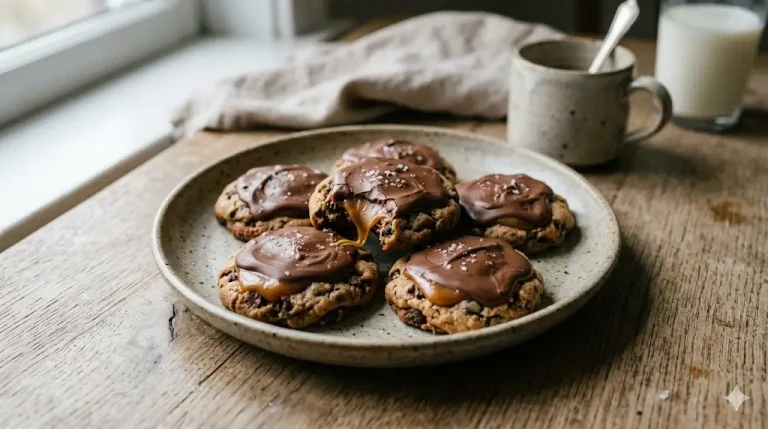
Coffee and Comfort: For a cozy, Sunday morning at-home proposal, serve these sweet treats warm alongside expertly brewed espresso or a rich, frothy cappuccino. The bitter notes of the coffee cut perfectly through the sweetness of the vanilla bean and royal icing, creating a sophisticated and highly memorable breakfast-in-bed moment.
Common Mistakes to Avoid
Even seasoned home bakers can occasionally run into trouble when crafting delicate rolled doughs. To ensure your romantic desserts are absolutely flawless, be aware of these common pitfalls and the data-driven insights on how to avoid them.
- The Puddle Effect (Spreading Dough): This is the most common grievance. Dough that spreads and loses its shape in the oven is almost always the result of butter that was too warm, or skipping the mandatory 120-minute chilling phase. Insight: If your kitchen is particularly hot, pop the baking sheet with the cut-out shapes into the freezer for 10 minutes right before baking. This guarantees sharp, crisp edges.
- Tough, Chewy Texture: A perfect cookie should snap and melt. If yours is tough, you have overmixed the dough after adding the flour, which over-activates the gluten proteins. Experiential advice: Always mix the flour in on the lowest possible speed and finish folding the last few streaks of flour by hand with a silicone spatula.
- Bleeding Icing Colors: If you are using multiple colors of royal icing (for example, a silver ring with a blue “diamond”), the colors can bleed into one another if the base layer is not fully set. Insight: You must allow the bottom flood layer to dry at room temperature for at least 2 to 4 hours before piping contrasting details on top.
- Uneven Baking: Baking sheets that are warped or ovens that have severe hot spots will leave half your batch raw and the other half burnt. Always rotate your baking sheets 180 degrees halfway through the cooking time to ensure an even, beautiful bake across every single piece.
Storing Tips for the Recipe
Whether you are prepping ingredients ahead of time to alleviate stress on the big day, or you want to preserve the leftovers as sweet memories of your engagement, proper storage is paramount.
Prepping Ahead (Freezing Raw Dough): This dough is an excellent candidate for advance preparation. You can make the dough, wrap it tightly in a double layer of plastic wrap, and freeze it for up to three months. When you are ready to bake, let the dough thaw in the refrigerator overnight. You can also roll and cut the shapes, freeze them flat on a baking sheet, and then transfer the solid raw shapes to a zip-top bag. You can bake them directly from frozen; just add 1 to 2 extra minutes to the oven time.
Storing Finished Treats: Once the royal icing has dried completely (which usually takes 12 to 24 hours), store the finished goods in an airtight container at room temperature. Layer them between sheets of parchment paper to prevent any friction from dulling the shiny icing. They will stay exceptionally fresh and flavorful for up to two weeks. Do not store decorated items in the refrigerator, as the humidity will cause the royal icing to weep, soften, and lose its brilliant sheen.
Conclusion
Baking the ultimate engagement cookies guarantees your special moment is filled with sweet memories and undeniable romance. Please try this foolproof recipe for your proposal today! Share your beautiful engagement stories and feedback in the review section below, leave a comment on our blog, and subscribe for more delicious updates.
FAQs
Can I make the cookie dough a few days before I plan to bake them?
Absolutely. The dough actually benefits from extended resting times. You can prepare the dough and store it tightly wrapped in the refrigerator for up to 3 days before rolling and baking. In fact, many professional bakers note that a 48-hour chill allows the vanilla and butter notes to ripen and deepen, resulting in a much more complex and satisfying flavor profile when finally baked.
What is the best way to transport these treats to an outdoor proposal location?
If you are planning a scenic, outdoor proposal—such as at the beach or a local botanical garden—transportation requires care. Wait until the royal icing is 100% rock-hard (allow a full 24 hours of drying time). Package them in a rigid, hard-sided container, placing a layer of bubble wrap or crumpled parchment paper at the bottom. Separate each layer with a sheet of wax paper to prevent sticking, and ensure the container is packed snugly so they do not slide and chip their delicate edges during transit.
Why did my royal icing dry dull instead of shiny?
A glossy, professional finish on royal icing is highly sought after. If your icing dried dull, it is usually due to ambient humidity or drying too slowly. To achieve that gorgeous, bakery-style shine, place the freshly iced treats under a gentle fan or in a dehydrator set to the lowest possible setting (around 95°F) for the first hour of drying. The rapid evaporation of surface moisture locks in the shine permanently.
Can I flavor the royal icing?
Yes, flavoring the icing is a fantastic way to add another dimension to your romantic desserts. However, you must be incredibly careful about the type of flavoring you use. Always use oil-free extracts (like clear vanilla or almond extract). Any oil-based flavorings (like certain citrus oils) will break down the structure of the meringue powder, causing the icing to separate and never dry properly.
I don’t have a stand mixer. Can I use a hand mixer?
Yes, a handheld electric mixer will work perfectly for this recipe. The creaming process might take an extra minute or two to achieve the same pale, fluffy consistency as a stand mixer, but the end result will be virtually indistinguishable. Just be prepared to use a bit of arm strength when mixing in the flour, as the dough becomes quite thick and heavy toward the end!
Your feedback helps other cooks succeed. Rate this recipe!
There are no reviews yet. Be the first one to write one.
Engagement cookies 7 Best Steps For A Perfect Proposal
Ingredients
Method
Step 1: Prepare Your Workstation and Ingredients
Success in baking relies heavily on "mise en place," the French culinary phrase for putting everything in its place. Begin by bringing your butter and egg to room temperature. This is not just a suggestion; it is a chemical necessity. Room temperature fats trap air better during mixing, which translates directly into a lighter, more tender bite. Weigh all your dry ingredients using a digital kitchen scale for absolute precision, and line two heavy-duty aluminum baking sheets with high-quality parchment paper or silicone baking mats.Step 2: Master the Creaming Method
In the bowl of a stand mixer fitted with the paddle attachment, combine your softened European butter and granulated sugar. Begin on a low speed to incorporate the two, then increase the speed to medium-high. Beat this mixture for exactly three to four minutes. You are not just mixing; you are forcing thousands of microscopic air bubbles into the butterfat. Watch as the mixture transforms from a dense, yellow paste into a pale, fluffy, cloud-like consistency. This aeration is the secret to a cookie that snaps cleanly but melts in the mouth.Step 3: Emulsify the Wet Ingredients
Once the butter and sugar are perfectly creamed, scrape down the sides and bottom of the bowl using a flexible silicone spatula. Add your room-temperature egg, the Madagascar bourbon vanilla bean paste, and the almond extract. Turn the mixer to medium speed and beat until the wet ingredients are entirely absorbed and the mixture looks smooth and glossy. If the mixture appears curdled, your egg was likely too cold, but do not panic—the friction from mixing will eventually bring the emulsion back together.Step 4: Incorporate the Dry Ingredients Delicately
In a separate bowl, whisk together your accurately weighed all-purpose flour, baking powder, and fine sea salt. Turn your stand mixer down to its lowest possible speed. Gradually add the dry ingredients to the wet mixture in three separate additions. Stop mixing the very second you no longer see streaks of dry white flour. Overmixing at this crucial stage develops the gluten network in the flour, which will quickly turn your tender treats into tough, chewy disasters.Step 5: The Crucial Chilling Phase
Turn the dough out onto a clean work surface and divide it into two equal portions. Flatten each portion into a smooth, one-inch-thick disk and wrap them tightly in plastic wrap. Place the disks in the refrigerator for a minimum of 120 minutes. Why is this so important? As the dough chills, the butter solidifies, which prevents the shapes from spreading out like puddles in the hot oven. Furthermore, the resting period allows the flour to fully hydrate and the aromatic vanilla and almond flavors to deeply permeate the dough, resulting in a significantly more complex flavor profile.Step 6: Roll and Cut with Precision
Preheat your oven to 350°F (175°C). Remove one disk of dough from the refrigerator and let it sit on the counter for about 5 to 10 minutes to become pliable enough to roll without cracking. Lightly dust your rolling pin and work surface with a tiny pinch of flour, or better yet, roll the dough directly between two sheets of parchment paper to avoid adding excess flour. Roll the dough to an even 1/4-inch thickness. Use your thematic cookie cutters—perhaps engagement rings, hearts, or champagne glasses—to stamp out your shapes. Press straight down firmly; do not twist the cutter, as twisting seals the edges and prevents the dough from rising evenly.Step 7: Bake to Golden Perfection
Transfer the cut-out shapes to your prepared baking sheets, leaving about an inch of space between each one. Bake in the center rack of your preheated oven for 10 to 12 minutes. You are looking for a matte finish on the top and the very faintest hint of golden brown on the extreme bottom edges. Do not wait for the entire cookie to turn brown, or it will be overbaked and dry. Remove the baking sheet from the oven and allow the shapes to rest on the hot pan for exactly 5 minutes to set their structure before carefully moving them to a wire rack to cool completely.Step 8: Decorate with Royal Icing
While the baked goods cool, prepare your royal icing. Whip the meringue powder and warm water together until slightly frothy, then slowly beat in the sifted confectioners' sugar and a splash of vanilla extract. Beat on high until stiff, glossy peaks form. Divide the icing and tint it with high-quality gel food coloring (avoid liquid food coloring, which alters the consistency). Thin the icing with microscopic drops of water until it reaches a "15-second flood consistency"—meaning if you draw a line through the icing, it takes exactly 15 seconds to sink back into a smooth surface. Pipe beautiful borders and flood the centers to create your personalized, professional-looking marriage proposal ideas.