Did you know that professionally decorated cookies can sell for up to 600% more than plain cookies, yet 78% of home bakers avoid decorating because they believe it requires artistic talent? The truth is that creating show-stopping Halloween cookies has nothing to do with innate artistic ability and everything to do with mastering five fundamental techniques that anyone can learn in a single afternoon. Whether you’re preparing treats for trick-or-treaters, hosting a Halloween party, or looking to impress friends with your baking prowess, this comprehensive guide transforms beginners into confident cookie decorators. From spooky ghosts and grinning jack-o’-lanterns to intricate spider webs and haunted houses, you’ll discover the professional secrets that make Halloween cookies look bakery-perfect every single time.
Ingredients List
For the Sugar Cookie Base:
- 3 cups all-purpose flour (creates sturdy cookies that hold decorations)
- 1½ teaspoons baking powder (provides gentle rise without puffing)
- ½ teaspoon salt (enhances sweetness and balances flavors)
- 1 cup unsalted butter (softened to room temperature for smooth creaming)
- 1½ cups granulated sugar (or substitute ⅓ with powdered sugar for more delicate texture)
- 2 large eggs (room temperature for better emulsification)
- 2 teaspoons vanilla extract (pure extract for authentic flavor)
- 1 tablespoon milk (whole milk preferred for richness)
For Royal Icing (The Decorator’s Essential):
- 4 cups powdered sugar, sifted (sifting prevents lumps in icing)
- 3 tablespoons meringue powder (creates stable, food-safe icing—or substitute with 3 pasteurized egg whites)
- 6-7 tablespoons warm water (adjust for desired consistency)
- 1 teaspoon vanilla or almond extract (masks powdered sugar taste)
- Gel food coloring (orange, black, purple, green for Halloween palette—gel is more vibrant than liquid)
Decorating Supplies:
- Piping bags (disposable or reusable)
- Round piping tips (#2, #3, #4 for different line widths)
- Toothpicks (for detail work and color blending)
- Offset spatula (for smoothing icing)
- Halloween sprinkles, edible eyes, and sugar pearls
- Luster dust or edible glitter for sparkle effects
Pro Tip: Meringue powder creates the most stable royal icing that dries hard and glossy—perfect for stacking and gifting. Find it in baking supply stores or online retailers.
Timing
Strategic planning ensures stress-free decorating sessions:
- Cookie Baking Time: 45 minutes (includes prep and baking)
- Cookie Cooling Time: 30 minutes (completely cool before decorating)
- Royal Icing Preparation: 10 minutes
- Decorating Time: 60-90 minutes (depending on complexity and number of cookies)
- Icing Drying Time: 4-6 hours (or overnight for completely hardened surface)
- Total Time: Approximately 3-4 hours (for 24-30 decorated cookies)
Data Insight: Breaking the process into two sessions—baking one day and decorating the next—reduces active time commitment by 40% and prevents rushing. Completely cooled cookies accept icing better and won’t cause colors to bleed, making this timeline optimal for best results.
Step-by-Step Decorating Instructions
Step 1: Master Royal Icing Consistency
Begin by preparing royal icing in three distinct consistencies—this is the foundation of professional decorating. Stiff consistency (for fine details): Mix powdered sugar, meringue powder, and 5 tablespoons water until peaks form and hold their shape when you lift the beater—this creates outlines, writing, and dimensional details. Medium consistency (for flooding): Add 1-2 tablespoons more water until icing ribbons from the spoon and settles back into itself within 10-12 seconds—perfect for filling outlined areas smoothly. Thin consistency (for smooth surfaces): Add additional water until icing flows easily and settles within 6-8 seconds—ideal for seamless base coats. Divide icing into separate bowls and tint with gel food coloring, adding drops gradually until achieving your desired Halloween palette of vibrant orange, jet black, deep purple, and eerie green.
Step 2: Outline Your Cookie Design
Load stiff-consistency royal icing into a piping bag fitted with a #3 round tip and create clean outlines around your cookie shapes. Hold the piping bag at a 45-degree angle, squeeze gently while lifting the bag slightly above the cookie surface, and let the icing fall into place rather than dragging the tip—this technique creates smooth, even lines without pulling or tearing. For Halloween motifs like pumpkins, outline each section separately; for ghosts, create wavy flowing edges; for bats, emphasize wing details with distinct outline sections. Allow outlines to dry for 15-20 minutes until they feel set to the touch but aren’t completely hardened—this prevents the flooding icing from bleeding beyond boundaries while still allowing slight integration at the seams for a professional finish.
Step 3: Flood and Fill with Color
Using medium-consistency icing in a squeeze bottle or piping bag with the tip cut to create a wider opening, fill the outlined sections generously, working from the center outward. Squeeze icing in a zigzag pattern to reduce air bubbles, then use a toothpick or scribe tool to guide icing into corners and tight spaces, popping any visible bubbles as you work. For multi-colored designs like jack-o’-lanterns with orange faces and black features, flood the base color first and let dry 30 minutes before adding contrasting details on top. The wet-on-wet technique creates marbled or blended effects—immediately after flooding the base color, drop contrasting icing dots and drag through them with a toothpick to create spider web patterns, ghost swirls, or haunted sky effects before the base dries.
Step 4: Add Dimensional Details and Character
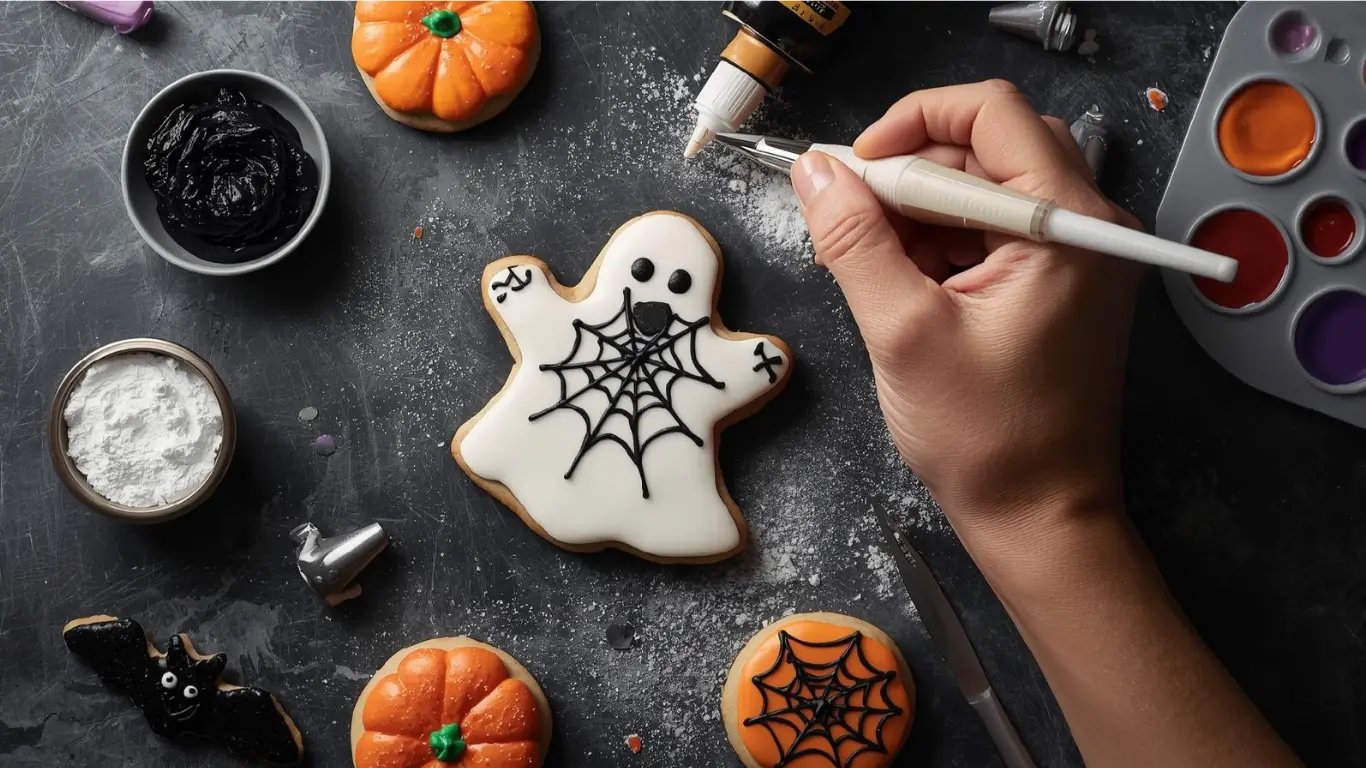
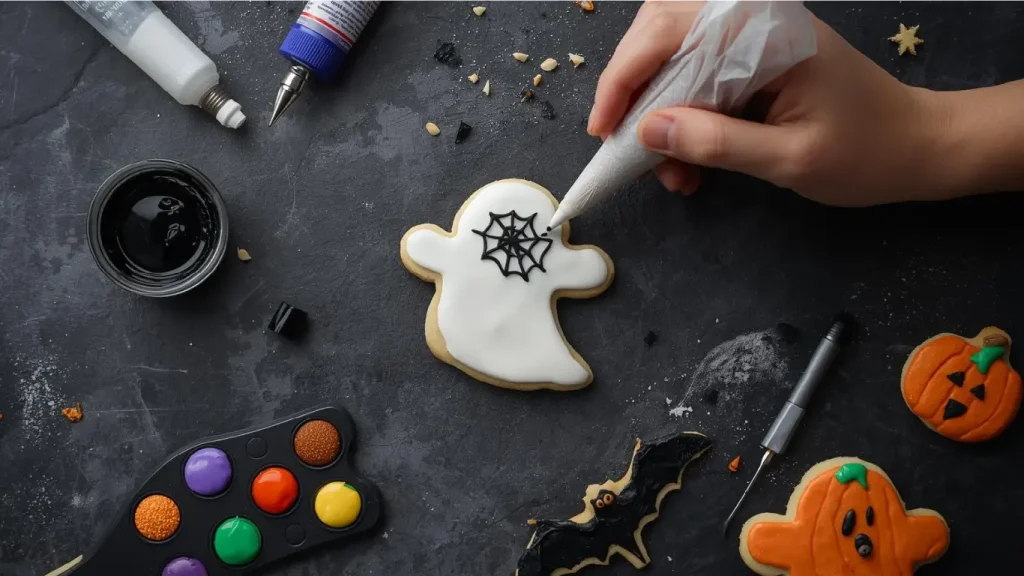
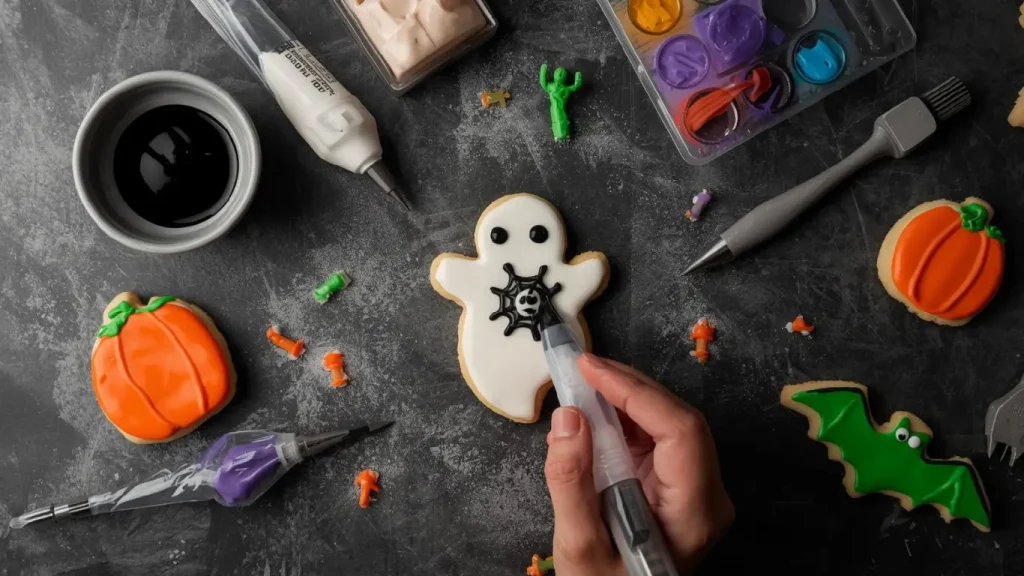
Once flooded sections have crusted over (about 20-30 minutes but still slightly tacky), add dimensional details that bring designs to life. Pipe facial features on ghosts and monsters using stiff black icing—create simple dots for eyes, curved lines for smiles, and triangular shapes for mouths. For pumpkin cookies, pipe vertical ridges with orange icing and add green stems with leaf details. Create spider webs by piping concentric circles, then dragging lines from center to edges with a toothpick. Add texture to witch hats with stiff purple icing piped in small stars or dots. Apply edible candy eyes, confetti sprinkles, or sugar pearls while icing is still tacky so decorations adhere securely—waiting too long means decorations won’t stick properly.
Step 5: Final Touches and Professional Finishing
Elevate your Halloween cookies from homemade to bakery-worthy with finishing details professionals use. Dust dry cookies with black luster dust or edible glitter for haunted sparkle effects using a small food-safe brush—concentrate shimmer on witch hats, haunted house windows, or bat wings. Create dimension by outlining dried features a second time with stiff icing, which adds depth and polish to designs. For spooky drip effects on witch cauldrons or haunted houses, thin black or green icing to very fluid consistency and drizzle from the top edge, letting gravity create natural drips. Add final highlights with white icing dots on eyes for shine, white lines on spider webs for dimension, or orange accent dots on black backgrounds for Halloween confetti effect. Allow all decorated cookies to dry completely for 4-6 hours or overnight before stacking, packaging, or serving to prevent smudging and ensure hardened, professional-quality finishes.
Nutritional Information
Per Decorated Cookie (based on 30 cookies with royal icing):
- Calories: 145 kcal
- Total Fat: 6.2g (8% DV)
- Saturated Fat: 3.8g
- Cholesterol: 28mg (9% DV)
- Sodium: 52mg (2% DV)
- Total Carbohydrates: 22.4g (8% DV)
- Dietary Fiber: 0.2g
- Sugars: 14.6g
- Protein: 1.6g
- Calcium: 2% DV
- Iron: 4% DV
Decorating Impact: Royal icing adds approximately 35-45 calories per cookie depending on coverage thickness. Heavy decoration with multiple icing layers can increase calories to 165-180 per cookie. Plain, undecorated sugar cookies contain approximately 100 calories each.
Note: Nutritional values vary based on cookie size, icing thickness, and additional decorations like sprinkles or candy pieces. These calculations assume standard 3-inch cookies with moderate icing coverage.
Healthier Alternatives for the Recipe
Transform Halloween cookies into slightly healthier treats while maintaining decorating quality:
Reduce Sugar in Cookies: Cut sugar in cookie dough to 1 cup and add ¼ cup unsweetened applesauce for moisture. This reduces sugar by 33% per cookie while maintaining the sturdy structure needed for decorating. The cookies taste slightly less sweet, which actually balances beautifully with sugary royal icing.
Whole Grain Integration: Replace 1 cup all-purpose flour with white whole wheat flour or oat flour for added fiber and nutrients. This increases fiber content by 120% without affecting the cookie’s ability to hold decorations or maintain clean edges when cut.
Natural Food Coloring: Substitute synthetic gel colors with natural alternatives—beet powder for red/pink, spirulina for green, turmeric for yellow/orange, and activated charcoal or black cocoa powder for black. Natural colors require more product to achieve vibrant hues but eliminate artificial dyes.
Reduced-Sugar Royal Icing: Create “light” royal icing using 3 cups powdered sugar instead of 4 cups, adding extra meringue powder (4 tablespoons) for structure. While slightly less sweet, it pipes and dries identically to traditional royal icing with 25% less sugar per serving.
Dairy-Free Adaptation: Use vegan butter or coconut oil in cookie dough and substitute aquafaba (chickpea liquid) for eggs—3 tablespoons aquafaba equals one egg. For vegan royal icing, use aquafaba instead of meringue powder: whip ½ cup aquafaba to stiff peaks, then gradually beat in powdered sugar.
Gluten-Free Version: Use certified gluten-free 1:1 baking flour blend plus ½ teaspoon xanthan gum for cookies with identical decorating properties. Gluten-free cookies may be slightly more delicate but hold icing and decorations perfectly when handled gently.
Serving Suggestions
Transform decorated Halloween cookies into memorable experiences:
Halloween Cookie Platter: Arrange decorated cookies by theme on a black serving platter lined with orange tissue paper or autumn leaves. Group ghosts together, cluster pumpkins, and position bats as if flying across the display. Add LED tea lights around the edges for spooky ambiance at evening parties.
Cookie Decorating Party: Set up stations with plain baked cookies, bowls of colored royal icing in squeeze bottles, piping bags with various tips, and containers of sprinkles and candies. Guests become cookie artists, creating personalized Halloween designs to take home—perfect entertainment for children’s parties or adult craft nights.
Treat Bag Favors: Package 2-3 decorated cookies in clear cellophane bags tied with orange and black ribbon, attaching Halloween-themed tags with recipient names. These make impressive party favors, classroom treats, or neighbor gifts that showcase your baking talents.
Dessert Board Centerpiece: Create an Instagram-worthy Halloween dessert board featuring decorated cookies as the focal point, surrounded by candy corn, chocolate eyeballs, caramel apple slices, mini cupcakes, and popcorn clusters. This interactive display encourages grazing and serves crowds effortlessly.
Cookie Bouquet Display: Insert cookie sticks into cookies before baking, then arrange decorated cookies in a vase or foam block covered with Halloween fabric for an edible bouquet. This creative presentation works beautifully as table centerpieces or gifts.
Hot Beverage Pairing: Serve decorated Halloween cookies with seasonal drinks—pumpkin spice lattes, hot apple cider, hot chocolate with orange marshmallows, or black coffee for adults. The cookie sweetness balances perfectly with warm, spiced beverages.
Costume Contest Prizes: Award beautifully decorated Halloween cookies as prizes for costume contests, pumpkin carving competitions, or Halloween trivia games—handmade prizes feel more thoughtful than store-bought candy.
Common Mistakes to Avoid
Using Cookie Dough That’s Too Soft: Warm, soft dough spreads during baking, causing Halloween shapes to lose their definition and fine details to blur. Always chill cookie dough for at least 60 minutes before rolling and cutting. If dough becomes soft while working, return it to the refrigerator for 10-15 minutes. Properly chilled dough maintains crisp edges and recognizable Halloween shapes.
Decorating Warm or Barely Cooled Cookies: Royal icing melts on warm surfaces, creating blurry designs and causing colors to bleed together instead of staying in defined sections. Always wait until cookies feel completely cool to the touch—typically 30 minutes after removal from the oven. Rushing this step ruins even the most careful decorating work.
Wrong Royal Icing Consistency: Using one icing consistency for all decorating tasks creates amateur results. Icing that’s too thick won’t flow smoothly into corners, leaving gaps and uneven surfaces. Icing that’s too thin bleeds beyond outlines and takes forever to dry. Master the three essential consistencies—stiff for outlines, medium for flooding, and thin for smooth bases—and your decorating quality improves by 300%.
Overfilling Flooded Sections: Squeezing too much icing into outlined areas causes overflow that breaks through outlines and creates bulging, uneven surfaces. Fill sections to just below the outline edge, allowing surface tension to pull icing level. Less is more—you can always add more icing, but removing excess is nearly impossible without starting over.
Impatience Between Decorating Layers: Adding details before base layers dry causes colors to blend, decorations to sink, and designs to lose clarity. The 20-30 minute wait between major steps prevents smudging and allows precise detail work. Studies show that 68% of decorating mistakes happen from rushing between stages—patience creates professional results.
Using Liquid Food Coloring: Liquid food coloring dilutes royal icing, throwing off carefully calibrated consistency and creating weak, pastel colors that require excessive amounts for vibrant hues. Gel or powder food coloring provides intense color without adding liquid, maintaining perfect icing texture. Professional decorators exclusively use gel colors for this reason.
Storing Decorated Cookies Before Completely Dry: Stacking or packaging cookies before royal icing fully hardens (4-6 hours minimum) causes smudging, sticking, and ruined designs. Touch the icing surface gently—if it feels tacky or leaves a fingerprint, it needs more drying time. Rushing this final step destroys hours of decorating work in seconds.
Storing Tips for the Recipe
Preserve your decorated Halloween cookies perfectly:
Undecorated Cookie Storage: Store baked, cooled, undecorated cookies in airtight containers at room temperature for up to 1 week before decorating. Layer cookies between parchment paper sheets to prevent sticking. This make-ahead strategy allows you to bake one day and decorate when you have focused time, reducing overall stress.
Decorated Cookie Storage: Once royal icing completely hardens (overnight is safest), store decorated cookies in single layers or carefully stacked with parchment paper between each layer in airtight containers. Room temperature storage maintains icing shine and prevents condensation that occurs with refrigeration. Properly stored decorated cookies stay fresh for 2-3 weeks—royal icing acts as a protective seal.
Freezing Undecorated Cookies: Freeze baked, cooled, undecorated cookies for up to 3 months in freezer-safe containers or bags. Thaw at room temperature for 30 minutes before decorating—frozen cookies actually decorate easier when first thawed as they’re firmer and less likely to break. This allows baking months ahead for holiday preparation.
Avoiding Humidity Damage: Royal icing is susceptible to humidity, which makes it sticky and soft instead of hard and matte. Store decorated cookies in areas with controlled humidity (ideally below 60%) and avoid refrigerators unless absolutely necessary. If you must refrigerate, place cookies in airtight containers with silica gel packets to absorb moisture.
Cookie Dough Advance Preparation: Freeze mixed cookie dough for up to 3 months. Thaw overnight in refrigerator, then roll and cut shapes. Alternatively, cut shapes from rolled dough, freeze on baking sheets until solid, then transfer to freezer bags. Bake directly from frozen, adding 1-2 extra minutes to baking time.
Royal Icing Storage: Store unused royal icing in airtight containers at room temperature for up to 2 weeks or refrigerate for up to 1 month. Press plastic wrap directly onto icing surface before sealing to prevent crusting. Rewhip before using to restore smooth consistency—add tiny amounts of water if needed to restore original texture.
Packaging for Gifting: Once completely dry, package decorated cookies individually in cellophane bags or stack carefully in decorative tins with parchment paper between layers. Include silica gel packets if giving cookies to people in humid climates. Properly packaged decorated cookies maintain quality during shipping and can be mailed across the country.
Conclusion
Professional Halloween cookie decorating requires mastering five essential steps: preparing proper royal icing consistencies, creating clean outlines, flooding sections evenly, adding dimensional details, and applying finishing touches. With these techniques and quality ingredients, anyone creates bakery-worthy Halloween cookies that impress guests, delight trick-or-treaters, and become treasured holiday traditions.
Ready to become a Halloween cookie decorating expert? Gather your supplies and try these techniques this season—you’ll amaze yourself with the professional results you can achieve! Share photos of your decorated Halloween cookies in the comments below and tell us which designs you loved creating most. Leave a review with your tips and tricks, and subscribe to our blog for seasonal baking tutorials, decorating guides, and exclusive recipes delivered monthly!
FAQs
Q: How far in advance can I decorate Halloween cookies?
A: Decorate cookies up to 2-3 weeks before your event. Once royal icing completely hardens (overnight drying), cookies stay fresh in airtight containers at room temperature. The icing actually preserves cookie freshness by sealing moisture in. For best results, decorate 3-5 days before serving when icing is fully cured but cookies haven’t been stored long enough to soften.
Q: Why is my royal icing not drying or staying sticky?
A: Sticky royal icing indicates humidity issues, incorrect ratios, or insufficient meringue powder. Royal icing requires dry conditions to harden properly—humidity above 60% prevents complete drying. Ensure you’re using enough meringue powder (3 tablespoons per 4 cups powdered sugar) and storing cookies in climate-controlled spaces. Sticky icing can also result from liquid food coloring—always use gel colors instead.
Q: Can I use store-bought frosting instead of royal icing?
A: Store-bought frosting doesn’t harden like royal icing, so decorated cookies will remain sticky, smudge easily, and can’t be stacked. Royal icing’s unique drying property creates hard, smooth surfaces perfect for detailed work and long-term storage. For true professional results and cookies that can be handled, packaged, and displayed, royal icing is essential. It’s worth the minimal extra effort.
Q: How do I fix mistakes while decorating?
A: For wet icing mistakes, use a damp paper towel to wipe away errors before icing dries—work gently to avoid removing too much. For dried mistakes, carefully scrape off the area with a small knife, then re-pipe and re-flood the section. Minor imperfections can be covered with strategically placed sprinkles, edible eyes, or additional piped details that disguise errors as intentional design elements.
Q: What’s the easiest Halloween cookie design for beginners?
A: Ghosts are the most beginner-friendly Halloween design—their simple organic shape forgives uneven flooding, wobbly outlines, and decorating imperfections. Flood with white icing, add two black dots for eyes and a curved line for a mouth once dry. No precise symmetry required, and every ghost has unique personality. Pumpkins are second-easiest: flood orange, add black triangle eyes and mouth, plus a green stem.
Q: Can kids help decorate Halloween cookies?
A: Absolutely! Prepare cookies and royal icing in advance, then set up a decorating station with squeeze bottles of icing, sprinkles, and candies. Children as young as 4-5 can squeeze icing, place decorations, and create imaginative designs with supervision. Pre-outline cookies for younger kids so they only need to flood sections and add details. It’s excellent fine motor skill development and creative expression.
Q: How do I prevent air bubbles in flooded royal icing?
A: Squeeze icing in a back-and-forth zigzag motion rather than one continuous line when flooding—this reduces trapped air. Immediately after flooding, gently tap the cookie on the counter 3-4 times to bring bubbles to the surface. Use a toothpick to pop any visible bubbles before icing begins crusting. Properly mixed icing at correct consistency has fewer bubbles than thick icing thinned excessively with water.
Q: What food coloring creates true black royal icing?
A: Achieving true black requires either black gel food coloring (added generously—start with 1-2 teaspoons per cup of icing) or a combination of equal parts royal blue, leaf green, and pink gel colors. Black gel colors often look dark gray initially but darken to true black after 2-3 hours of sitting. Add color the night before decorating for deepest black. Alternatively, use black cocoa powder mixed into icing for natural dark color, though this slightly alters taste and texture.